Showing posts with label decorative label punch. Show all posts

Monday, December 16, 2019

Merry Monday- More scrappy cards

Hello! I am back to share more of my holiday cards, and once again, I challenged myself to use scraps!  I am proud to share that I have finished my cards and will be posting them in the days leading up to Christmas. 

I'm also pretty excited that in one week, I won't have to get dressed for work and can enjoy my coffee in my jammies!  Christmas Break can't come soon enough!  I really love my job, but DD1 is home from college and I am enjoying every minute we have together (when she's not running off with her boyfriend and friends).  It will be nice to have a whole day to hang out and make some memories.

My cards today have a rather nontraditional color scheme, but since I love blue, I'm loving these colors together!


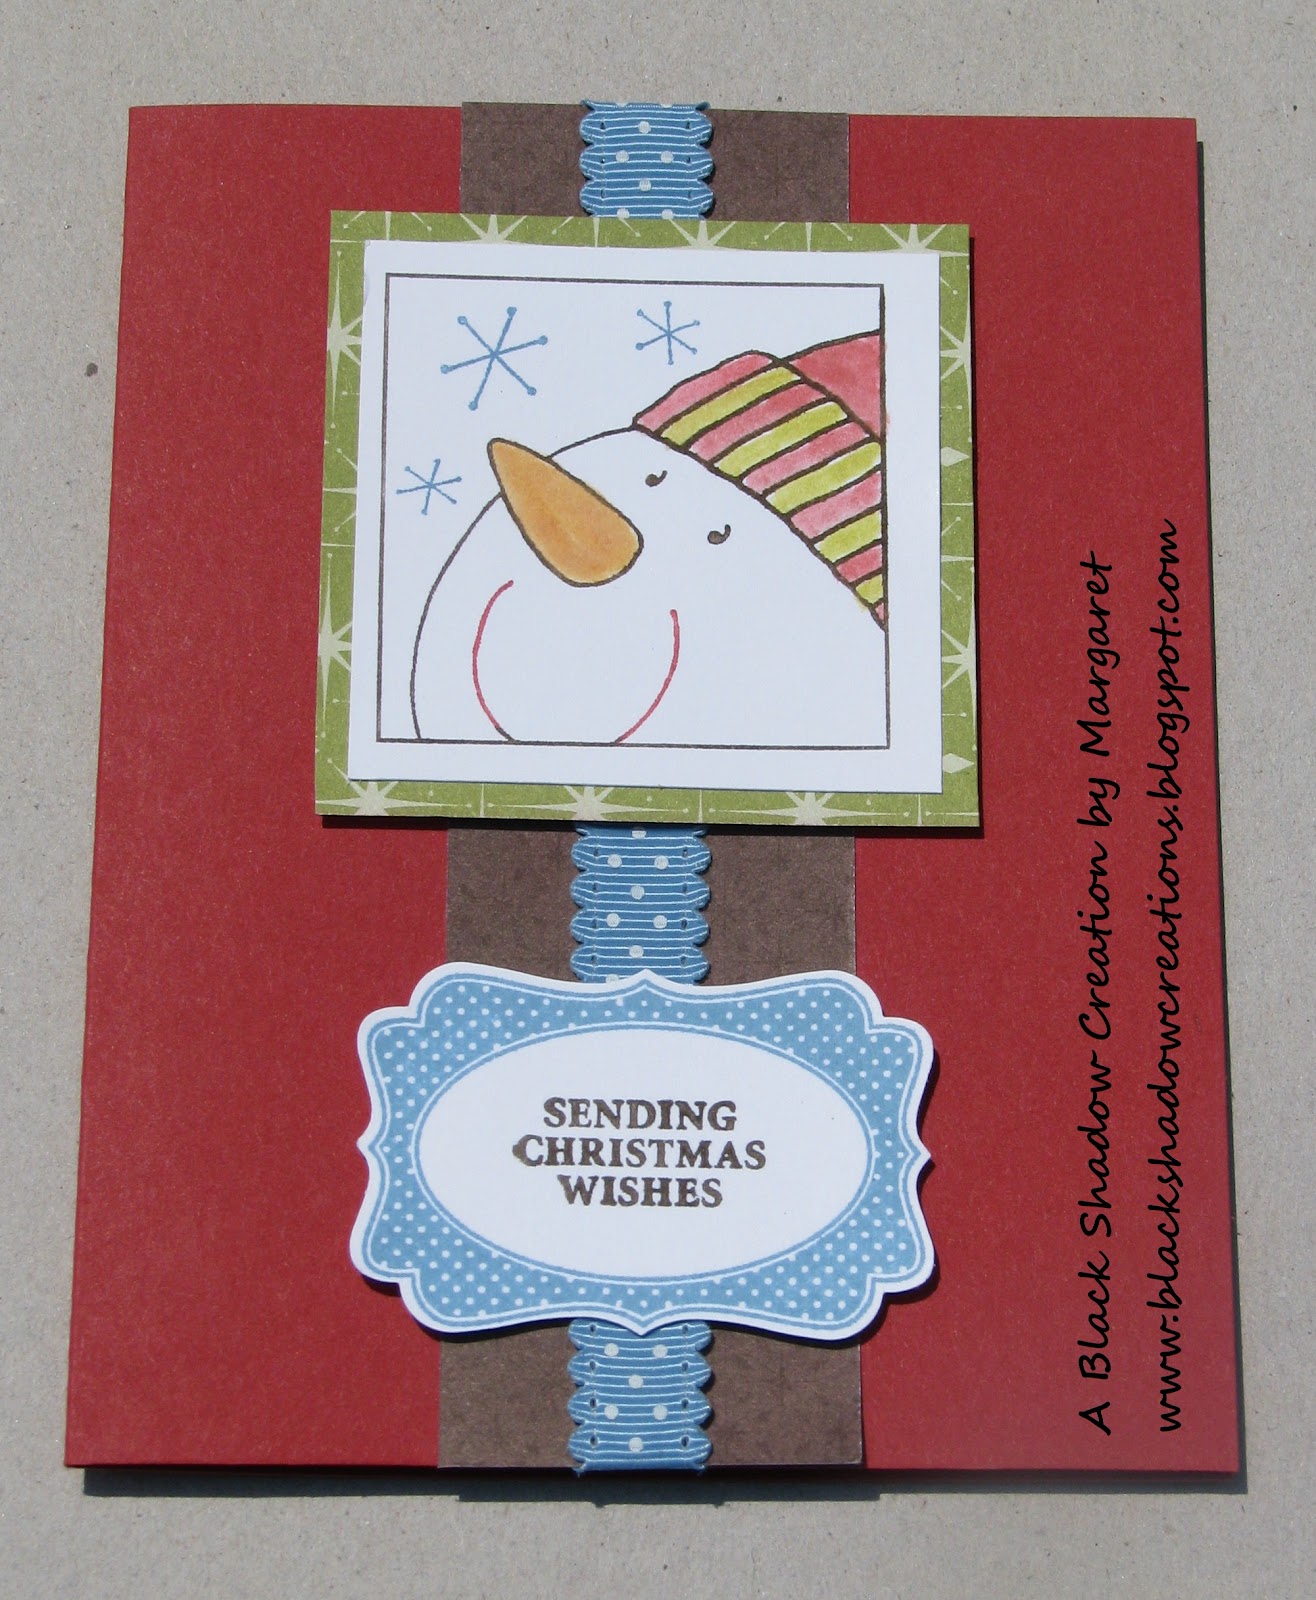
This one is a bit more traditional, and I actually used a whole piece of DSP to make six of this style.  I also played a bit with punches and layers on the focal sentiment.


Thanks so much for visiting and have a wonderful day!

Card Recipes: Paper-Snow Festival DSP, baja breeze, cherry cobbler, whisper white, gumball green, Stamp Sets-Joyous Celebration, Crazy for Christmas, Timeless Tidings, Ink-soft suede, gumball green, tuxedo black (memento), assorted markers, Accessories-small oval punch, 2 x 1 3/8 oval punch, decorative label punch, cherry cobbler scallop dot ribbon

Tuesday, September 3, 2019

Thanks for being you!

Hello! Today I have a thank you card to share.  I made several of these to send to my co-workers and friends for the kindness they showed during and after my dad's passing last month.

I used the stamp People Like You.  I always use markers to color this stamp because it is just so pretty with the different colors together on one layer.  This time, I actually stamped the sentiment frame separately, punched it out and added dimensionals to give it a little more layering.  I pulled out Sycamore Street DSP (ret) and the matching summer starfruit ribbon to finish off the card.


I work with a great group of people, and even those who retire still keep in touch and join in the occasional gathering.  When I called in to work to let them know I was going to stay with Dad, everyone was so kind and telling me not to worry about work and to focus on family time.  They knew I was concerned since it was the first week of school and there was so much going on.  I received so many texts checking up on my family and telling me to take as much time as I needed. It really helped ease my mind and made doing the right thing quite a bit easier.  After Dad passed, there were cards, more texts, and food arriving and the promise of a very special memorial gift.  They were paying for the dried flowers from Dad's floral arrangement to be made into a rosary and a bracelet for me.  I thought that was such a special way to remember him and wanted to make some equally special thank you cards for them. I was also reminded of a Charles Schulz quote"In Life, It's not where you go, it's who you travel with".  They definitely make my work 'road' a little smoother and happier!

Thanks so much for stopping by and reading my ramblings! Have a terrific day!


Friday, March 6, 2015

Flashback Friday- Ladies Day Goodies

Hello! I am back again with another Flashback Friday, and I'm so glad you stopped in to visit!  I really need to get back to regular postings on Fridays.  It encourages me to use my older goodies to create something new, and occasionally even makes a dent in my mountain of paper!

I was so happy on Monday that the temperatures were finally above freezing and all of the snow was melting away.  We even had rain on Tuesday to wash all of the dirty grimy stuff off of the roads!  But apparently winter is not quite ready to give up yet because I woke up Wednesday morning to a school cancellation because we were expecting rain turning to sleet turning to snow.  I was really hoping the weather people were wrong and I would have a day off without all of the nasty weather.  No Such Luck!  It was raining when I woke up and by 10 it had already started to shower little pellets of ice.  By the time DH left for work that evening, we had over 6 inches of snow on the ground... Yuck!

On a more positive note, the snow day did give me a chance to work on some things for an upcoming fundraiser I am participating in at our school.  Two of our teachers are raising money to attend a training on autism and are hosting a Ladies Day Out.  Lots of different vendors, including me, and some of our students made things to sell in their booth.  I've never participated in an event like this and am not quite sure what might possibly sell besides the wonderful Stampin' UP items from the catalog.  I made a lot of cards with the thought that if they don't sell I can still use them, and I also made a few little Easter goodies.  I will also have a fun little 'make and take' that I will share with you next week.

Today's creation is a little treat holder.  I found the cutest mini Uno and Apples to Apples games at Wal-Mart in the Easter section, and I made little folders to pretty them up a little.

The folder measures 2 1/2 x 2 1/2, so you can 
have some idea of how little the card sets are!


My base is 2 1/2 x 5 1/2.  I scored the base at 2 1/2 and 3.  Then I used some retired DSP and added the cute little bunny from Tags So Much!  Hopefully, some other people will think these are as cute as I do!

I will try to post more of my creations in the following week, and I hope I can share that the event was a huge success!  Have a wonderful weekend!

Project Recipe: Paper-pistachio pudding, crisp cantaloupe, pool party, whisper white, Sweet Sorbet DSP (ret), Stamp Set-Tags So Much (ret), Ink-memento tuxedo black, pistachio pudding, crisp cantaloupe,pool party,blushing bride,  Accessories-1 3/4" circle punch, decorative label punch 


Wednesday, December 10, 2014

We need a little Christmas-a little Christmas gift idea!

Hello! I am so glad you stopped by today!  As many of you already know, things have been pretty hectic in my household, so I'm especially happy that I have something to share!

Quite a while back, my fellow ABAC teammate, Lynne, was in the spotlight and shared how to create these cute post it note and pen sets.  I loved them so much I made 60 of them for our ladies group at church!!  Of course, I did not have them finished in time to post on her spotlight challenge, and then actually forgot to take a picture until this past weekend (right before I packed them up for our party!).  They were a big hit and are actually pretty simple to make.  You can see Lynne's spotlight here, see a lot of her other marvelous creations (She makes the most wonderful quilts!!), and get to know a little more about her.

In an effort to use up my Christmas papers, I opted to make a Christmas version.  I used the Trust God stamp set for the sentiments, and I found the perfectly sized pens at Wal-Mart in their Christmas section.  I wouldn't be giving them an advertising spot but it was the only place I found pens that would fit!


If you would like to make your own post it sets, you can click on the 'here' link above and Lynne has very clear instructions you can follow.

There is a new challenge on the ABAC blog too! Our theme is Celestial and we would love to see how you interpret this into your artwork!  I would love it if you would link up and play along!

I hope you have a very pleasant week filled with creativity!  I will be back soon with a few more creations!

Friday, October 17, 2014

Flashback Friday and a little Christmas too!

Wow! Posted twice in one week!! That hasn't happened in a little while!  I am also happy to say I used up a bit more of the stash of older Christmas papers to make a few more Christmas cards!

Once again, the card is quite basic and was quick to create.  Hopefully, there will be a bit more free time soon for me to make something a little more time consuming.


This was as simple as cutting a piece of dsp, adding ribbon and a punched sentiment.  Then a metal button from a collectables/antiques store was threaded with some bakers twine and glued to the ribbon.  Easy peasy!

As the title of the post hints, the dsp is very retired and now there is only a little bag of scrap pieces left!  I may have to come up with a little something to use them so I can say I completely used the whole pack!

We have a busy schedule for the next few weeks, but I do have a couple of posts scheduled so there will be a little activity on my blog anyway.  I am hoping there will be some free time for me to visit blogs!  Somehow, there never seems to be enough hours in the days this school year!  I hope you find plenty of time to be creative and have a wonderful weekend!

Card Recipe: Paper-chocolate chip, whisper white, Ski Slope dsp (ret), Ink-chocolate chip, Stamp Set-Good Greetings, Accessories-real red stitched ribbon, cherry cobbler bakers twine, decorative label punch, metal button from stash

Tuesday, June 3, 2014

Shopping list? I don't think so!

Hi! I am so glad you are here!  I'm not sure exactly what I should call today's creation, but one thing it is NOT is a shopping list holder!  Let me elaborate.  One of the things I set out to accomplish is getting some of my older Paper Pumpkin kits put together.  Today's kit was supposed to make a shopping list holder.  It even has a roll of lined paper that was to be attached at the top.  Don't get me wrong, I like shopping lists.  They are essential to me actually getting real food in the house instead of all of the impulse buys I would otherwise make.  But I already have a system.  We have a magnetic list on the fridge and the theory is that when someone uses the last of something, it goes on the list.  It works about 60% of the time with the other people in the house, but I use it 99% of the time so I call it a success.

So there I was, looking at a kit that I knew I really did not want to make, when I started thinking the lined paper would make a wonderful journaling strip for scrapbooking.  Then I studied the thick woodgrain embossed base...way too nice not to use for something... I'm still not sure exactly what to call this, but it will probably have a photo placed on it in the future.  Let's call it a wall hanging!  The only thing from the kit that I did not repurpose was the extra wide rubber band that was supposed to hold the paper at the bottom.  I still have it, but it will likely end up with a more practical purpose rather than decorative.


I also added lots of goodies from the artisan kit and even used up a
skinny strip of leftover dsp to make a rolled 'thing'.  It's not exactly
a flower, but it still looked pretty good with the other embellishments.


As I was making this, I was thinking about a fellow blog friend
who is going through a very rough time and decided
to use this sentiment from the Trust God stamp set.


I'm pretty sure everything but the punches, very vanilla cardstock, and soft suede ink are retired.  Felt good to use up a bit more of the older goodies!  

Thanks so much for stopping by and I hope you have a wonderful day!

Project Recipe: Stamp Set-Trust God, Punches-decorative label, 1 3/4" circle, Accessories-paper pumpkin kit, linen thread, victorian crochet trim, artisan kit, inka gold metallic rub

Monday, February 17, 2014

A Punchy Penguin and Thoughts on Morning

Hello and Happy Monday!!!! What's that you say? I can't use happy and Monday in the same sentence? Well, more on that later...

Recently we celebrated DD#1's birthday and she loves penguins so when I saw this @ I knew I wanted to recreate it for her card.  It was super easy to make too, thanks to all of the punches and the top note die!


I am happy to say she loved her card! I am one of those mean moms who won't let her kids eat cereal completely loaded with sugar.  A little sugar is ok but if it's more than 10 g, no dice... Did I mention diabetes runs in my DH's family?  So for her birthday, I indulged and bought a box of Cocoa Puffs for her.  When she woke up birthday morning she found her birthday card taped to the box of cereal.  I could hear her squeals at the other end of the house!  Such happiness coming from a non-morning person!!  Which leads to the second part of my post.

I recently came across a quote on pinterest that I just can't buy into.  It was something to the effect that since we choose to be happy, someone who is not a morning person chooses not to be happy.  Now I will admit I am NOT a morning person, but I do consider myself to be a happy person.  I do agree that we have to make a conscious effort to direct our moods and we can choose how we respond to things; I just don't think that not waking up chipper is a 'choice'.  I simply need a little more time to ease into my day.  My oldest DD is the same way-quite pleasant after you give her a chance to completely wake up. 

What is my theory? I think people are predisposed to their morning attitudes and sleep cycles.  When DD#1 was a baby, she would wake up and be content to lay in her bed for a while before calling for attention.  DD#2 (my morning person) would wake up and instantly want to be out of bed, changed and fed so she could start her day.  She even resorted to shaking the sides of her crib to get our attention as she got older! :)

I also think having morning lovers and haters in the same household leads to better social skills.  For example, DD#2 learned at a very early age not to talk to her sister until after breakfast, Mom required a cup of coffee before turning human, and Dad, well Dad worked nights so well all gave him a wide berth until after lunch!  The rest of us learned that no matter what we thought, DD#2 would never sleep in and would always have a perky smile on her face as soon as her feet hit the floor.  We don't have to like it but we accept it!  On the plus side, she is one person I never have to wait on to get ready.  She is usually dressed, breakfast done, and teeth brushed before I finish my first cup of coffee.  She also likes going out in the cold to start my car! Not sure where she got that gene, but so glad she does!!

So if you don't like mornings, especially Monday mornings, don't worry... You're in good company and I'm happy I'm not alone!  Hope you have a great week!

Card Recipe:  Paper-basic black, whisper white, pumpkin pie, elegant eggplant, Ink-elegant eggplant, stampin' chalk marker, Stamp Set-pennant parade, Accessories-top note die, 1" circle punch, oval punch, scallop oval punch, decorative label punch
  

Sunday, December 1, 2013

Blending the old with the new!

Hello! I am so glad you stopped by to visit!  December crept up on me and now I'm in a semi rushed state trying to get all of my projects completed on time!  Good thing I had a jump start on my cards!

Today's card features a stamp set I've had for quite a while and it is still one of my favorites!  I gave this set a modern twist with some new paper and accessories from the SU Holiday catalog...


I love the silver and blue combination that seems to be so popular this year, and the papers in Winter Frost are gorgeous!  I paired the paper with the pretty silver ribbon layered on top of some pool party seam binding.  After I finished my card, I realized that pool party was not the blue in the DSP, but it went beautifully anyway so I left everything as is!

Our family survived two food filled days of Thanksgiving and now we are in full mode for Christmas!  Hopefully all of the decorating and cookie baking will keep me focused on the Christmas cards that I really need to finish!  Wish me luck!  

Thanks so much for stopping by and I hope you have a marvelous and crafty day!

Card Recipe:  Paper-Winter Frost paper stack, Island Indigo, Pool Party, Whisper White, Ink-Island Indigo, Encore Silver, Stamp Set-Miracle of Christmas, Accessories-large oval punch, decorative label punch, pool party seam binding, 1/8" silver ribbon, rhinestones

Saturday, November 9, 2013

Flashback Friday (on a Saturday night) -Still trying to get a jump start...

Hello! I am so glad you stopped by and I'm even happier that I actually had a little time to get online and post something for you to see!  I am amazed at how quickly time can pass lately.  Normally, I'm online every evening and catching up on things, but it has been several days since I've even gone online!  Things are going well with my job and our lives aren't overly crazy right now, but I still find that between work, family, and housework, there is very little time at the end of the day!  Not complaining though!!  I am however missing out on visiting my blog buddies and really want to squeeze in some time to visit everyone again!  So if I haven't been around lately, I promise I will be soon!

Many of you know that I am a true blue procrastinator and always seem to be doing everything at the last minute.  You may also remember that last year I actually had my Christmas cards completed early and was quite shocked at the extra craft time it gave me.  I also decided last year that I would make Christmas cards throughout the year so I could be finished earlier this year too. Well... let's just say that I started out with the best of intentions and then it all just kind of went out the window!  But I recently was inspired again to dig into some of my older papers and decided I REALLY needed to make a few (ha!) more Christmas cards before Dec. 25th!  So I pulled out some retired paper and ribbon, combined it with several current materials and knocked out 4 more cards!  They are all the same so I'm only sharing a photo of one.


On a noncrafty note, I've recently started doing a major overhaul of my entire home.  We are hoping to build within a year and I really want the actual move to be as painless as possible.  Our current little home is so crowded with stuff that we 'needed' when we moved here and I'm really trying to look at everything with a new perspective.  I think I've finally hit the point where I've realized that all of this stuff is not necessary and it will be so much easier to move if there is less to pack.  I even got the girls on board this week and they have gone through their closet and dresser to pull out any clothes they know they won't wear.  Now I need to make a trip to our local charity thrift store to give all of our 'stuff' a new home!  If you are looking for a great site to motivate you to organize and clean your home, Fly Lady is awesome!  She even sends you emails to remind you that you're supposed to be cleaning instead of playing on pinterest (not that I would EVER waste time on pinterest when there was housekeeping to be done...) Nope, sorry...couldn't keep a straight face through that one!!  She has a great sense of humor too which helps when you're facing a messy house!

I hope you are enjoying your weekend and find some time to be crafty too!  Thanks so much for visiting!

Card Recipe:  Paper-Holiday Treasures DSP (ret), old olive, Baja breeze, ruby red, whisper white, Stamp Sets-Four Frames, That's the Ticket, Ink-chocolate chip, ruby red, Accessories-old olive scallop dots ribbon (ret), ticket duo builder punch, decorative label punch


Friday, June 14, 2013

Flashback Friday-Goin' Waaaay Back!

Welcome back to another Flashback Friday.  Once again, I have dug into my older supplies, this time pulling out some really old border stickers.  

In the late 90's and early 2000's  it was the big scrapbooking trend to put stickers everywhere.  It has jokingly been referred to as the sticker sneeze technique.  Needless to say, I still have quite a few stickers in my stash, including the long ones that would be used as a border or trim piece.  After looking at this particular sheet of borders, I knew I wouldn't ever use them for their original purpose, but thought they might work in a different way.  Here's what I came up with...


Now, depending on how technical you want to get, there is another 'old' item on this. Crushed Curry is a 'new' color in the current SU catalog, but it was actually a retired color from a few years ago.  I had purchased some curry paper before it retired to coordinate with some DSP.  I haven't used this color in ages and technically it is old stash, but since the color is no longer retired, it's not officially 'old'... So if you want to split hairs, I'll concede that the base and label are current product! :)

It was quite interesting that I thought the borders were incredibly gaudy, but cut into strips and layered on a card, they actually look quite trendy...  Maybe I'm just glad they're on a card and no longer in my stash!!

I hope everyone has a wonderful weekend and maybe celebrate Father's day with their favorite guys!  Happy crafting!

Card Recipe: Paper-crushed curry, whisper white, Stamp Set-Memorable Moments, Ink-black stazon, Flashback Items-stickers, Accessories-decorative label punch, old olive brads

Sunday, March 24, 2013

Anything But a Card Challenge 15-Spring/Easter

It's time for week 2 of Challenge 15 at Anything But a Card Challenges and it's my turn to share my project for the challenge Spring/Easter/Alice in Wonderland.  As much as I really wanted to do an Alice project, I have absolutely no Alice goodies in my stash, sniff! sniff!  So my project is following the Easter portion of the theme.

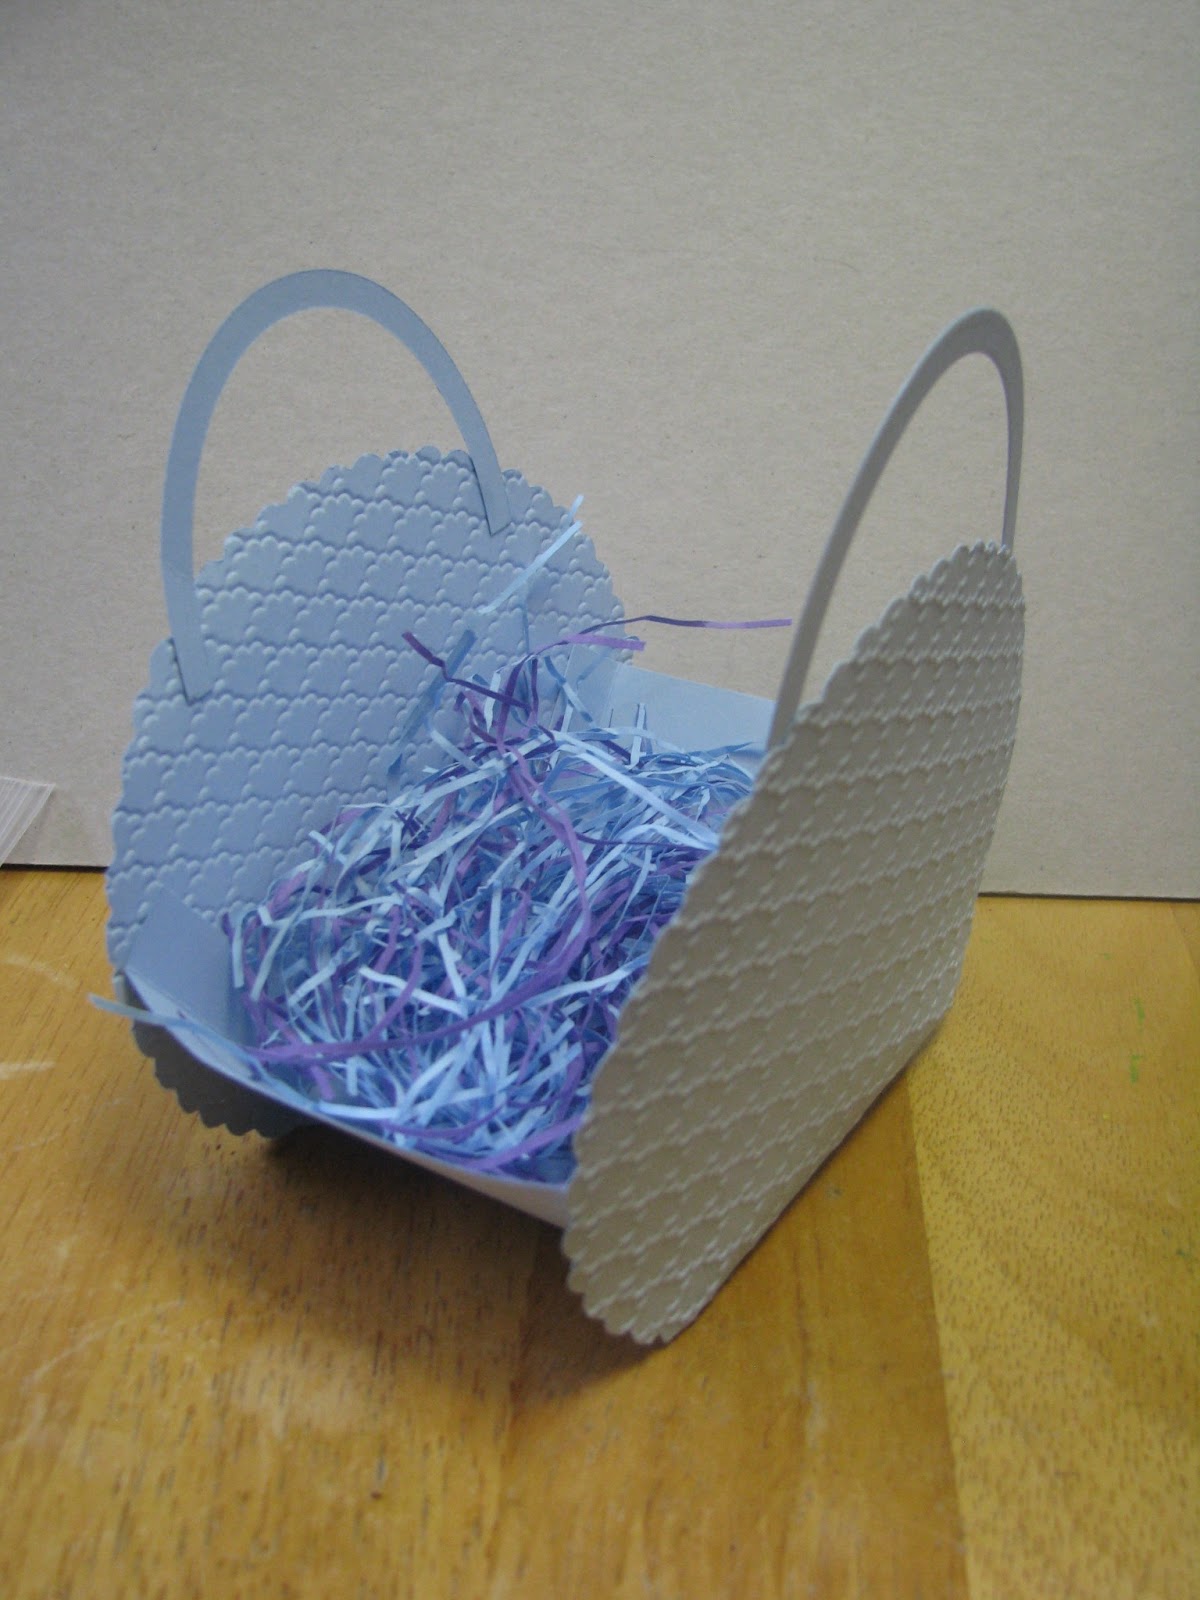
I would love to take credit for this sweet little basket design, but my crafty sistah, Sheila, shared this as a make and take at our most recent Stampin' UP meeting.  I couldn't get over how easy this was to make and only takes one sheet of 8 1/2 x 11 cardstock.  I also added the bow and little tag just to dress it up a little bit!  Wouldn't this be so cute full of candies?! Especially chocolate!!


I will try to get the diagram for the cardstock piece on my blog later this week.  I am officially on spring break and hope to have lots of crafty and bloggy time to get caught up on some much neglected things!  I hope you enjoyed my little Easter basket and that it inspired you to link up with us and share your own craftiness!  Have a fantastic week and happy crafting!

Sunday, March 17, 2013

Anything But a Card Challenge 15

Hello! So glad you stopped in today! It has been a WET and nasty day in southern Indiana. The perfect day for curling up with a good book or crafting, or if you are as fortunate as I was, taking a nap!

There is a new challenge posted at Anything But a Card Challenges.  This time, we are encouraging you to think spring! Of course, if you follow our challenge blog, you know that things are never as simple as this...  We like to get as creative as possible and Carla, our fearless leader, has taken the Spring theme and made it even more open ended!

"For Challenge 15 we are asking for something Spring-y or spring colors, or Alice in Wonderland!  I know it may seem like a strange combination, but that's how it works in my mind! :)  I think it's probably the rabbit/Easter thing."

So there you have it! Get your thinking caps on and see where this challenge leads you.  We would love to see your creation, and if you are so inclined, the team would love it if you checked out their creativity for the week.

I will be posting my project on Week 2, so be sure to stop back in to see the inspiration for the second week as well!

And just so you have something to look at on my blog this week, I created a card for my most recent club meeting that fits the theme of the challenge.  Yes, I know this is a card and the challenge very specifically is Anything BUT a Card, but since this isn't a DT post, I'm bending my rules a little!!  Feeling a bit rebellious at the moment... Hee! Hee!


This card was inspired by a card I saw on Pinterest.  You can see that card here.  She has a great tutorial on how to create her card.  Since I was using mine for a club project, I simplified it using punches instead of the oval framelits.  I also made mine a standard sized card so the ladies could use the envelopes they already have on hand.

I hope you have a most wonderful week and find lots of time to be crafty!!

Card Recipe- Cardstock-Baja breeze, whisper white, pink pirouette, Stamp Set-Wacky Wishes, Ink-Baja Breeze, pretty in pink, early espresso marker, Accessories-extra large and large oval punches, 2 1/2" circle punch, small heart punch, decorative label punch, wisteria wonder bakers twine, perfect polka dots folder, big shot

Sunday, January 27, 2013

Anything But a Card Challenge 11- Tie it up!

Hello! I am so glad you stopped by to visit and  I hope you had a marvelous weekend! My youngest was not feeling well earlier this week providing me with an additional day at home. So while she rested, I managed to get a little housecleaning done and also squeezed in some crafting time. One of the things I finished was my project for Anything But a Card.  You still have time to join us with your own wonderful creation and the challenge is 'tie it up'.  We really love variety and there are so many different ways to approach this challenge.  I decided to use some bakers twine on my quotes journal page.


The 'tie it up'  portion of my page uses pool party bakers twine.  I braided three strands of twine and then tied that piece around my cardstock.  I also used some of my hand made stamped tiles. I used scupley clay and a stamp to create the tiles and then painted them with acrylic paints after they were baked.  I wanted my 'bling' to match the blues on my page so I colored some clear rhinestones with a blue sharpie.

My quotes journal is slowly being completed thanks to some inspiring challenges, and I am so happy that I will have such a pretty way to display these wonderful quotes when it is finished.

Project Recipe: Cardstock-very vanilla, Spice Cake DSP (ret), Ink-soft suede, Stamp Set-fabulous phrases, cute by the inch (tile), Accessories-large oval punch, decorative label punch, pool party bakers twine, basic rhinestones, sculpey clay, acrylic paints

Wednesday, September 19, 2012

Sorry card...you didn't make the cut...

As many of you already know, I am on the design team at Color Me Beautiful and AnnMarie and Carole really come up with some fabulous color combinations!  I saw the colors for this week's challenge and immediately thought HALLOWEEN!! and I proceeded to make a card, which I quickly decided was not going to be my DT card.  Silly, I know, but I feel like if it's going to inspire someone else, I really need to LOVE it! So I made a new card which was posted on the challenge blog.  But, I didn't hate my Halloween card, so I figured I might as well share it on my blog.  So even though it didn't make the cut for the challenge blog post, it's getting a little love from my personal blog! Apologies in advance for the shadows...


While I really need to use up my DSP, I didn't have a pattern in these colors that I thought matched cute little Frankie's personality! So out came the embossing folder and the sponge daubers to add a little something to the otherwise basic cardstock. The rhinestones were colored with a sharpie to match the rich razz paper. I was thrilled with how well they matched!

So there you have it... I know I'm not the only one who critiques her work, and generally even if I don't love it, someone else does.  I really hope that in some way this is inspiring and I would love it if you found the time to join us in the color challenge!

Card Recipe: Cardstock-tempting turquoise, basic gray, rich razzleberry, lucky limeade, whisper white, Stamp Set-Googly Ghouls, Ink-Black Stazon, basic gray for sponging, Accessories-chevron folder, big shot, lucky limeade ruffled ribbon, basic rhinestones, glimmer brads, word window punch, modern label punch, decorative label punch, googlies, dimensionals

Wednesday, August 15, 2012

Masculine cards don't have to be scary!!

Hello! I am half way through my first week of school and they haven't made me run for cover yet!! hee! hee! I managed to get my three projects prepared in time for my club meeting this past weekend! Nothing like working under pressure!! The day was so unusually beautiful and cool that we changed locations and went outdoors to a local park.  We ladies sat at a picnic table in a shelter house to get crafty while our children played together on the playground.  Fun for everyone!!  As a payment for their babysitting duties, I took my girls to the local ice cream shop after the meeting for some yummy treats!  I was a little bummed that they didn't have mango flavored Dole whip as the flavor of the week and consoled myself with a pineapple sundae! Oh, the sacrifices I make...  But enough of that!

I had something interesting pointed out to me at our club meeting.  I have never considered myself a great creator of masculine cards.  It is always so much more natural for me to go with whimsical or flowery when I make cards.  Because of this, I always have plenty of feminine and kids cards on hand, but have to make sure I actually have guy cards when the occasion arises.  This led me to the assumption that I am not good at the manly design.  I started off our club saying "I always struggle with guy cards..." and one of the ladies started to laugh. When I stopped, she said "You ALWAYS say that and then show us these great cards!" Hmmm... So now I am going to change my mindset on masculine.  I think it is so easy for many of us to say "I'm not good at..." when we really mean it's not our favorite style.  After all, I live in a home where the estrogen outnumbers the testosterone 3 to 1 (the dog and cat cancel each other out), so I tend to go girly.  But seriously, isn't masculine a lot simpler?  (I know... stay with me for a minute!) Find some manly paper, slap on a sentiment or image, and the embellishing is minimal. I usually do embossing on my cards anyway so really the only difference between the card below and a girly card is what I DIDN'T put on it!  This partially explains my blog title today.


The other explanation of my title lies in the paper.  I used Howlstooth and Scaringbone DSP for this handsome card!  Yes, Halloween colors on this paper!! But don't you just love the manly prints in this pack?!  They remind me of some blazers you might find in a second hand store!  I adhered the alternating vanilla and patterned strips onto black cardstock, then embossed them with the houndstooth folder.  The chevron folder added some texture to the basic gray strip, and the brad (from antique brads collection) was the perfect finishing touch.

So no more excuses! Repeat after me-"Masculine cards are NOT scary!" Now go make something manly!  Have a great rest of the week and happy crafting!

Card Recipe: Cardstock-Howlstooth & Scaringbone DSP, very vanilla, basic gray, basic black, tangerine tango, Ink-stazon black, Stamp Set-Word Play, Accessories-houndstooth & chevron folders, decorative label punch, antique brads

Friday, August 3, 2012

Flashback Friday, Another Christmas Card, and A Close Call!

Hello all! I have reverted back to my older Christmas DSP again for this week's flashback project!  I also pulled out an older stamp and a retired stamp pad to keep with my oldies theme!

I am amazed at the number of Christmas cards that are in my stash now!  I might actually be finished before Thanksgiving!  Then what will I do?!  Hmmm... I may have to rethink this whole process or I will lose my membership card to the Procrastinators Club. (I don't really have a card... they keep telling me they'll send me one...)

But anyway! On to the card!!


I really like the little snowman image and it was fun to pull out the blender pen to color in the bits and pieces too!  Not a very difficult card to make and now my Ski Slope paper is all but gone as well!  I think this will make a nice card for a little one!

My flashback items were the Ski Slope DSP, a retired Kiwi Kiss ink pad, and the non SU snowman stamp.

Now... on to something a little more personal.  As the post title states, I had a very close call the other day.  No, not a car wreck, accident, or anything like that... THIS was much more serious!
The girls and I are sitting on the couch watching a movie and the phone rings.  Youngest DD truly believes she was born to answer the phone, so she sprang up to grab the phone.  This is where the story begins...

DD-"Hello?....Yes..." a very confused look crossing her face as she hands the phone to her sister...
"It's for you?!"
As DD #2 takes the phone, DD looks at me with wide eyed wonder and whispers "It's a BOY!"
Mom-"GASP!" then a bionic Mother's ear kicked in as I shamelessly eavesdropped on the conversation...
DD#2- "Hello? Oh, Hi (enter boy's name here)"
*I felt a tiny bit of relief as it was one that I knew well, but only a little relief...
"Umm... I'm not sure... I'll have to ask..."
*At this point, I have a dull ache in the pit of my stomach...MY BABY IS ON THE PHONE WITH A BOY!  AND SHE HAS TO ASK ME SOMETHING!!!!!!! I suddenly begin to have flashbacks of her playing in the dirt... climbing trees... begging for a softball glove, helmet, and cleats so she can look like a real ball player... throwing on the closest shirt and hoping it's clean... No...It can't be...Must be a mistake...
DD#2-"Mom, it's (boy's name) and he wants to know..."
*Before she can ask I'm inwardly pleading 'please don't let me have to be the mean mom yet...please don't let this be a date request...I am really not ready for this yet!'
DD#2 continues "if I can play on the whiffle ball team he's trying to get together for the fest."

OH THANK YOU GOD  for small miracles!! My baby is still a tomboy and her friend is only calling cause he knows she will be a good athletic addition to the team!  So, after breathing a sigh of relief, I said 'of course she could play' and got the details for the weekend!

While I realize this really isn't as life altering as an accident or illness (had plenty of experience with those!), it really was a major deal for me.  I realized that my baby is not really a baby anymore and that I have a new role as Mom.  Because at some point, it will be a boy that doesn't want to play whiffle ball, and 'likes' my daughter, and I get the nasty job of telling her that there is no way that my middle school aged daughter is going on a 'date'.  But better me than her father, who almost busted a vessel in his forehead as I shared this story with him! Tee! Hee! He has a new role coming too!
Oh...did I mention she's starting to enjoy clothes and shoe shopping, and makeup...sigh...

Thanks for letting me have my Mommy moment and have a wonderful weekend!!

Card Recipe: Cardstock-riding hood red, whisper white, Ski Slope DSP, Ink-chocolate chip, marina mist, riding hood red, kiwi kiss, pumpkin pie, Stamps-Four Frames, Joyous Celebrations, Accessories-decorative label punch, blender pen, marina mist dotted scallop ribbon

Friday, June 29, 2012

Flashback Friday-Merry Monday #4

I am on quite the roll with the Christmas cards!! I hate to admit, but I'm actually enjoying this!  I thought being limited to two packs of DSP would drive me batty, but it has actually made things easier.  Of course, there is still the temptation to dig into one of the newer packs...must be strong...

Today's card is based on sketch #4 from Merry Monday.  Sorry for the shadowy pictures... I waited a bit to long to try and take pictures outside...


and I even decorated the inside!!

My next project is making a 6x6 Christmas album.  I'm thinking that will just about finish off my Merry Moments paper (sniff...).  Only a few more days before my July preorder for the Holiday goodies!!!!

Well, that's it for me today! Another busy weekend with little time for craftiness... good thing there's still over a month of summer vacation left!  Have a wonderful weekend and happy crafting!

Card Recipe: Cardstock-real red, very vanilla, Merry Moments DSP (ret), Ink-real red, chocolate chip, soft suede, Stamp Sets- Snow Swirled, Tags Til Christmas, Accessories- petals a plenty folder, ornament punch, photo corner punch (ret), decorative label punch

Saturday, January 28, 2012

Feelin' Blue...

Nope! I'm not sad, it's the theme of  the challenge at Shopping Our Stash.  Since blue is my favorite color, it was not a problem to find some blue goodies in my stash!  I even used up some small scraps of paper for my flowers --not that you could tell by looking at my box of paper scraps!  My upline and friend, Kelly recently joined the DT at Let's Capture These Sketches.  She does amazing things with MDS and is equally as talented with paper! The sketch they had this week was pretty cool and had quite a bit of layers, which is not my normal style, but that's why it's called a challenge!!  So I used lots of my blue goodies to create a scrapbook page using their sketch...


Apologies for the shadows; the sun was starting to go down when I took the pictures...

And a closer, slightly blurry shot of the flower...


These pictures were taken last spring.  We had a tornado warning in our area and the town closest to us did receive quite a bit of damage, but the strong winds were what took down this HUGE hickory tree that has been big since I was a little girl!  The next morning, we went out to check things out and realized the core of the tree was rotting out and that the tree probably wouldn't have lived more than a few years anyway.  But it was still sad to see it on the ground.

Our girls, who are avid tree climbers anyway, loved that they could finally reach the top of the tree (they bragged to their Dad, a lot!) and enjoyed several days playing and exploring the tree.  That was, until the morning they realized that the tree was home to several black snakes.  Then they kept a safe distance until my brother cut up the tree and removed the snakes. Since the actual page didn't have much room for journaling, the story is on the back.  I do this a lot for my pages, since it also allows me to write more personal and private messages to my girls.

Page Recipe: Cardstock-whisper white, marina mist, basic black, Paisley Petals DSP, and several scraps from my stash, Accessories-decorative label punch, Baja Breeze corduroy brad (ret), Daisies #2 die, title cut w/ cricut

Saturday, December 17, 2011

Tags Part 2

This is the #2 of the 3 tags I made for a swap.  The third was a 3-D ornament tag that can be viewed here.
I recently bought Winter Post and for the life of me, I don't know why I have waited so long!  I have stamped craft paper for wrapping, made tags, and altered some gift bags using this set. And I haven't even used it for a card yet!!!


For this tag, I stamped the deer first in versamark then chocolate chip ink.  I heat embossed with clear embossing powder to add a little shine.  I think the hardest part of making these tags will be watching others throw them away... I know some of the recipients will save them, and I will have the pleasure of walking in with the prettiest tags!

Recipe: Cardstock-garden green, crumb cake, Ink-chocolate chip, versamark, Stamp Set-Winter Post, Accessories- decorative label punch, early espresso satin quilted ribbon, basic rhinestone (colored w/ Sharpie), hemp twine

Thursday, October 13, 2011

Snow Swirled

Here is another card from our most recent stampin' club. This is a really simple card that has such an elegant look!

It's hard to see in the picture, but we added some dazzling details to the snowflakes on the tree.

Card Recipe: Cardstock-cherry cobbler, wild wasabi, very vanilla, Holly Berry Bouquet dsp, Ink-chocolate chip, wild wasabi, soft suede (distressing), Stamp Set-Snow Swirled, Accessories-decorative label punch, dazzling details, dimensionals, chocolate chip satin ribbon