Showing posts with label Easter. Show all posts

Saturday, April 25, 2020

Belated Easter Greetings


Hello! I am so glad you visited today!  I'm a bit behind on sharing my Easter cards, but this whole working from home/remote learning/everyone's home thing has me a bit loopy!  While I don't like the reason, I am counting my blessings that both of my girls are home and actually seem to enjoy being here with their mother!  They have both recently rediscovered that they enjoy baking, gardening, and spending time outdoors.  My oldest has even started a little side hustle doing custom embroidery on sneakers.  She updated an old pair of Cons with a ton of pretty little daisies, and suddenly two of her friends wanted their own sneakers personalized.  It's been a nice past time for her and helps her de-stress from trying to do college lab classes online...

But I digress... Because we're all sheltering in place, I thought sending Easter cards would be a little way to let family know I was thinking about them and maybe brighten their day just a little.  They were super easy (seems to be my 'go to' design lately) with the gorgeous Cottontail paper from Authentique!  I just added a little embossed cardstock, ribbon, and a base, and taadaa!!


Don't you just love those gorgeous vintage Easter images?! So sweet!  Well, I have about 5 projects in the works right now, and they're not getting finished while I'm on here.  Thanks so much for hopping in (see what I did there?!) for a visit!

Card Recipes:  Authentique Cottontail, very vanilla, blushing bride, certainly celery, baked brown sugar, Accessories: square lattice and fancy fan embossing folders, assorted ribbons from stash



Thursday, March 19, 2015

Bunny Butts, Anyone?

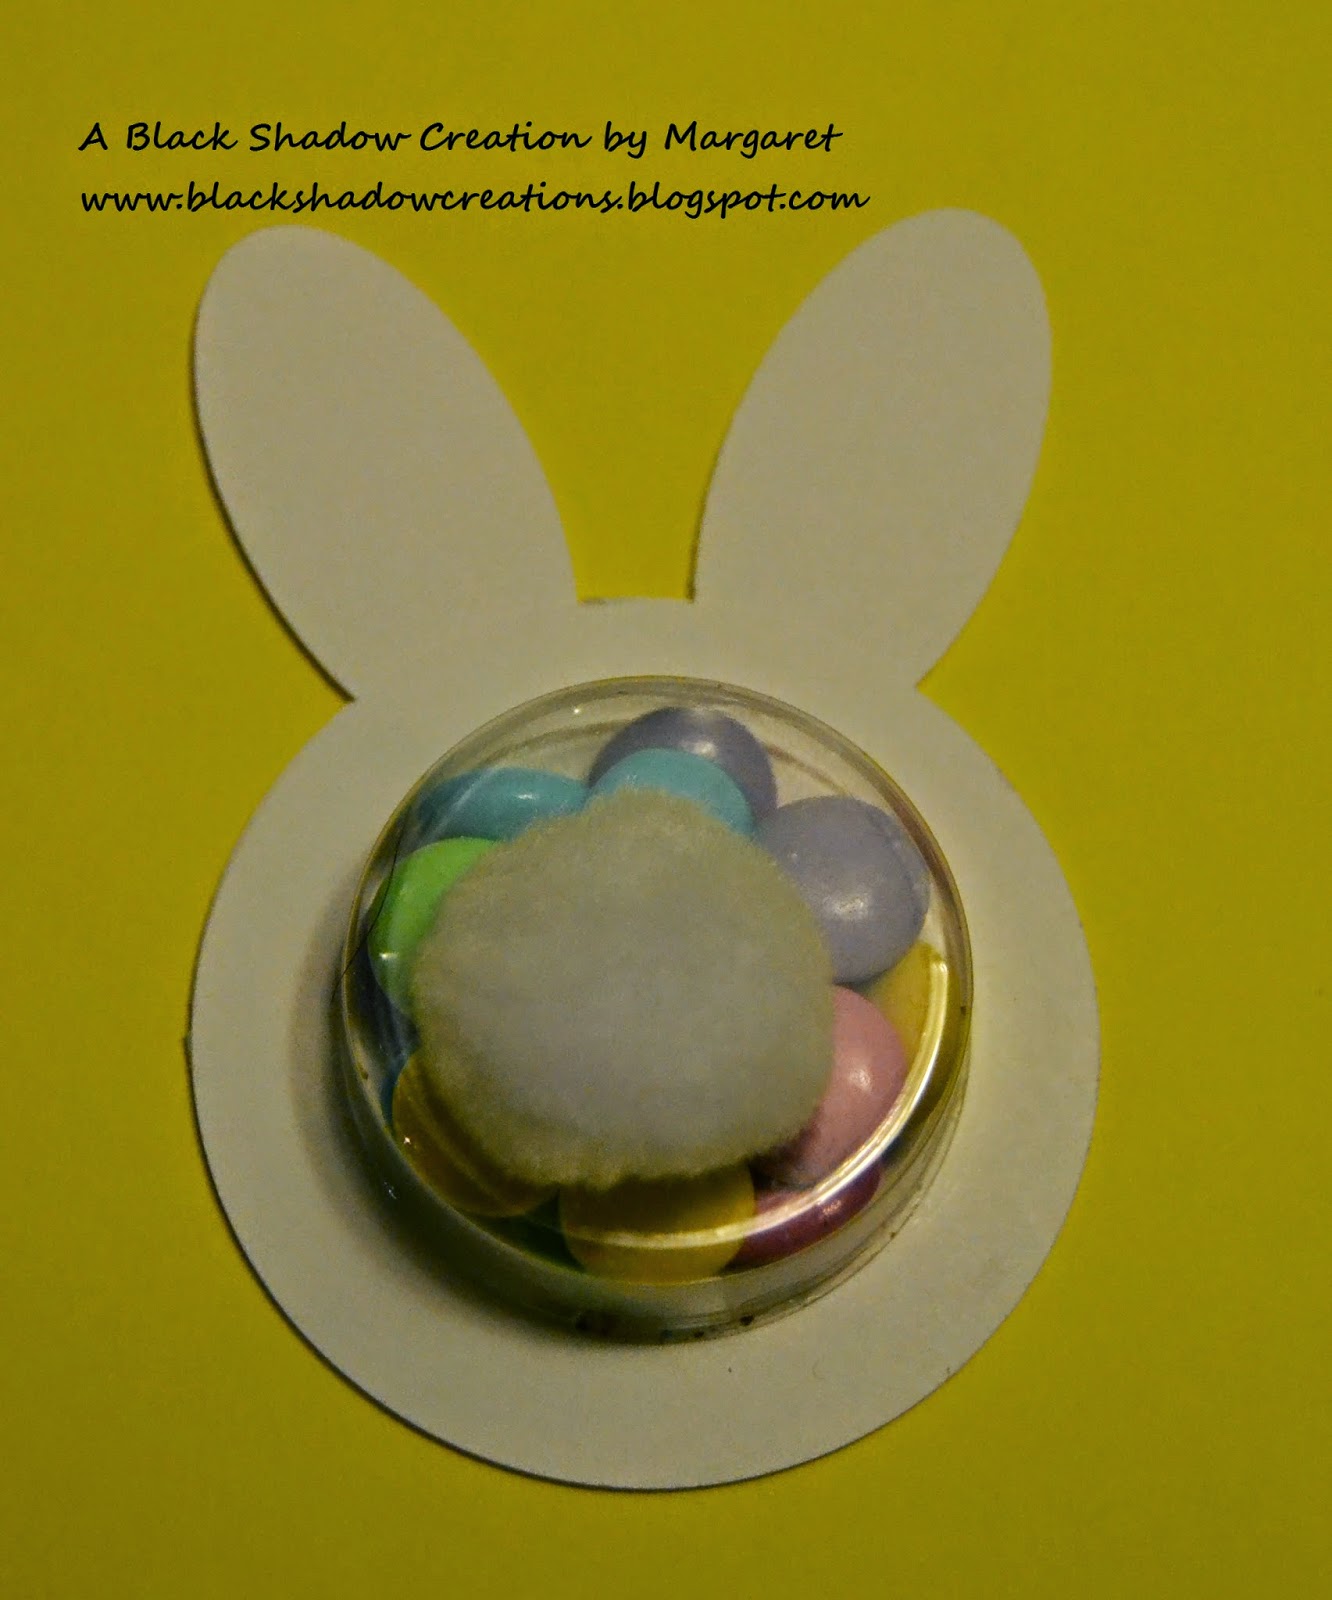
Hello! So very happy you stopped by for a visit! Today I have a cute little treat that is super easy to make and perfect for Easter.  This was my 'make and take' project for a recent fundraiser at my school.  My girls have affectionately named these Bunny Butts. 


If you need something that is easily reproduced (like bunnies...), this is a terrific option.  I punched out all of the pieces for 30 of these while watching tv one evening.  They are even easier to put together.  For each Bunny you need a 2 1/2" circle with a 1 3/4" circle punched out, a complete 2 1/2" circle, and two small ovals.  I also used a circle treat cup ($2.95 for 12) and a 1" white pompom.  The snack size bags of pastel m&ms fit perfectly inside the cups!

We had a lot of fun making these at the Ladies Day Out and I think they could be cute table setting decorations for Easter as well.  I have been playing around with a lot of my new to me supplies and will have quite a bit to share with you soon!  Spring Break is almost here and I have big plans to get a lot of scrapbooking completed and lots of other creative things accomplished too!

Well, I better get hopping back to work! Thanks so much for stopping by!

Project Recipe: Paper-whisper white, Accessories-2 1/2" and 1 3/4" circle punches, small oval punch, circle treat cups, white pompoms

Tuesday, March 10, 2015

Happy Easter Bunny

Hello! I am so glad you stopped by today!  I have a fun little card to share with you that I made during one of our most recent snow days.  I am not normally prone to purchasing Easter stamps since they aren't as versatile for other purposes, but the Happy Easter Bunny stamp from the Occasions catalog was just too cute!  Plus, it has absolutely nothing to do with snow and freezing cold weather, so it was a pleasant change from my current view...

I paired the sweet bunny with the Painted Blooms DSP (also from Occasions) because this spotty paper reminded me of dyed eggs.  It was fun to color the image as I watched movies with my girls.


When I finished putting all of the layers together, the card looked like it still needed something.  So I pulled out some retired wild wasabi ribbon to make a bow.  I really wish I had moved the oval up a little so the bow would be under the image, but it was already glued down and I didn't want to tear up the card.  

I can't believe that in a few short weeks, Easter will be here!  Where has the time gone?! Not that I am complaining that spring is on its way!!!!! Bring it on!  I am just hoping that I will be ready when the time comes!  

Thanks so much for visiting today and have a marvelous day!

Card Recipe: Paper-daffodil delight, whisper white, Painted Blooms DSP, Ink-memento tuxedo black, wild wasabi, rose red, blackberry bliss, soft sky, blushing bride, pacific point, Stamp Set-Happy Easter Bunny, Accessories-oval framelits, wild wasabi stitched ribbon


Friday, March 6, 2015

Flashback Friday- Ladies Day Goodies

Hello! I am back again with another Flashback Friday, and I'm so glad you stopped in to visit!  I really need to get back to regular postings on Fridays.  It encourages me to use my older goodies to create something new, and occasionally even makes a dent in my mountain of paper!

I was so happy on Monday that the temperatures were finally above freezing and all of the snow was melting away.  We even had rain on Tuesday to wash all of the dirty grimy stuff off of the roads!  But apparently winter is not quite ready to give up yet because I woke up Wednesday morning to a school cancellation because we were expecting rain turning to sleet turning to snow.  I was really hoping the weather people were wrong and I would have a day off without all of the nasty weather.  No Such Luck!  It was raining when I woke up and by 10 it had already started to shower little pellets of ice.  By the time DH left for work that evening, we had over 6 inches of snow on the ground... Yuck!

On a more positive note, the snow day did give me a chance to work on some things for an upcoming fundraiser I am participating in at our school.  Two of our teachers are raising money to attend a training on autism and are hosting a Ladies Day Out.  Lots of different vendors, including me, and some of our students made things to sell in their booth.  I've never participated in an event like this and am not quite sure what might possibly sell besides the wonderful Stampin' UP items from the catalog.  I made a lot of cards with the thought that if they don't sell I can still use them, and I also made a few little Easter goodies.  I will also have a fun little 'make and take' that I will share with you next week.

Today's creation is a little treat holder.  I found the cutest mini Uno and Apples to Apples games at Wal-Mart in the Easter section, and I made little folders to pretty them up a little.

The folder measures 2 1/2 x 2 1/2, so you can 
have some idea of how little the card sets are!


My base is 2 1/2 x 5 1/2.  I scored the base at 2 1/2 and 3.  Then I used some retired DSP and added the cute little bunny from Tags So Much!  Hopefully, some other people will think these are as cute as I do!

I will try to post more of my creations in the following week, and I hope I can share that the event was a huge success!  Have a wonderful weekend!

Project Recipe: Paper-pistachio pudding, crisp cantaloupe, pool party, whisper white, Sweet Sorbet DSP (ret), Stamp Set-Tags So Much (ret), Ink-memento tuxedo black, pistachio pudding, crisp cantaloupe,pool party,blushing bride,  Accessories-1 3/4" circle punch, decorative label punch 


Friday, July 5, 2013

Flashback Friday-See what a little cleaning can do?

Hi! Welcome to another Flashback Friday! I hope all of my fellow Americans survived their Independence Day's activities without any injuries!  Our holiday was pretty low key.  My nephew came home for a visit and we all had a wonderful time together.

I have been using my time off this summer to try to do some much needed cleaning and organizing.    No big surprise that one of the first areas I tackled was my crafting space!  Since then, I have moved on to other areas of the house (not nearly as much fun, but easier to purge clothing that is the wrong size, than old beloved stamps!), but I keep coming across things that pull me back to my crafting space!  For example, my dryer was becoming the catch all area for outgrown clothes, so I finally bagged them up so they would be ready for donating to our local charity thrift store.  During this cleaning, I found a few homeless buttons and figured that I would never find the matching clothes, or they were probably long gone.  So I gave them a new home in my buttons container where I found the bag of buttons I bought a long time ago at an antiques and collectables store.  This led to a complete side track from cleaning!

My first card actually features one of these buttons.  They are metal and a little shabby looking and I absolutely loved them.  I used a faux mosaic tile technique for the focal point and added the button as an accent.  Along with my old button, I also pulled out some retired Tea Party DSP for this card.


As I was working on the first card, I moved a ziplock bag of thin strips of paper that were scraps from Easter cards.  I decided I really needed to either use them or pitch them and then I remembered the cute Easter bear digi I colored a looooong time ago.  This image is so old that when I went back to the person's site to link up to it, her site was gone...  So Caroline, I tried to give you credit but I'm not sure where you are now!


I glued all of the skinny strips of paper onto a rectangle of copy paper and then trimmed the edges to make them even.  Then I glued that to the base and glued the teddy to the front.  I realize that little bag of scraps didn't make a big dent in my stash, but I am glad that I finally found a use for all of the colorful scraps!

Well, DD#1 and I have a date to watch the Warehouse 13 marathon, so until next time, happy crafting!!

Friday, April 5, 2013

A Little Digital Play Time

Well, hello! I am so glad you stopped by! Especially since my sporadic posting hasn't given you much to look at lately... I am starting to wrap up my final year of teaching and while my stress level has gone down a little, there are a lot of things that need to be handled before I leave. So bear with me if I'm not around as much.  I promise that by the end of May, you will be seeing a lot more activity on my litttle ol' blog!

I do have a little something to share with you.  I recently signed up for a MDS class with my upline, Kelly.  A few of us meet every other month and work on 3 different digital projects.  This is the card front that we made. I had never used the digital card format because I wasn't sure about printing it out and having that be my card.  Kelly shared with us that she sizes her cards a little smaller than  a standard card (4 1/4 x 5 1/2) so that she can mount the digital print onto cardstock. Now, perhaps many of you are thinking this is not such a revelation, but it really opened the door for me!  I ended up using this idea not only for this card front...


which simply was matted onto a piece of soft suede and sent to my brother in law for his birthday, but I also created two Easter card fronts for my niece and nephew, made them even smaller, then added ribbon and a bow to my nieces, and added buttons to my nephews.  


Of course, I thought about taking pictures of the completed cards after I gave them away... so you are only seeing the digital fronts.  Sorry... 

I think I will use this idea for cards that are being mailed and need to be fairly flat.  It's also a great way to make cards when you are short on time and can't pull out all of your crafting supplies!

I hope you enjoyed my little experiments today and in case you didn't know, Stampin' UP has recently announced that they are making MDS a lot more affordable! It is now only $19.95 to purchase the full software program, and believe me, that is an amazing deal with a lot of digital material included in the price!  This is the exact same program that was previously offered for $79.95!!!

Well, I'm off to finish some laundry so my family has clothes to wear tomorrow... They are SOOOO needy!!!  :)  Have a wonderful weekend and happy crafting!

Oh! I almost forgot! I will be back on Sunday with a project that has been cooking my brain!

Sunday, March 24, 2013

Anything But a Card Challenge 15-Spring/Easter

It's time for week 2 of Challenge 15 at Anything But a Card Challenges and it's my turn to share my project for the challenge Spring/Easter/Alice in Wonderland.  As much as I really wanted to do an Alice project, I have absolutely no Alice goodies in my stash, sniff! sniff!  So my project is following the Easter portion of the theme.

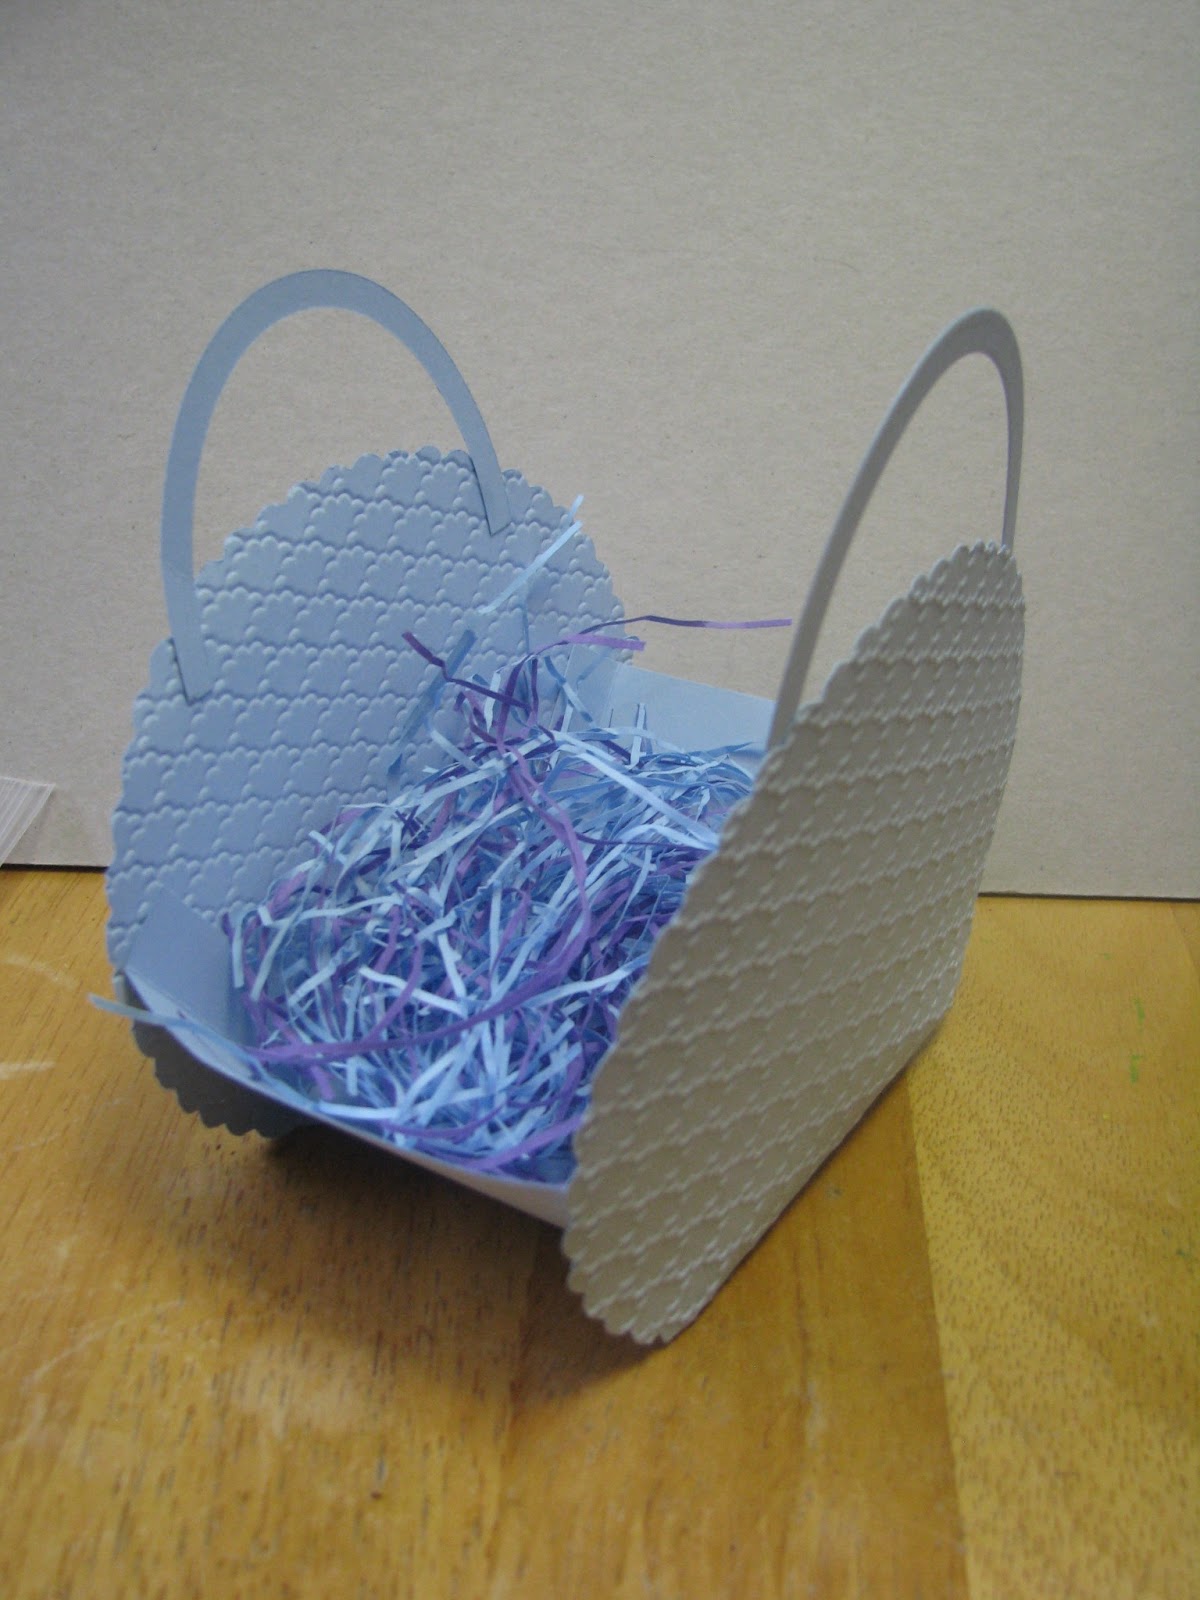
I would love to take credit for this sweet little basket design, but my crafty sistah, Sheila, shared this as a make and take at our most recent Stampin' UP meeting.  I couldn't get over how easy this was to make and only takes one sheet of 8 1/2 x 11 cardstock.  I also added the bow and little tag just to dress it up a little bit!  Wouldn't this be so cute full of candies?! Especially chocolate!!


I will try to get the diagram for the cardstock piece on my blog later this week.  I am officially on spring break and hope to have lots of crafty and bloggy time to get caught up on some much neglected things!  I hope you enjoyed my little Easter basket and that it inspired you to link up with us and share your own craftiness!  Have a fantastic week and happy crafting!

Sunday, March 17, 2013

Anything But a Card Challenge 15

Hello! So glad you stopped in today! It has been a WET and nasty day in southern Indiana. The perfect day for curling up with a good book or crafting, or if you are as fortunate as I was, taking a nap!

There is a new challenge posted at Anything But a Card Challenges.  This time, we are encouraging you to think spring! Of course, if you follow our challenge blog, you know that things are never as simple as this...  We like to get as creative as possible and Carla, our fearless leader, has taken the Spring theme and made it even more open ended!

"For Challenge 15 we are asking for something Spring-y or spring colors, or Alice in Wonderland!  I know it may seem like a strange combination, but that's how it works in my mind! :)  I think it's probably the rabbit/Easter thing."

So there you have it! Get your thinking caps on and see where this challenge leads you.  We would love to see your creation, and if you are so inclined, the team would love it if you checked out their creativity for the week.

I will be posting my project on Week 2, so be sure to stop back in to see the inspiration for the second week as well!

And just so you have something to look at on my blog this week, I created a card for my most recent club meeting that fits the theme of the challenge.  Yes, I know this is a card and the challenge very specifically is Anything BUT a Card, but since this isn't a DT post, I'm bending my rules a little!!  Feeling a bit rebellious at the moment... Hee! Hee!


This card was inspired by a card I saw on Pinterest.  You can see that card here.  She has a great tutorial on how to create her card.  Since I was using mine for a club project, I simplified it using punches instead of the oval framelits.  I also made mine a standard sized card so the ladies could use the envelopes they already have on hand.

I hope you have a most wonderful week and find lots of time to be crafty!!

Card Recipe- Cardstock-Baja breeze, whisper white, pink pirouette, Stamp Set-Wacky Wishes, Ink-Baja Breeze, pretty in pink, early espresso marker, Accessories-extra large and large oval punches, 2 1/2" circle punch, small heart punch, decorative label punch, wisteria wonder bakers twine, perfect polka dots folder, big shot

Thursday, April 12, 2012

Happy Easter (a little late!)

Well, I had intentions of posting this on Easter, but life had other plans for me! I had some last minute errands and preparations that needed to be done since DH had a scheduled out patient surgery on Monday.  We did manage to have a wonderful Easter with our family and had lots of yummy food, an Easter egg hunt, and even a campfire since it was a little chilly as the sun started to go down.


I used up some left over scallop strips from a card I made earlier.  I colored these images over a month ago and thought I better do something with them too. A very easy card to put together and I ended up making enough for my whole family who were pleasantly surprised to receive an Easter card.  I don't usually make them for everyone.

Needless to say, my crazy week has resulted in the lack of a Scrapbook Monday post, but I am going to a crop on Saturday and am looking forward to getting a lot done! Wish me luck!!

Card Recipe:  Cardstock-whisper white, melon mambo, tempting turquoise, daffodil delight, certainly celery, Ink- black stazon, markers, Stamp Set-Festive Four, Punch-scallop border, Extras-dazzling details, crystal effects

Tuesday, April 10, 2012

My Not So Little Artist!

My oldest DD decided that she would help me out and make Easter cards for her teachers.  She has her own 'stash' of supplies which consists mainly of my cast offs, and a few new purchases-she's almost as bad as her mother when it comes to craft shopping...  So while I was busy with Easter preparations, she was sitting on the living room floor creating.  After a little while, she came to me and asked my opinion on this card...


Isn't this awesome?! I realize I am her mother and have to say things like this, but I was floored at how well the composition was on this!  She has quite the eye for embellishment placement! So after giving my squeal of approval, I asked if I could post it on my blog.  She was so excited and happily agreed.

On a personal note, thanks so much for the comments wishing DH well! He is recovering very well and I think he is going to enjoy his little, mini vacation after a few days! He was up and moving around more today, so my job just got a lot easier!!

Saturday, March 31, 2012

CAS Easter

Surprise! Another post from me!!! Can you tell I'm thoroughly enjoying my extra crafting time?!
Over spring break, I had some extra time to blurf (blog surf) and check out some challenge sites.  I was too late for Colour Q but loved the bright colors so I used them anyway!


Then I found an awesome sketch at Clean and Simple Stamping.


Hand Stamped Sentiments and The Squirrel and the Fox both had Easter challenges and the colors were begging for an Easter theme so that's just what I did!


The layers of scallops were a first for me and I think next time I'll make sure to stagger them even more than I did, just for a better effect.  Other than that, this was a pretty basic card to make.  Thanks for popping in!

Card Recipe:  Cardstock-daffodil delight, tempting turquoise, certainly celery, melon mambo, whisper white, Ink-black Stazon, markers, Stamp Set-Gift Givers, Punch-scallop border punch, Extras-pear pizzazz seam binding

Tuesday, March 8, 2011

Easter Wishes

Wish I could take the credit for the design on this one, but I have to give props to Kelly Birrell (the queen!)  This was a card we made at her stampin' club.  I love the different textures!  All of the products are Stampin' Up, even the fabric!  The fabric yoyo (don't ask me why it's called that) was actually easy to make.  LOVE this design!!!  Thanks for looking and be sure to check out Kelly's blog Scrap Happy!