Showing posts with label Boho Blossom punch. Show all posts

Wednesday, April 17, 2024

A Little Paper Therapy

After a long break from creating, I finally made some time for card making. My sister and I attended a local crop and had a wonderful time surrounded by so many wonderful and creative people! This was just the push I needed to plan my card making class for the library and a fun afternoon at home. 

These cards were made at the crop and are going to the sunshine ministry for our ladies group at church. They will be sent to various people in our church family to let them know we're thinking about them!


The card below was made at the crop as well. I bought some really cute and fun monster dies from our LSS and had a lot of fun making these guys! My glue use needs a bit more work, but overall I'm happy with them!


Inside of monster card

This hydrangea stamp is an old favorite that I pulled out of the cabinet. Poor thing needed to be dusted off! 😉

The next three cards were the designs I used for the library class. Not too complicated, but used different techniques which is one of my goals for each class.
A little punching, die cutting, and freehand drawing-of course there was a bit of bling too!

More punching, dry embossing, and stamping
I loved showing them a different way to use simple circles!

Multi-step stamping and coloring for this one

I hope you enjoyed my cards and found some inspiration for your own creations. Thanks for visiting!


Friday, January 31, 2020

Flashback Friday-using up my stash

Hello! I haven't done a flashback in a while, even though I'm always trying to use up what I have before buying anything new.  I recently went shopping for supplies and was so proud that I only bought adhesive, cutting blades, and some xyron sticker refills!  Not saying this will happen next time, but it did this time!

My two pages aren't connected; actually they're for two different albums.  The first is for my oldest one's album.  She transferred school last year and we helped her move.  She is doing so well and we are so proud of her!  The background is all one page.  It came blocked off like this and I've had it for quite a while trying to figure out what to do with it...  A little trimming of photos, cutting letters, and punching flowers and that was it!


This page is part of the goal album for DD2.  The page is actually one I made at a class years ago. Long, long ago!  I finally dug the container out that held all of my ready to go pages and decided to use this one.  Since it was finished, I just needed to add the photo and journaling.


I can't remember everything from the second page, but I think the DSP is Lap of Luxury. Most of the supplies are listed in the labels section.

Thanks so much for stopping by and have a wonderful day!

Sunday, March 29, 2015

Another Fifth Sunday at Anything But a Card Challenges

Hello!  In case you had not noticed, this month has 5 Sundays in it.  That means there is a mini challenge going on this week at Anything But a Card Challenges to create something with five.  That's it; no other requirements (other than the whole card thing...) needed.  It can be the number five, five items- the sky's the limit!

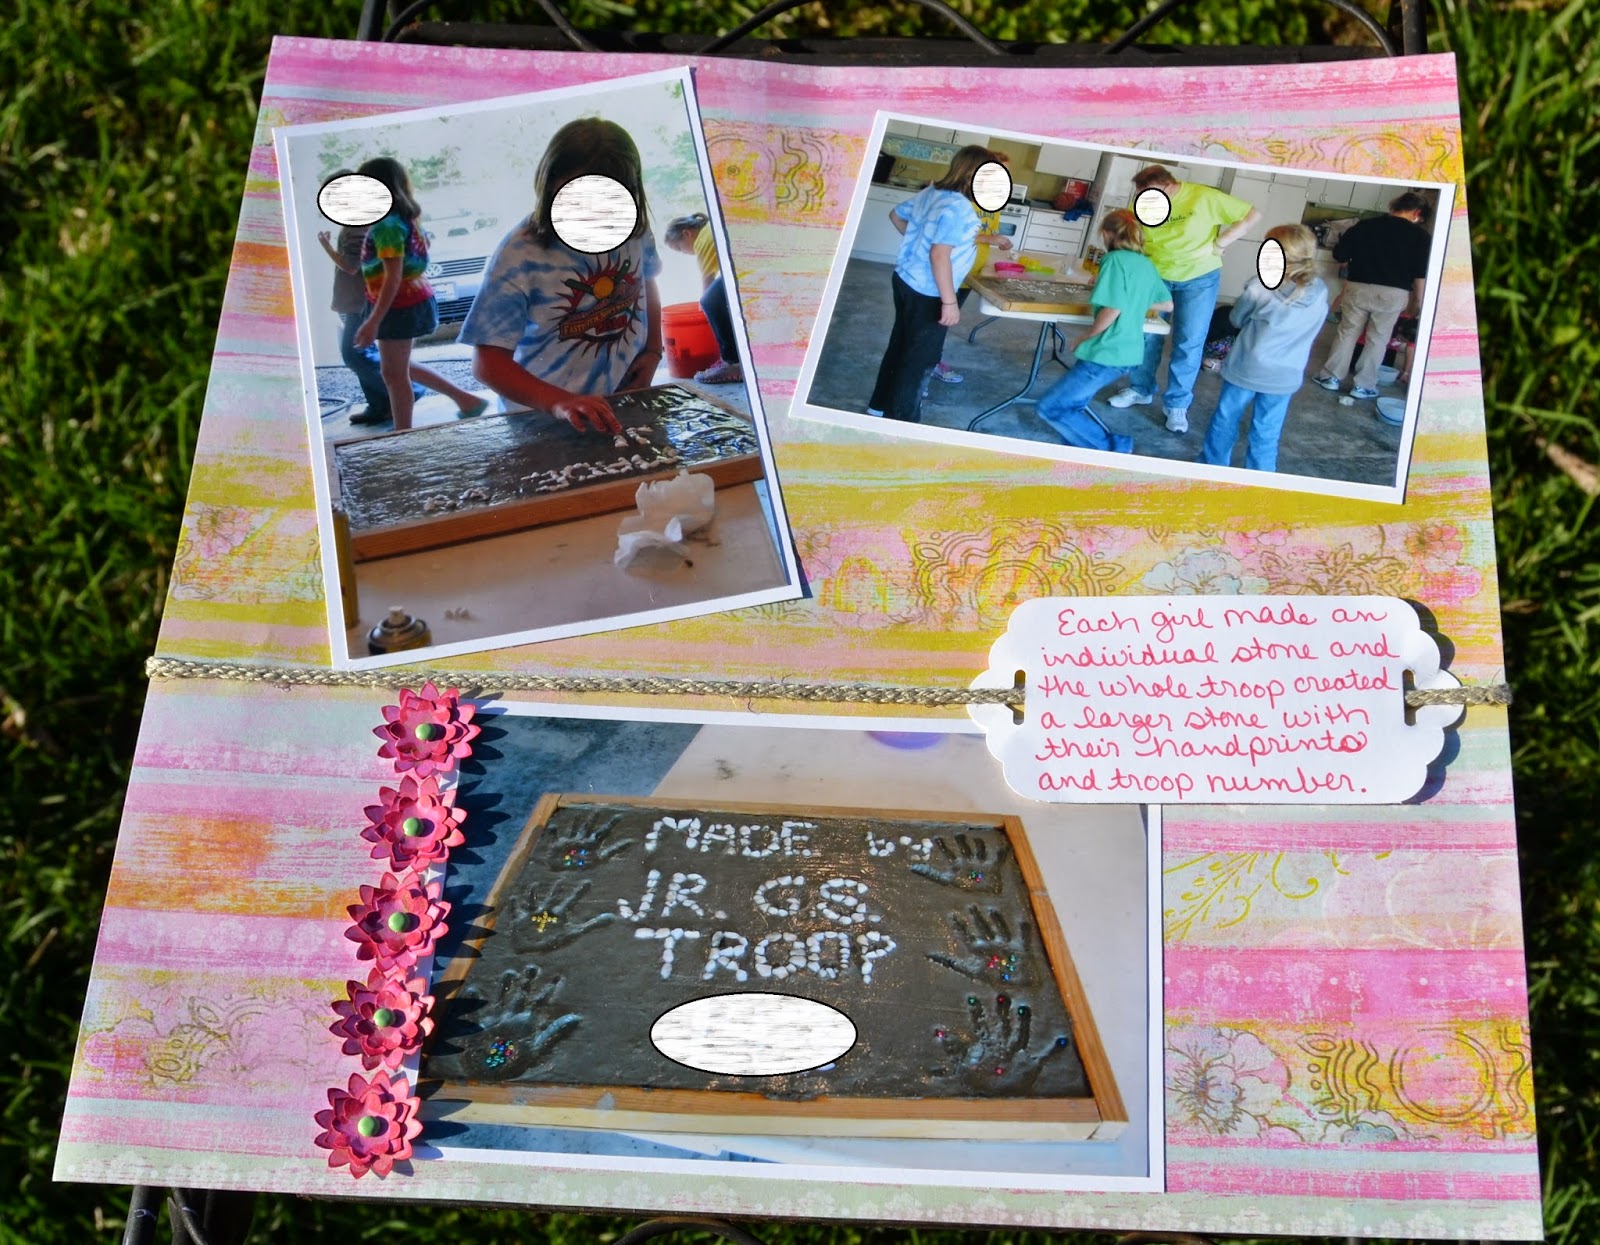
I went to a Relay For Life cancer fundraiser crop this weekend and had the most wonderful time with my oldest DD and many incredibly talented ladies.  Lots of food, lots of laughs, and lots of creating for a very good cause.  My five could also easily be the five pounds I probably gained from all of the yummy snacks and meals, but instead I'll share a photo of my five flowers I made on this scrapbook page.  You really don't want to see me with my extra five pounds!


I used the Boho Blossom punch to make the flowers, inked the edges and put them together with some very old green brads I had in my stash.  That's one of the good things about crops-they make you use what you brought!

I have also decided I love my tag topper punches! These are so awesome for dressing up journaling!  I was a little proud that when we left the crop, I had scrapped all of the photos I had brought with me.  Feels pretty good to be putting a few more pages in my girls' albums!

I will be back soon with more layouts from my scrapbooking day.  Have a wonderful week and thanks so much for stopping by for a visit!

Page Recipe: paper-base from stash, whisper white, ink-strawberry slush, accessories-boho blossom punch, scallop tag topper punch, green brads, twine from stash

Sunday, February 16, 2014

Tic Tac Love Challenge-A Cheesy Remake

Hello! Hope everyone is having a wonderful weekend and feeling quite loved (It is Valentines weekend after all!).  Personally, we don't really do a lot for this holiday.  When the girls were in grade school they would make their own Valentines to share with their classmates, but now that they're getting older, there's not a lot of Valentine crafting happening.  So I was a little stumped on whether I wanted to make an actual Valentines project for this month's Anything But a Card Tic Tac Love Challenge, or go with an all purpose idea.  I compromised and made something that had a romantic feel but could be used for other occasions.  I decided to go with the top row.  Red, Recycle, Glitter.  Yes... I know my red is quite 'pink' but it is rose red so I'm pushing the envelope here!  I made up for my little act of rebellion by following the other squares to the letter.  My recycled container once held wedges of spreadable cheese, and I used both glass glitter and dazzling details for the glitter square.

I painted the cardboard container with vintage white acrylic paint and topped that with TH black soot distress crackle paint.  It's hard to see in the photo, but there are some fine crackle lines on there making it look just a bit aged.  I glued a circle of Junior Varsity DSP to cover the top of the container and used the spiral flower die to make the two larger blooms.  This was my first time using the die and while I'm ok with the results, I really need to play a lot more to get the rolling just right.  I inked the edges of the First Edition DSP with rose red ink before assembling the flowers, then added dazzling details to the edges of the petals.  I covered the seam around the rose red DSP with champagne glass glitter.  Then I decorated the top with the flowers and leaves.


 a close up of the sparkly flowers...

On a side note, these photos were taken with my new camera.  I would love to say this was a planned purchase, but unfortunately, my good ol' Canon bit the dust last week.  I was going to try to find a repair shop (none in our area) when my DH made the comment that it might be cheaper in the long run to just buy a new one.  WELL...Since you put it that way, twist my arm and I'll go pick out a new one!  I did some research, took advice from other shutterbugs, and finally decided to try a Nikon this time.  So far I really like it, although I must admit I don't have a clue what most of the buttons and settings do... :)  Hopefully, I will have some time to read the manual soon and learn a little more.

I hope you find some time to play along with our Tic Tac Love challenge; there's still a week left!  Have a wonderful week and thanks so much for stopping by!

Project Recipe:  empty cheese container, Junior Varsity DSP (ret), First Edition DSP (ret), circle framelits, spiral flower die, little leaves sizzlit, boho blossom punch, champagne glass glitter, dazzling details, vintage white acrylic paint, TH black soot distress crackle paint

Wednesday, February 5, 2014

Mission Impossible

Hello! I am so thrilled that you are here!  We are half way through the week and I am ready for the weekend!!  My mom pulled a muscle in her back a few weeks ago and I've been doing double duty between my house and theirs. The recent colder temperatures  and the early arrival of lambs has made things a little stressful and I'm looking forward to a break!  Add to that all of the yucky snow and sleet that we received yesterday and I am ready for a new start! Is it Friday yet? But I digress...

Have you ever been struck by the fact that you're fighting a losing battle?  Like getting all of the laundry washed, dried, folded, and put away and then you turn around and BOOM! A clothes bomb has exploded in your laundry room?  Or that moment when you let the dishwater out of the sink because you KNOW you checked the entire house for stray cups and all of the dishes are clean, only to have one of the kids bring you a cereal bowl from under their bed (not that they are allowed to eat cereal in bed!)?  Yeah, me too!

I would love to say that I scrapbooked all of my photos (I wish!), but actually I just realized that while I have completed a lot of scrapbook pages, there are still a LOT of photos left and that doesn't include the ones that are still on my memory cards waiting to be printed, or the ones on the computer waiting to be dropped on a digital page.  I have decided that I'm like an agent on Mission Impossible.  My mission if I choose to accept it, is to get as many photos onto some sort of page and document the story as accurately as my mind will allow.  I will probably never achieve the status of Mission Completed, but at some point I have got to start making some sort of progress!  One goal that I think I might actually achieve is to use up all of the older 12x12 cardstock papers.  I am at the point where there are mostly oranges and yellows left on the pile and I'm thinking they may become some sort of card boxes at some point.  My ribbon and embellishments are a totally different story, but one mission at a time!

Today's page used the last of my older pink stash.  I also snuck a few vellum letter stickers on there. Those babies are OLD!


I had a hard time selecting a layout for this page.  I wanted all five photos on one page and was trying to figure out how to make it work.  I remembered that a long time ago, I had made a quilt-like page that had lots of pictures and thought that might work.  The hardest part was balancing the embellishments.  I have such a hard time with 'white' space.  But when I was finished, I managed to have all five photos and even a tiny shot of my in-law's Lab.  Shadow loves her and he couldn't bear for me to throw her in the trash bin!

Well, I better slip on my black sunglasses and get back to being an agent.  I just have to decide whether my mission will involve dishes, laundry, or pictures...  Wish me luck!

Page Recipe: Paper-pink base from stash, strawberry slush, pistachio pudding, Stamp Set-Just Journaling, Ink-crumb cake, pistachio pudding, black journaling marker, Accessories-paper daisies, Boho blossom punch, bitty butterfly punch, 1 3/4" and 1 3/8" circle punches, Martha Stewart leaf punch, dazzling details, green vellum stickers from stash.

Wednesday, May 29, 2013

A sneak peek, spring/summer cleaning, and lots of rambling...

Hello and welcome to my blog! I am so excited to have some new followers and hope that you get either inspiration, insight, or something to make you smile when you visit!!

I am in a 'bunny trails' kind of mood today, so I will share my cards (a sneak peek of my ABAC project for Sunday) first-just in case you don't want to wander the trails with me!


Challenge number 20 at Anything But a Card Challenges  is "Dust Off Your OLD Supplies". For this challenge we are having a bit of a spring cleaning theme. Go "Dust off your older supplies" for this challenge - and make something... ANYTHING GOES! Use up those paper scraps, break out tools that haven't seen the light of day, finish up one of those U.F.O's {unfinished objects}... or how about those hoarded stickers - we all have a stash. The theme is open so the possibilities are endless.... just remember create anything except a card... this is going to be FUN!!!

Now how easy is this?! Well... When your crafting space looks as horrific as mine, first you actually have to do spring cleaning (or for those of us who love to procrastinate, summer cleaning) to find most of your supplies and the table. I really wish I was exaggerating, but I'm not!  It's been a very crazy month! So after spending the morning finding my table (and several started projects), I knew what I would be doing for our challenge.  I am part of week 2 of the design team and usually finish my project Friday night or Saturday morning and rush to get it photographed, but this week it is ready to go by Wednesday afternoon!  I am sharing the cards today because I can't show the other part yet, and the blog is anything BUT a card...  Can't be flaunting any cards on Sunday, so the cards become the sneak peek for the main piece.

I spent most of the afternoon working on the cards for a very special friend from our  church.  She is one of the most caring and selfless people I know.  She made meals for my parents when Dad had his stroke, and still occasionally drops off goodies for them.  She has also been a wonderful mentor.  Last week, she stopped by to drop off some asparagus from their garden since she knows my oldest DD loves asparagus.  She handed me two HUGE bags of fresh asparagus, enough for many meals, and refused to accept any payment for it. "It will be a relief to get it out of the house." is all she says.  Well, if I have learned little else from the crafting community, one of the joys of crafting is passing on our creations to others.  Plus, I know she won't be able to turn down a handmade just for her gift! Pretty sneaky, right?  So I made a set of 8 greeting cards for her.

Now if you're still on the trail with me, I'm moving on to dusting off supplies.  I decided that while I was in cleaning mode, I would go through my DSP and clean that up too. OH MY!  We will not discuss just how much retired paper I have that can't be used for classes, not to mention the non SU things...  So I decided my summer crafting goal would include using up some of that paper.  I found a lone sheet of the paper above and have no clue which set it came from but I do know it was from a loooooong time ago. I managed to use almost the whole sheet for the 8 cards! Woo! Hoo! 1 page down, 4 million to go...  I also dusted off my daisies die which hasn't bonded with my Big Shot in ages. They were so happy to be together again!

I have really been slacking in the commenting and visiting of blogs lately.  Mom has been in the hospital twice this month with heart issues.  While her condition is not life threatening, it does sap all of her energy and messes with her heart rate.  They switched her to a new med this time so we are crossing fingers and praying that this one gets the job done.  I'm just thankful that I wasn't working this last time and could commit to being there for her and Dad.  Makes things a little less stressful!

Well, this is the end of today's bunny trail and post. If you made it all the way to the end, I applaud your tolerance! Hopefully Sunday will bring some less distracted blogging!  Have a wonderful rest of the week and I hope you don't have to clean before you do your happy crafting!

Card Recipes: Cardstock-wild wasabi, bashful blue, pumpkin pie, whisper white, old DSP, Stamp Sets-Word Play, Loving Thoughts, Ink-pacific point, bashful blue (sponged on daisy), Accessories-daisies 2 die, boho blossom punch, 2 1/2" circle punch, perfect polka dots & square lattice EF, non SU circle framelits, brights buttons, white bakers twine, bashful blue brad

Sunday, December 16, 2012

Anything But a Card Challenge #8- Frosty the Glowman

Hello and welcome to week two of the current challenge at Anything But a Card.  We are celebrating the light or Seasonal Holiday.  You are free to interpret light however you like, as long as it's not a card.  We would love it if you would join in our challenge!

I am neck high in planning and making gifts for Christmas and knew that I would combine my design team project with something that would make a nice little present as well. It's multitasking by only doing one thing!! Gotta love that!!

I have been on an ornament kick lately and enjoy giving them as gifts because most people have a Christmas tree and who doesn't love a gift made with love?!  I first saw a snowman using a tea light, at Stamp & Scrap with Frenchie and thought it would make a cute idea for a little gift.  Then I saw another version that had a body as well.  Debbie's snowman is part of her 12 Days of Christmas Ornaments and she has a great tutorial, and some absolutely wonderful creations displayed on her blog!  I loved the hat on France's snowman and decided it had to go on my snowman too.  Of course, I took a little artists inspiration to change things around a little and make this guy my very own...


This was so easy to put together that I made 6 of them using up the tea lights I had left over from DD#1's birthday party a few years ago.  My girls liked them so well, they immediately laid claim to them as gifts for their teachers.  Good thing I made six of them!!

If you would like to recreate my little snowman, he really is super simple to put together.  Just layer the two larger circles and then use the 3/4" circle punch to make a hole for the switch to fit through. A little sticky strip around the base hold the ribbon in place and also attaches the tea light to the circles.  The eyes, buttons, and mouth are pearls that I colored with a black sharpie.  If you need a more visual description, I suggest a visit to Debbie's blog.

Well, that's it for me today! Only three more school days until our Christmas vacation begins.  Woo! Hoo! I am planning on doing a lot of crafting during my break and am looking forward to some 'not busy' time with my family.  Have a wonderful week and happy crafting!

Project Recipe:  Cardstock-basic black, whisper white, red glimmer paper, Ink-Baja breeze, whisper white, black sharpie, Punches-2 1/2" circle, 3/4" circle, Boho blossom, modern label, word window, Accessories-3" circle die, basic pearls, neutrals brads, old olive grosgrain ribbon (ret), sticky strip


Sunday, July 1, 2012

CAS and CASE

Today's card is the last of my stampin' club cards.  I already had a design in mind and then I saw Tiffany's card.  I loved the clean design and how simple it was to put together. I swapped the butterfly for a flower and changed the sentiment stamp, and colors, but other than that, it's pretty much a CASE.  This is also a great card for using up scraps and I'm sure I will be using this layout a lot!


Card Recipe: Cardstock-whisper white, pink pirouette DSP from subtles stack, certainly celery, Baja breeze, Ink-soft suede, Stamp Set- Curly Cute, Accessories-corner punch, little leaves sizzlit, Boho blossom punch, silver brad from metallics collection

Thursday, May 17, 2012

Out of the Box for Mother's Day

I am officially on summer vacation!! I can not tell you how wonderful it is going to be to sleep in the next few days!  But enough of me rubbing my good fortune in your faces!!

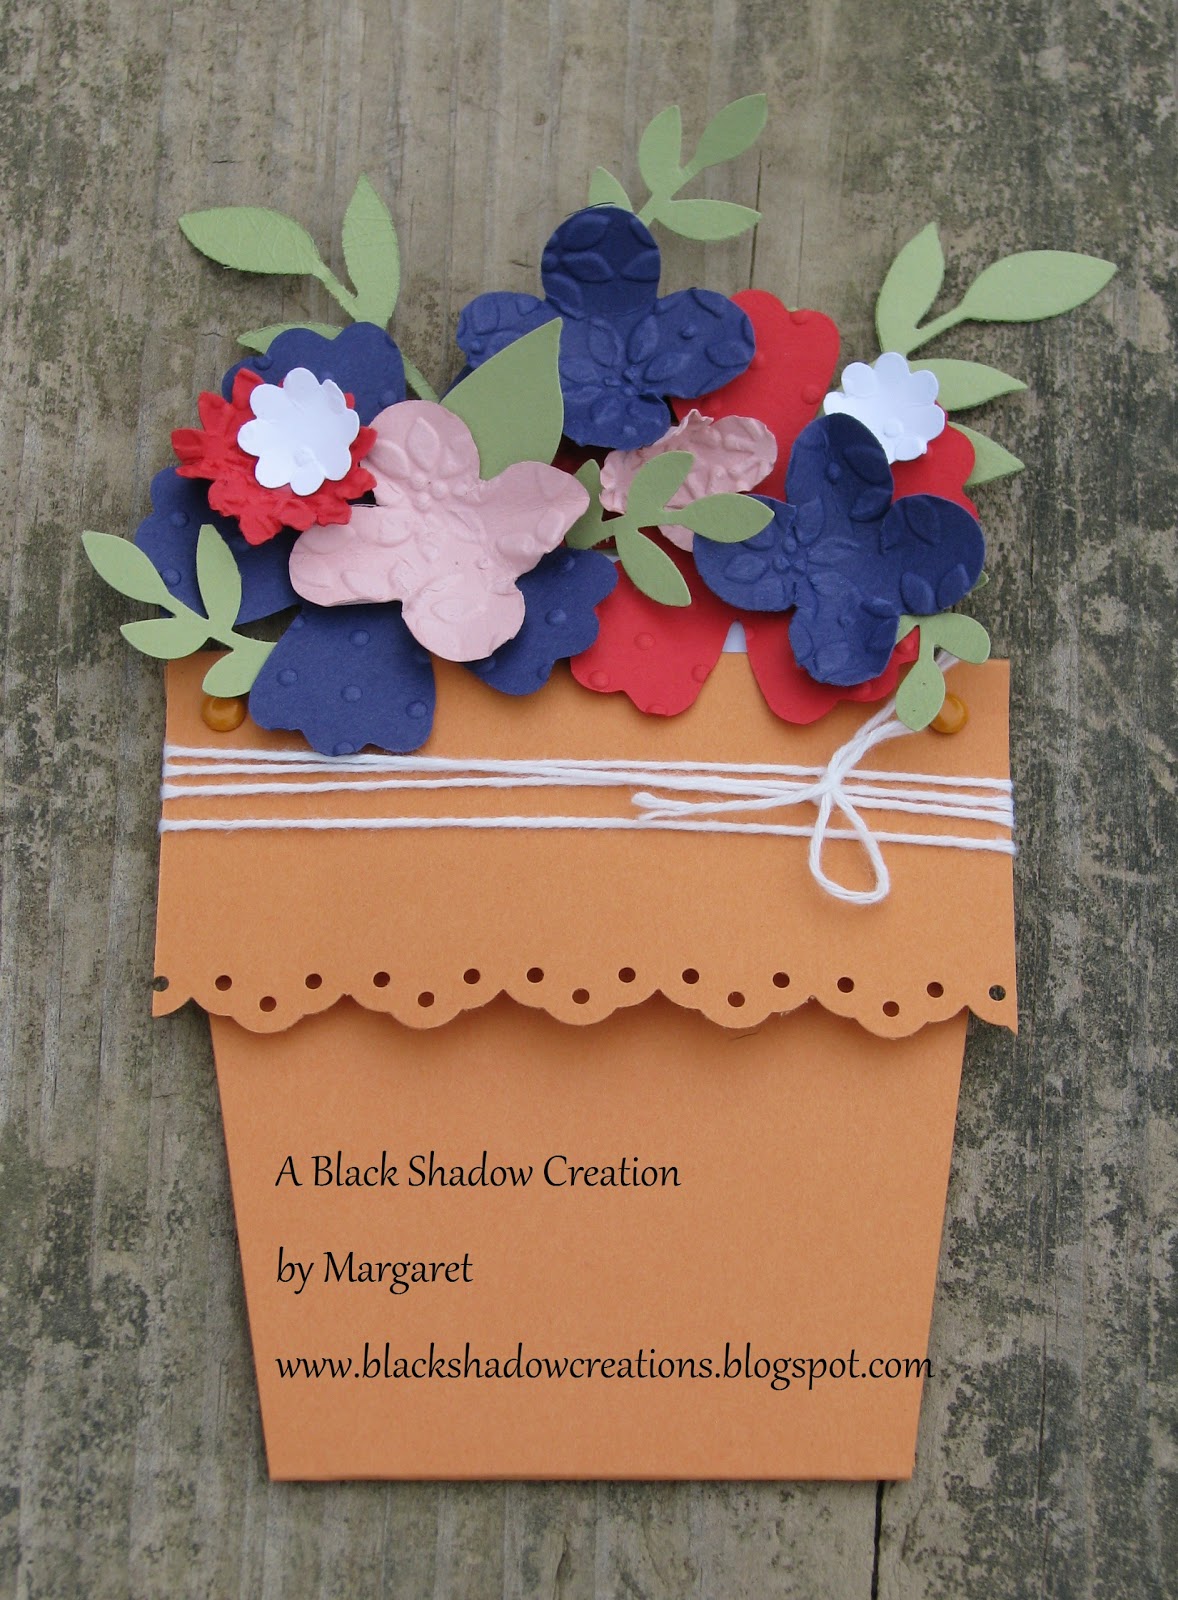
Last weekend, I needed to make a couple of Mother's Day cards for Mom and my MIL.   I have seen flower pot cards on different blogs, but never saved a link.  I went to Pinterest to see if I could find one with instructions.  *Here's a little background on me... I'm not sure why, but I tend to make most of my cards the standard size.  I've done a some square cards and even a few shaped cards, but I always end up going back to good ol' 4 1/4" x 5 1/2".  And my cards ALWAYS  fit in the envelope (stop laughing, Lisa M, don't you judge me!!).  So I was trying to stay away from any designs that would be too big.  I found the perfect one here and Brenda's step by step instructions were fabulous! Even better, it would fit a standard card envelope!

So I got busy cutting and scoring the pot, making the insert and then the fun part-the flowers!!  I wasn't sure how many I would need and didn't want to stop to make more after I started assembling so I made a nice variety to choose from. Then something incredible happened, well at least for me...  I went crazy! I kept adding more leaves and flowers and absolutely loved how it was turning out.  I finally hit a point where I looked at it and thought 'OK, I'm finished.'  Then it hit me... There was NO WAY this was going to fit in a standard envelope!!!  I had completely stepped out of my comfort zone, had a wonderful time, made a card both Moms would love, and I had no idea how I was going to present it to them!  Luckily after a little digging, I found some larger envelopes, left over from who knows what, and there was enough room to slip the cards in without squishing them.  Problem solved!  I'm just glad I didn't have to mail these!


I decided to use all of the retiring In Colors on this card.  I absolutely love pear pizzazz, but hadn't really used a lot of the other colors.  I'm also hoping I haven't forgotten any of the supplies.  It was a bit of a whirlwind of creativity on this one!

If you would like to recreate this card, I highly suggest clicking on the link above! Her directions and pictures really made this easy to create!

Card Recipe: Cardstock-2010-2012 In Colors, whisper white, Ink-pear pizzazz, concord crush, Stamp set-Fresh Vintage (from SAB), sentiment-unknown, Accessories-bakers twine, Boho Blossoms punch, eyelet border punch, bird builder punch, fun flowers die, floral fusion and little leaves sizzlit dies, square lattice folder, perfect polka dots folder, petals a plenty folder

Monday, April 23, 2012

Scrapbook Monday- Fun Flowers part 2

Hope everyone had a great weekend! Mine was busy, but spent a lot of quality time with friends and family, so it was pretty enjoyable!

Today's page is the second page I used the fun flowers die to embellish.  Nothing too fancy...


I also used the Boho Blossom and Butterfly punches.  I stamped the background in elegant eggplant using a stamp  from the retired set, Sprinkles.  A little ribbon and some dazzling details and we're done!

Page Recipe: whisper white cardstock, dp from stash, Just Journaling stamp, black stazon & elegant eggplant ink, Fun Flowers die, boho blossoms & butterfly punches, title cut w/ cricut, black scallop dots ribbon, dazzling details

Saturday, March 24, 2012

A New Challenge Blog!


It never ceases to amaze me how you can find so many amazing challenge blogs just by reading other crafty people's blogs.  Makes life so much easier than aimlessly searching!  Through two different blogs, I located Twisted Tuesday Challenges.  This site is brand spankin' new and they are having a DT challenge.  Since I only found it last night, I am squeaking my entry in at the very last minute!!  The DT challenge was to use pastel/spring colors with black added somewhere and the twist is the creation must be square.  Well, I don't often do square cards and I was rolling ideas around in my head when the word creation popped out at me.  It did not say it had to be a card... So here is my scrapbook layout meeting all of the requirements!


I used the sketch from Simply Stampin' Challenge.  See the pretty daffodils?  I learned how to make these from  Amanda.  Just use the 5 petal flower  and the Boho Blossom punches!  I inked the edges of the cup with pumpkin pie ink for a little contrast.  The pics show off the beautiful blooms on our trees. I love the color that bursts out in spring!!  It makes it so easy to find inspiration! Well, it was a little last minute, but I'm pretty happy with it and I have another page completed! YAY!! Wish me luck!

Page Recipe: Cardstock-wisteria wonder base, basic black, whisper white, certainly celery, barely banana, Lap of Luxury DSP (ret), Ink-whisper white (craft), pumpkin pie, daffodil delight, certainly celery, Stamp Set-Broadsheet Alphabet, Extras- 5 petal punch, Boho Blossom punch, eyelet border punch, certainly celery ribbon (ret), dimensionals

Monday, January 23, 2012

Scrapbook Monday with the Triple T

Well, so far so good on the resolution to post a layout once a week! It helps that some of my blogging buddies have been checking in to see if I remembered : )

Today's layout used a sketch from Top Tip Tuesday designed by the ever talented, Lisa.  There are two sketches to choose from  and I used the CAS sketch earlier to make a Valentines card, but this one struck me as a scrapbook layout.  TIP TIME:  I have to admit that the angled piece threw me at first, then the logical half of my brain (the part that usually doesn't kick in until I've goofed up) said "Cut the piece to the width you want, then angle it on the page and use a ruler to draw your angles. DUH!!!" (my logic section is not very polite to the rest of my brain) So, if you are struggling with parallelograms or trapezoids, this is my suggestion!  Now to switch off the logic and let the creative and fun part take over lest everyone think they are back in math class. YIKES!!


The banner came from the Apothecary Art stamp set and only took a little fussy cutting to make it. I really like that! My flower was made using multiple layers of the boho blossom punch and the pretty pink rhinestones were colored with a pink sharpie. I LOVE this money saving technique and there's almost no limit to the colors I can create!

Even with the layers and circles, the page remains uncluttered and the photo is still the main element. Now all I need to do is add a little journaling to the page and it's finished.  I still have a stack of Christmas pictures taunting me and they keep getting put back in the photo box.  Maybe next week they will finally make it onto a page and into a book!

I also want to take a minute and thank everyone who visits, follows, and comments on my blog! Whether your comment is encouraging, witty, or advising, I really appreciate the feedback! Especially since my DH (bless his little heart!) says such wonderful things like "Looks OK to me." or "What do you mean, does it need anything else?".  He is incredibly supportive when it comes to a messy table, late dinners, and a ton of supplies that he doesn't understand exactly what they do, only that I need them! So I guess I can't complain too much!!  Thanks so much for stopping by and I hope you come back soon!

Page Recipe:  Cardstock-Sending Love DSP (ret), very vanilla, real red, pretty in pink, and the base is from my stash, Ink-soft suede, chocolate chip, Stamp Set- Apothecary Art, Accessories-1 3/4" and 1 3/8" circle punches, Boho blossom punch, houndstooth folder, chocolate chip corduroy button (ret), real red brad