Wednesday, July 31, 2013

The last of the mini album

Hello again! As promised, I'm sharing the last of my mini Christmas Traditions album.  I did manage to keep the washi obsession to only one page today!

an old glimmer brad & using up some retired paper too...

finally using some stickles I've had for ages
-a green and red mixture

pulled out the silver glass glitter too!


I managed to pull out some neglected supplies for this project.  I hadn't used the glass glitter in ages and almost forgot how awesome it looks.  I HAD to have this bottle of red and green stickles a few years ago and this is the first time I've used it...  I also used a little more of Be of Good Cheer DSP left over from last year.  I was amazed at how many things I pulled out for this album.  Usually I try to keep everything really simple and don't pull out the fancy stuff, but it was a lot of fun playing with the pretties and not really all that time consuming either.  Once you've brought something out, you might as well keep using it! Maybe that's what happened with the washi... yeah... let's go with that!

We only have a week of carefree days left before school resumes and my girls are determined to fill them with lots of fun activities.  We went to one of the free movies at a local theater this morning and they really want to go to the pool tomorrow.  I'm hoping I can convince them to be crafty on Friday so I can have some playtime too! Wish me luck and happy crafting!!

Project Recipe: Paper-Be of Good Cheer (ret), Ink-black stamp and write marker, cherry cobbler, Stamp Sets-Tags til Christmas, Joyous Celebrations, Accessories- Season of Style washi, silver glass glitter, silver glimmer brad, postage stamp punch, extra large tag punch, circle framelits, very old stickles

Tuesday, July 30, 2013

More Mini Album Pages and a slight addiction...

Well hello! I am so glad you are visiting because I finished my mini album this weekend, and I have pages to share!  We had some rainy weather followed by a drop in temperature this weekend.  I actually had the a/c off and the windows open and it's the end of July!! Crazy!!! Not that I'm complaining...made it a lot easier to mow the grass and pull weeds!

The cooler weather also gave me a little motivation to finish my mini album I started for the current ABAC challenge-Christmas in July.  I also discovered that I have a slight addiction to washi tape.  Once I started using it, I wanted to put it on every page... Sheesh! Well, at least I'm using the stuff!!  I kept my pages pretty simple since the pictures took up most of the space anyway.

I used washi tape to make the stripes.

more washi to add some color...

and a frame made from washi... Are you seeing
the trend here?

I have a few more pages to share, but will save them for another day.  I'm pretty sure there's washi on at least one more...

I also thought I would share a pic of Shadow enjoying the cooler weather. I think he got wind of the kitty post and was slightly offended that I would allow them to have the spotlight...


Well, I have promised my youngest a fun filled day so I better get off of here!! Have a wonderful day and happy crafting!!

Project Recipe: Ink-black stamp and write marker, cherry cobbler, Stamp Set-Tags Til Christmas, Accessories-Season of Style washi tape, scallop square punch, chipboard album, vintage white acrylic paint


Sunday, July 28, 2013

Anything But a Card Challenge 24-Christmas Album

Hello! We are in week 2 of challenge 24 at Anything But a Card Challenges.  Our challenge is to celebrate Christmas in July (or Hanukkah, Kwanzaa, or winter) and you are welcome to share just about anything!

I had originally planned to scrapbook some photos from past Christmases, but it has been so terribly hot and humid here this week that I just couldn't get myself motivated.  I did however begin to alter a chipboard mini album which will feature some of my favorite holiday tradition photos.

The chipboard album came from the clearance bin at Michaels.  I think they were a quarter and I just couldn't pass them up.  Since I'm making an effort to actually use some of these things instead of letting them gather dust, I chose the wreath shape for this week's project.


I also used the retired Be of Good Cheer DSP.  This pattern reminded me of a berry covered holly wreath, so much so that I added some cherry cobbler dazzling details to really make the dots dimensional and festive! The silver ribbon is from the new Holiday catalog which goes live on August 1st.  I absolutely love this!! It's the perfect size for cards and smaller creations and it's so pretty!!

a close up showing the 'bling' factor...

On the back side, I painted the chipboard with Folk Art vintage white acrylic paint.  After the paint dried, I added a few strips of Season of Style washi tape (from the new Holiday catalog too) and mounted my photo on another piece of DSP.  I was debating what to add next when a piece of cherry cobbler tulle caught my eye.  I played with this a few months ago and opted not to use it.  I wanted a slightly tattered look, so I cut fringes  and scrunched them up before using glue dots to attach my shabby bow.  The snowflake was an extra punched from wax paper for a project completed long ago, but I kept it in my 'someday' container.  Apparently today is 'someday'!


You probably can't tell from the pic, but my DD is making Christmas cards.  The girls and I get together every year with my sister to work on Christmas projects.  Usually it's cards, but we've also made a Christmas Bingo game, and photo ornaments over the years too.

I'm hoping to get a few more pages finished this week since it's the last week of summer vacation.  I'm sure things will get quite a bit busier once the girls are back to their activities and schedules...  Maybe I'll manage to keep myself busy with some crafting projects while they're gone during the day!

I hope I have inspired you to pull out your holiday goodies and make something crafty to link up with our challenge!  Just remember, anything BUT a card!

Project Recipe:  Paper-Be of Good Cheer DSP (ret), very vanilla, Stamp Set-Joyous Celebrations, Ink-cherry cobbler, gumball green(sponging), Accessories-silver dazzling details, cherry cobbler dazzling details, silver 1/8" ribbon, basic rhinestones, large scallop circle punch, non-su snowflake punch, Season of Style washi tape, chipboard mini album, cherry cobbler tulle

Friday, July 26, 2013

Furball Central...not a crafty post!

Today's post has absolutely nothing to do with paper crafting at all!  I thought I would catch all of my bloggy friends up with my ever changing family.

Many of you know Shadow, our Black Lab & my foot warming crafting partner, but I'm not sure I ever posted about his kitty, Midnight.  Midnight started as my parent's farm cat and personal kitty to Corky, their rat terrier/chihuahua mix.  Well, Corky got older and didn't venture outside as much and then they added Abby, an incredibly sweet but ultra hyper border collie to the mix.  Abby thought Midnight made a wonderful toy and terrorized her at every opportune moment.  Well, Midnight had enough of that mess and quickly relocated east to our property where she could sit safely across the invisible fence line and sashay safely out of reach.  It didn't hurt that Midnight intimidated the crap out of Shadow and he gave her plenty of space.  Over time they became friends and Shadow actually chased off the stray cats that would attempt to eat Midnight's food.

Midnight was a very old kitty when she adopted us and shortly after summer vacation began, we noticed she was really starting to show her age.  We had just made the family decision that if she got worse, we would step in, when she disappeared.  I'm pretty sure she wandered off somewhere and is no longer with us, but my youngest likes to think she left us so we wouldn't be sad about having to make the choice for her.  I kinda like that thought... Gives her a lot of dignity...

So we had some pretty sad weeks and my parents decide that the girls needed another cat. This was not brought on so much by our emotions as the persistence of one of their cats to constantly sneak in the house which drove my parents crazy.  So we were given a tomcat who was quickly named Zazzles (Big Bang Theory anyone?).  He sounded like a fine tuned engine as he purred and swiped our legs every chance he got, and after one face to face encounter with Shadow, stopped trying to sneak in our house.  Imagine our shock when we came back from our camping trip, and our oldest found Zazzles dead in the yard.  We have no clue what happened, he didn't show any signs of being attacked or hurt and once again, we had some very heartbroken girls...  I was pretty much finished with trying to keep a cat, until our house was built and it could come inside, but apparently there was a higher power at work.  I'm still not sure if it was divine intervention or my mother, but I'm not willing to argue with either...

My parents have several farm cats roaming around and the girls love to play with them when they go down to visit.  Princess who recently had kittens is one of their favorites, and since she is also trying to get in Mom and Dad's house, she was another consideration for the one who needed to go. She suddenly began appearing on our deck begging to be loved on, and since she had two kittens, they became part of the package. Hmm... three new cats...  We brought the 'dog' house of Princess and family up to our house and proceeded to spoil them rotten.  We must have done a fantastic job because Buddy and Ruby (the two remaining cats) began to visit as well.  So at any given time, there are 5 cats on our deck! For all of the Big Bang Theory fans, we officially have a clowder... While Shadow enjoys sniffing certain areas that shall remain nameless on the kittens, he's not so sure about the adult cats. They still scare him a little!  I'm just hoping that they still have several of their lives left. I am not sure we can deal with any more losses!

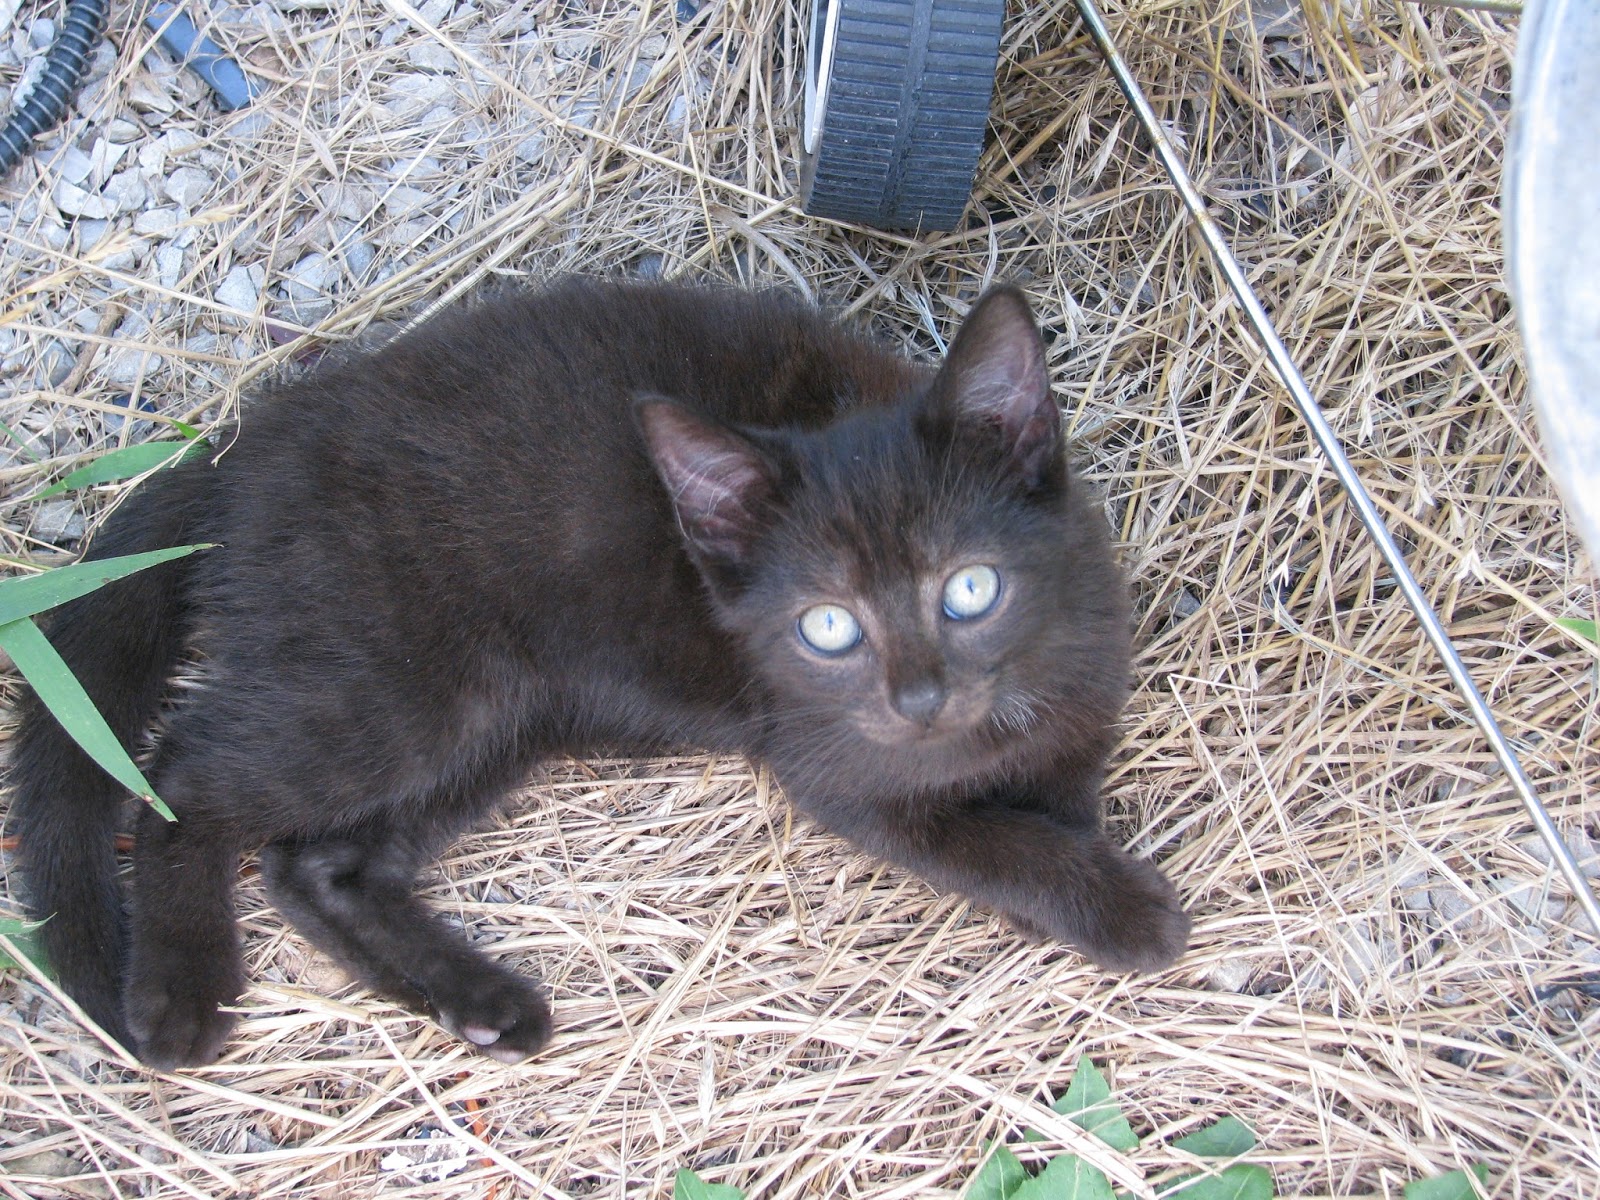
To end this post on a more positive note (God knows there was enough sadness...), I'm sharing some photos of our new permanent residents...

Katniss-quite sassy and always up to something, she
sneaks in the house on a regular basis.  Shadow really
likes her since she doesn't attempt to claw his eyes out!

Black Beauty-a little more shy, but will pounce without 
warning.  Shadow does not like her at all and the
feeling is mutual.  She is in perpetual hiss 
mode when he's around.

Princess-proud Mama and very sweet.
She head-butts Shadow all the time and 
seems to know that he couldn't possibly
hurt her.

Now our days are filled with purring furballs, side stepping said furballs as we attempt to leave the house, and bracing ourselves for the sneak attacks that happen when we return home.  Not such a bad way to live...

Well, that's it for me and my ever expanding fur family.  Have a wonderful week and may all your crafty projects contain pet hair! I know mine will!

Sunday, July 21, 2013

Anything But a Card Challenges- Christmas in July!

Hello!  Just popping in to let everyone know that we have a new challenge beginning today at Anything But a Card.  We are celebrating Christmas in July and we are hoping to see lots of great ideas being shared!!


I made the light up snowman ornament last year for Christmas. If you want details on him, click here.

Just think...you could get an early start on your gift making and decorations,  or finally work on those holiday scrapbook pages from last year (or if you're like me-several years ago).  Oh the possibilities of what you could make!  The only thing we don't want to see is a card.

If you don't celebrate Christmas, we would love to see your Hanukkah, Kwanzaa, or other December related projects too!!

Be sure to check out the wonderful creations being shared by our Week 1 design team!  I'll be back next week with my contribution.

Have a wonderful week and happy crafting!

Saturday, July 20, 2013

Paper Pumpkin at a special price!

Paper Pumpkin is a fairly new feature at Stampin' UP.  It is very similar to a craft of the month kit, yet it allows you a lot of flexibility.  After you sign up, you have the option to skip a month or stop receiving the kits all together.  Not that I think you will WANT to do that, but it's nice to know that you're not committed forever!!   If you saw my post sharing a card I made with the Paper Pumpkin kit, you had a sneak peek at the quality of the things you receive when you join.

Well, now I have even more good news!  If you have been on the fence about this product, you can now receive your first two kits for only $10 each!!! How awesome is that!!  After receiving your first two kits at this special price, you can continue receiving the monthly kits at $19.95 (includes shipping).

You can click on the image to go to the site and sign up.  Make sure you enter the promotional code : PUMPKINDEAL and list me as your demonstrator!  But don't wait too long, this code will expire on August 31st!!!


I am sure you will be as impressed with the quality of the kits and they are a breeze to put together too!  If you know someone who doesn't stamp, but would like to begin, this is the perfect gift too!  Each kit includes everything you need to finish the products, except adhesive.  It even includes the ink!!

I hope you have a fabulous weekend and happy crafting!!

Friday, July 19, 2013

Flashback Friday- A little more Ski Slope...

I am so glad you stopped in today, and hope that you're not sick of seeing my Ski Slope Christmas cards!  I am happy to say that all that is left is 1 full sheet and a baggie of scraps!  So there's a good chance that this will be the last you see of Ski Slope for a while, but no promises!

I went with a very simple design  that featured the DSP as the focal point and embossed the paper for a quilted look.  I love the distressing that occured when I did this-a happy accident, but happy all the same!  The delicate snowflakes were punched from some ragged scraps of whisper white cardstock that really needed to be used up.  I only made two of this design, but I think I will probably use this layout again using different papers.

a close up for a little more detail...


I hoped you enjoyed my new creations using old products and that maybe I've inspired you to dig out some of your older favorites too!  As this is posting, I will be knee deep in cookie making and camp prep. We are once again helping out at our local Kids Camp and will be in charge of feeding 18 hungry boys!!  Wish me luck! Have a wonderful weekend and happy crafting!

I also linked this up at Crafty Hazelnuts Christmas Challenge. They have an anything goes as long as it's Christmas challenge for the month of July!

Card Recipe:Paper-Baja Breeze (ret), Riding Hood Red (ret), Whisper White, Ski Slope (ret), Stamp Set-Teeny Tiny Wishes, Ink-chocolate chip, Accessories-snow burst embossing folder, non SU snowflake punch, basic rhinestones

Wednesday, July 17, 2013

More Stamp Camping

Hello! I'm back with another creation from my stamping while camping day.  Today's card was quite possibly the easiest and fastest card I have ever made! So how did this miraculous card come about?  With a little help from a new product line from Stampin' UP called Paper Pumpkin!  This is like a club in that you can receive a new Paper Pumpkin kit at your door every month, however, you have the option to stop at any given time.  This kit contains everything you need to make the enclosed project with the exception of adhesive and a scissors to trim ends if needed.  Your first kit even comes with a clear block, and each kit contains ink and embellishments as well!


I have to admit that when this first released, I did not think this would be something I would personally use, but I signed up so I could show it to friends and customers.  I also thought they might make great give aways too!  Since I hadn't used them, I had several of these cute kits sitting on my shelf.  I decided to take one of the kits camping with me... just in case...  I am LOVIN' this concept now!  It was so amazingly easy to put the cards together and I love the fun sentiments! The third one (not shown) says 'love your guts'!  The quality is fantastic and I love that everything is precut.  These would also be so easy to modify to different designs if you didn't like the original or just didn't feel like making them all the same.  Plus at only $19.95 (shipping included in this price) it's a great deal too!  If you are interested in learning more about Paper Pumpkin you can go here to read all about it and you can even sign up at this site!  Just be sure to list me as your demonstrator!!

Have a wonderful rest of the week and happy crafting!

Card Recipe: All supplies from Paper Pumpkin kit

Tuesday, July 16, 2013

A new meaning to Stamp Camp

Hello! I am so glad you stopped by today! I am finally sharing some NEW Stampin' UP items on my card for today!

This spring, we made the decision to upgrade from our ancient pop up camper to a larger pull behind type.  A friend of ours was selling his camper and the price was right, so we now own a not so new 5th wheel.  I love that it has a refrigerator, stove, microwave, and most importantly bathroom!  I am not a 'glamping' (glamour camping) type person, but I am also not a survivalist either!  We took our new to us camper for a test run the last week of June.  We had a great time sitting around the campfire, and made at least one meal a day over the flames.  I'm pretty sure that the light carpet in the camper will never be clean again, but DH has already said his goal is to rip it out and replace it with laminate flooring. Score!

So I'm sure you are wondering what in the world this has to do with stamping right?  Well, I have had my new Stampin' UP goodies sitting here waiting to be used and couldn't seem to find the time and mojo to use them.  So I packed them up and took them camping with me.  I had a pretty good idea of what I wanted to make and just brought the bare bones necessities along.  So on Wednesday when it started pouring down rain and everyone retreated into the camper, I pulled out my stamping supplies and got busy!  I'm thinking I may start a new trend... Stamp Camping...


As soon as I saw Perfect Blend in the new catalog, I knew I had to have it!  It is the perfect set for all of us Java Junkies!  In case you were wondering, the sentiment is made to look like this, not an artistic flair on my part!  I colored the cup sleeve with one of the new in color markers, crisp cantaloupe and then decided that it looked too bare.  I had already tried out the new clay and flower mold at home and on a whim tossed the molded flowers in with my supplies.  A little coloring with my markers and I had a coordinating flower that was just the right size for my cup!  If you look closely, you can see a stamp shadow at the top of the very vanilla layer... I really need to trim down this stamp a little, but didn't have my trusty snips along.  So I inked the heck out of the edges to blend in the ink from my 'oops'.  The DSP is retired, but the color and pattern worked so well with this!

I hope you enjoyed my camping card! Maybe next time you'll join me in stamp camping! Just don't forget the bug spray, marshmallows, and coffee!!  Have a wonderful day and happy crafting!

Card Recipe: Paper-very vanilla, soft suede, Comfort Cafe DSP (ret), Stamp Set-Perfect Blend, Ink-soft suede, early espresso (how perfect is this!), crisp canteloupe, baked brown sugar, Accessories-simply pressed clay, buttons and blossoms clay mold

Sunday, July 14, 2013

Anything But a Card Challenge 23: Steampunk- On the right track (I hope...)

Hello! I am so glad you stopped in today!  It is week two of challenge 23 at Anything But a Card.  Our theme is Steampunk and I am bravely sharing my journal page today!

I have absolutely no experience in this genre and hope I'm not too far off mark on this one!  I decided to make a page for my quotes journal and thought that a new art style was fitting of the accompanying sentiment.


I think there is more Victorian influence than industrial, but overall I like it.  I was a mess trying to figure out where I wanted to go with this... I kept moving everything around, trying to find the best placement.  I also had a hard time deciding what to add as far as inks.  I really didn't want to go a step too far and hate the result...

I found the train image at a wonderful free site called From Old Books (what an amazing place to completely lose track of time!), and due to my lack of Steampunk supplies, it was a great starting point!  I printed it on very vanilla cardstock and colored it with a combination of copics, watercolor pencils, and metallic markers.  The distressing and aging came from river rock, soft suede, and crumb cake inks.  I added just a touch of copper glitter glue to the wheels. Of course, I had to do a little shopping for coordinating goodies. Don't you just hate that?!  I found the Tim Holtz metal sentiment tag and the decorative ticket on sale so I had to snag them.  The metal/rhinestone flower was spotted at Big Lots of all places.  I added a bit of copper colored Sharpie to the rhinestone to lessen the bling factor.  You may have spotted another of my metal buttons from my stash, and I even managed to make some of my Stampin' UP goodies work for this project.  The crochet ribbon, vintage brad, metal brad, and doily background stamp all seemed to fit my image of Steampunk accessories.

While I was initially a bit worried about this project, it was fun to research and learn about a new to me style.  I really hope to see some of you join us with your versions of Steampunk!

I hope you have a wonderful week and happy crafting!!

Friday, July 12, 2013

Flashback Friday-Scrappy Holidays!

Hello! I'm so glad you stopped by today!  I am doing my very best to keep up with the Christmas card making plan and I have four more cards to share today!  Once again, I used the retired Ski Slope DSP and  the package is looking even more pitiful than before. 

I was so excited as this card came together for three reasons. 1. It used a lot of smaller scraps that I always struggle to use (but yet can't seem to throw away!). 2. It used almost all retired product. and 3. It came together so quickly!

a close up of the design

and all four cards...


I have to admit that it feels pretty good to use up some of my older goodies and add to the growing stack of Christmas cards.

**Revised** I am linking this card up at Merry Monday where they are having an Anything Goes-Christmas challenge all month long!  I've also linked up with Crafty Hazelnuts Christmas Challenge, who also has an anything goes as long as it's Christmas challenge for the month of July!

I hope you have a marvelous weekend and happy crafting!

Card Recipe: Paper-riding hood red, scraps of whisper white, Ski Slope DSP (ret), Stamp- non SU from my stash, Ink-kiwi kiss (ret), Accessories- brads, photo corner punch


Wednesday, July 10, 2013

Christmas in July, sorta...

It's beginning to look a lot like Christmas...NOT!  I am nowhere near ready to celebrate, but last year, I started my Christmas cards early and was so glad to have them finished before December 24th!  So I decided to do this again this year.  There's nothing better to put you in the Christmas spirit than a muggy summer day!  I also continued last year's trend of using up some of my older papers.  I used a very retired Ski Slope.  Sketch #83 from Operation Write Home gave me a perfect starting point for using lots of patterned paper.


I figured while I was digging through and trimming my scraps, I would go ahead and make four cards.


During one of my cleaning sprees, I found a box of Christmas cards I had saved from different classes and stamp a stacks I attended.  I took pictures of my favorite designs and added them to my stash.  Between these and my four new cards, I have a pretty good start on my Christmas cards.  Now I just need to keep making them! Wish me luck!

I hope you have a wonderful day and find some time to be crafty!

Card Recipe: Paper-chocolate chip, whisper white, baja breeze, Ski Slope DSP (ret), Stamp Set-That's the Ticket, Ink-kiwi kiss (ret), Accessories-ticket duo punch, 1 3/4" circle punch


Sunday, July 7, 2013

Anything But a Card Challenge 23-Steampunk?!

It's time for a new challenge at Anything But a Card.  Challenge #23 is Steampunk. 

I just want to go on record that I knew absolutely nothing about this genre!!  I have seen Steampunk art and always thought it looked pretty cool, but didn't ever explore any aspect of it.  The closest I've come to experiencing it was watching Monty Python...  So I did a lot of research, googled steampunk, searched pinterest for art inspiration, and visited blogs of friends who seemed to have a pretty good grasp on this.  It was actually quite interesting and a lot of fun.  It is also WAY out of my comfort zone.  Good thing I have another week to put the finishing touches on my creation!  Fortunately, the other members of the design team seem to have a better understanding of Steampunk and have shared some fabulous inspiration on the challenge site.

In my research, I came across this beauty!  It's a Steampunk wine bottle opening and pouring device...  If you click on the image, you can watch a video of this wonderful contraption in operation!

rob-higgs-steampunk-corkscrew

Now this is a Steampunk piece I can truly appreciate!!

I hope you will join us in this challenge, even if you're a newbie like me!

Friday, July 5, 2013

Flashback Friday-See what a little cleaning can do?

Hi! Welcome to another Flashback Friday! I hope all of my fellow Americans survived their Independence Day's activities without any injuries!  Our holiday was pretty low key.  My nephew came home for a visit and we all had a wonderful time together.

I have been using my time off this summer to try to do some much needed cleaning and organizing.    No big surprise that one of the first areas I tackled was my crafting space!  Since then, I have moved on to other areas of the house (not nearly as much fun, but easier to purge clothing that is the wrong size, than old beloved stamps!), but I keep coming across things that pull me back to my crafting space!  For example, my dryer was becoming the catch all area for outgrown clothes, so I finally bagged them up so they would be ready for donating to our local charity thrift store.  During this cleaning, I found a few homeless buttons and figured that I would never find the matching clothes, or they were probably long gone.  So I gave them a new home in my buttons container where I found the bag of buttons I bought a long time ago at an antiques and collectables store.  This led to a complete side track from cleaning!

My first card actually features one of these buttons.  They are metal and a little shabby looking and I absolutely loved them.  I used a faux mosaic tile technique for the focal point and added the button as an accent.  Along with my old button, I also pulled out some retired Tea Party DSP for this card.


As I was working on the first card, I moved a ziplock bag of thin strips of paper that were scraps from Easter cards.  I decided I really needed to either use them or pitch them and then I remembered the cute Easter bear digi I colored a looooong time ago.  This image is so old that when I went back to the person's site to link up to it, her site was gone...  So Caroline, I tried to give you credit but I'm not sure where you are now!


I glued all of the skinny strips of paper onto a rectangle of copy paper and then trimmed the edges to make them even.  Then I glued that to the base and glued the teddy to the front.  I realize that little bag of scraps didn't make a big dent in my stash, but I am glad that I finally found a use for all of the colorful scraps!

Well, DD#1 and I have a date to watch the Warehouse 13 marathon, so until next time, happy crafting!!

Wednesday, July 3, 2013

Wanna play Doctor??

OK... Get your mind out of the gutter!  This is a PG blog! :)

I was going through my supply of cards and while I had plenty of 'get well' cards, I also like to have some that are a little humorous to send some laughter with the wishes.  Night Nurse Nina definitely fits in the fun category.  I found her at Dr. Digi's, yet another purchase I made thanks to the enabling of my dear friend, Lisa M...  If you enjoy funny and slightly warped images, you will love this place!

I used copics to color the lovely Nina, and created the background with pastels.  Notable Alphabet worked perfectly for adding the sentiment on the first one.


and I changed things up just a little on the second one with Teeny Tiny Wishes.


I'm hoping that when these are delivered, they will bring a smile to someone's face.  I also hope that they won't be facing a needle like the one Nurse Nina is clutching... Makes me shiver just thinking about it!

I hope you have a wonderful day and remember, paper crafting each day keeps Night Nurse Nina away! And for all of my American friends and visitors, Happy (early) Independence Day!!!

Card Recipes: Paper-basic gray, basic black, tempting turquoise, real red, whisper white, Ink-copics, black stazon, Stamp Sets- digi images from Dr Digi, Notable Alphabet, Teeny Tiny Wishes, Punches-modern label, word window, 3/4" circle, Accessories- whisper white grosgrain ribbon(ret),  pastels