Showing posts with label Wacky Wishes. Show all posts

Thursday, November 26, 2020

You just never know what you'll find!

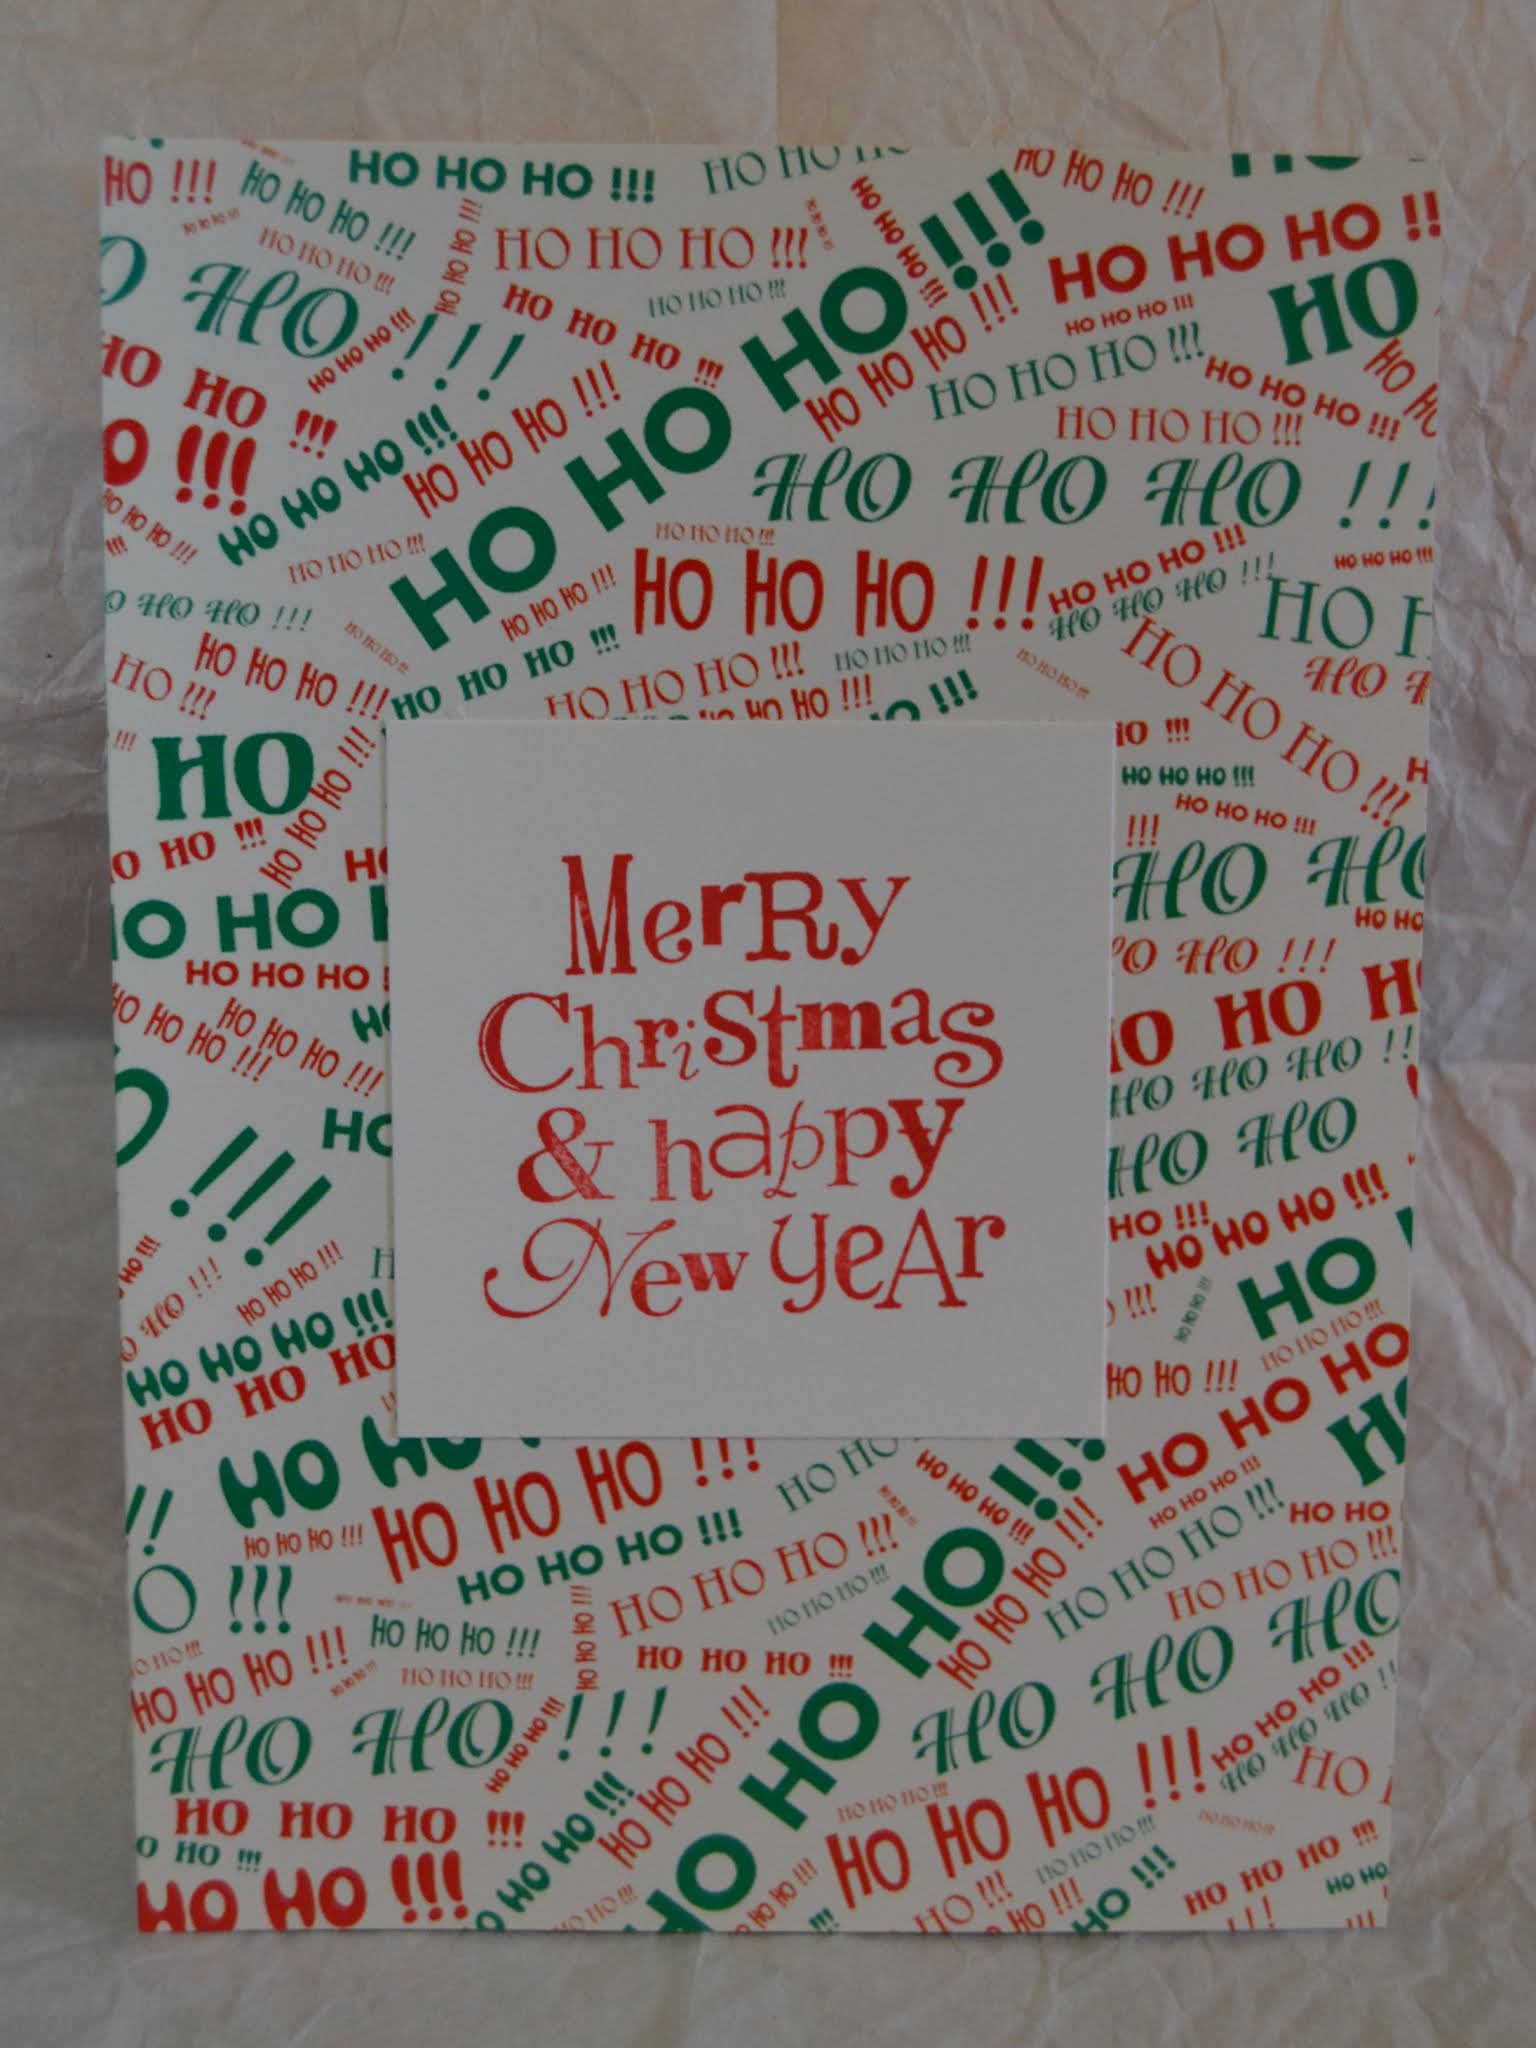
Hello!  My recent post about getting back into my creative space became a reality yesterday.  After spending a lot of the day cleaning (yikes!!), I finally cleared my table enough to start making some Christmas cards.  I also rediscovered a package of card bases that had the cutest holiday patterns on them.  I really didn't want to cover the base, and honestly was looking for a quick way to make some cards, so I dug out a Hero Arts Merry Christmas stamp and Wacky Wishes by SU, pulled some inks to match and got busy.  Super simple cards that still look cute.


Added a little linen thread bow to dress this up!


A little layering on these to make
the sentiment stand out!


I have to confess that I don't actually remember buying these bases... Yeah... Have I mentioned recently that I have a craft supply hoarding problem?!  I'm wondering if these weren't a prize from a crop or a gift from someone because this isn't something I would ordinarily buy.  I guess this is just another reminder that I don't really need to shop for new items; I just need to go through my stash and discover treasures that are already here!!  You really never know what you'll find if you dig deep enough!

I am so happy to be  posting again and look forward to sharing more creation and inspiration soon!


Monday, November 5, 2018

Mondays keep getting merrier!

Happy Monday and as you may have guessed from the title, I have another Christmas card post!!  My box is slowly filling with cards and I'm starting to think that I just might be able to mail these babies out at the beginning of December instead of the beginning of January!  

Today's cards are very quick and easy and it's a fun fold I haven't used in quite a while.  I'll share the measurements at the end of my post.


I have been making an effort to use up my hoarded Christmas papers and I can actually see the packs getting smaller finally!  The papers I used for today's cards are from Holiday Treasures, a very retired pack that I still love! The papers have a vintage feel that seems perfect for the holidays!  I also used the sentiment set Wacky Wishes, which hasn't seen ink in quite a while.  I think I heard it crying "pick me!" as I looked through my stamps, so I did! 

This fold is quite easy.  You start with a 12x12 sheet of cardstock and get two bases from it.  Cut the papers into 5 1/2 x 12 pieces.  There will be a strip of 1" paper left that you can either toss or save for another purpose.  Score the paper at 2",4", 8", and 10".  Then simply fold your card on the creases.  The 4 and 8 are folded in toward the center and the 2 and 10 are folded out.  This gives you two nice flaps to decorate. I cut my pattern paper into 1 3/4 x 5 1/4 pieces and glued them to the flaps.  Then I stamped the sentiment, mounted it onto cardstock and glued the left half to the left flap of the card base.  Make sure you don't glue the entire sentiment piece down or you won't be able to open the card.  I hope the instructions are easy enough to follow. If you have any questions, just ask!

Well, that's it for me today.  I hope you have a wonderful day and thanks so much for stopping by!

Saturday, September 29, 2018

Simple Sunburst Christmas

Well, hello!  I am back with more Christmas cards and a new type of design for me.  I know sunburst cards have been around for a while, but I had yet to attempt to create one until today.  After looking at all kinds of options of pattern paper and color combinations (and getting a mild headache and a bit overwhelmed by options), I decided to stick to a really simple design for my first attempt.  Using the sunburst thinlit seemed like a perfect way to achieve this look, but I'm thinking that if you're wanting a mix of patterns, it may not be the best choice.  I managed to get two for one by using the cut offs of the die and gluing them on another card base! Gotta love a time and paper saver!!

I've also decided that a smaller, less busy pattern would be best for this technique if you want a variety of papers to be used.  Maybe next time...


I do like the bold colors shooting out of the circular sentiment, and the less traditional patterned paper.  

I wish I could say that I had almost filled up my card box with Christmas cards, but we're not even close to that point and I'm sure I'm not the only person who manages to reach December without finishing all of their Christmas cards!  Come on fellow procrastinators...back me up!

Thanks so much for visiting and I hope you find time to try something new too!! Have a wonderful day!

Card Recipe: Paper-mossy meadow, cherry cobbler, whisper white, Season of Cheer (ret), Ink-mossy meadow, Stamp Set-Wacky Wishes (ret), Accessories-Sunburst Thinlits die, Circle Framelits


Monday, February 5, 2018

Another Merry Monday!

 Hello! Well, I've managed to get a few more Christmas cards created over the weekend and it is feeling pretty good to get the stash started this early! 

Today's addition to the pile was inspired by some super cute paper I bought a week ago.  DD#1 loves everything vintage and has recently fallen in love with older vehicles, especially the round fender trucks!  We didn't find paper with those (which probably would have been an easier delivery of the tree...), but Hobby Lobby did have these adorable cars hauling home their freshly cut trees. I'm wondering how sappy the windshield was by the time they arrived at their destinations! LOL! Anyway...I kept these pretty simple since the paper was too cute to cover up completely.  I also managed to use more ribbon that has been in my collection for a while.


I also had a bit of assistance on these.  Nessie decided she HAD to be a part of the action and pass her judgmental gaze over my work.  I'm not sure whether she approved or not, but she did seem content to watch the process.  If you notice, she is sitting on the notepads I keep on the table for inspiration and jotting down reminders.  She will not sit on the bare tabletop, but delights in perching on the printer, notepads, DSP...you name it!  Such a silly cat!  Shadow however, is quite happy to curl up on his bed and take a nap while I work. Yes, he has his very own dog bed in my studio...spoiled, but definitely deserving of it!


I am so grateful that you stopped for a visit and hope you will come back again soon! Have a wonderful week!

Card Recipe: Paper-Always Artichoke, Very Vanilla, pattern paper from Paper Studio, Ink-memento tuxedo black, Stamp Set-Wacky Wishes (ret), Accessories-circle and starburst framelits, riding hood red striped grosgrain ribbon (ret)

Monday, June 26, 2017

Birthday greetings and hazardous working conditions

Hi! I'm so glad you're here!  I took a break from my grown up duties this past weekend to do some card making!  During my unpacking and organizing, I came across Wildflower Fields DSP and remembered how much I liked the colors in this paper pack.  The patterns are great too since there is a nice mix of feminine and masculine prints.  My box of birthday cards was almost empty and I will need to send several very soon so I decided to take a break from working to 'work' on some cards.
Because I don't have everything unpacked yet and lots of stuff on my table, I kept things simple and let the great prints take center stage.

a design for the ladies

and one for the guys

I managed to make six cards from each sheet of pattern paper, with some scraps left over for another project.  Now my stash is a little better and I can get back to work again (yippee...), but before I go I want to share a couple of photos of my new work space.  I thought having my own room with my own table would allow me more freedom to leave projects and supplies out, instead of having to pack everything away when I was using the kitchen table.  What I didn't include in my plan was the perfect placement of my table under a wonderful window that allows a perfect resting spot for our cat...
She is so glad that we remodeled this house for her and especially likes the nice resting table in her studio!  Never a dull moment when she decides to join me...

chasing the cap to my glue bottle...

earning her keep as a paperweight...

As much as she drives me crazy, she really is a sweet kitty and something of a miracle since she was basically dying when my daughter rescued her-not that you could tell now!

Thanks so much for stopping by! I hope your day is filled with good things and your working conditions are a little less eventful than mine!

Card Recipe: Paper-Wildflower Fields dsp (ret), old olive, calypso coral, blackberry bliss, hello honey, whisper white, Ink-lost lagoon, Stamp Set-wacky wishes


Friday, January 2, 2015

A New Year and a New Outlook

Hello and Happy New Year!  I am so glad you stopped by!  Today, I have two cards to share and I'm pretty sure they will be the last of my 'Christmasy' cards for a little while!  I am also sharing my  new year outlook as well (most of you know my feelings on resolutions-great for a week or two!).

My two cards are one design, but different papers, colors, and ribbons.  I found the design on Pinterest and you can see the original by Amy Frillici, here.  This is such a wonderful design for using up scraps, and is a pretty quick and easy card too!  I made several of these to use as thank you cards for the wonderful gifts I received from co-workers and loved ones.


I had to smile as I created the second version.  The paper is the very retired Ski Slope and there was not an entire sheet of any of the patterns-a small pile of scraps yet I managed to make two cards and still have a tiny bit left.  It reminded me of my blogging friend, Lynn, who once commented about the secret reproducing of scraps.  Perhaps I need to separate my scraps like we do the sheep... hehe!

With the beginning of a new year, everyone tends to reflect on the past year and make improvement plans for the future.  I can honestly say that my reflection process started around October-about the time that the days were rushing past so fast that I was left completely unorganized.  I am by nature a procrastinator,but also do a pretty good job of keeping deadlines in sight.  So this swirling chaos of three months without stopping for a breath really caught me off guard.  I began to take inventory of what had changed, what was working, and what really needed to go.  Unfortunately, blogging was one of the first things that moved to the bottom of  the list.  I came to the conclusion that I had been saying 'yes' to too many things (worthwhile and important things, but way too many), and also allowing too many 'issues' to take over my mind.  

I spent the better part of the days after Christmas focusing on family and giving myself a break. During this time, I tried to re-prioritize  things and also let go of a lot of unneeded baggage.  I am happy to say that my blog made the 'keep' list, however, I know there will be times when it has to sit for a little while-hopefully not too long!  Instead of making resolutions, I found something that I am going to do my best to follow every day...


I would like to wish you a new year full of peace, love, and kindness! Thanks so much for taking the time to visit my blog!

Friday, July 5, 2013

Flashback Friday-See what a little cleaning can do?

Hi! Welcome to another Flashback Friday! I hope all of my fellow Americans survived their Independence Day's activities without any injuries!  Our holiday was pretty low key.  My nephew came home for a visit and we all had a wonderful time together.

I have been using my time off this summer to try to do some much needed cleaning and organizing.    No big surprise that one of the first areas I tackled was my crafting space!  Since then, I have moved on to other areas of the house (not nearly as much fun, but easier to purge clothing that is the wrong size, than old beloved stamps!), but I keep coming across things that pull me back to my crafting space!  For example, my dryer was becoming the catch all area for outgrown clothes, so I finally bagged them up so they would be ready for donating to our local charity thrift store.  During this cleaning, I found a few homeless buttons and figured that I would never find the matching clothes, or they were probably long gone.  So I gave them a new home in my buttons container where I found the bag of buttons I bought a long time ago at an antiques and collectables store.  This led to a complete side track from cleaning!

My first card actually features one of these buttons.  They are metal and a little shabby looking and I absolutely loved them.  I used a faux mosaic tile technique for the focal point and added the button as an accent.  Along with my old button, I also pulled out some retired Tea Party DSP for this card.


As I was working on the first card, I moved a ziplock bag of thin strips of paper that were scraps from Easter cards.  I decided I really needed to either use them or pitch them and then I remembered the cute Easter bear digi I colored a looooong time ago.  This image is so old that when I went back to the person's site to link up to it, her site was gone...  So Caroline, I tried to give you credit but I'm not sure where you are now!


I glued all of the skinny strips of paper onto a rectangle of copy paper and then trimmed the edges to make them even.  Then I glued that to the base and glued the teddy to the front.  I realize that little bag of scraps didn't make a big dent in my stash, but I am glad that I finally found a use for all of the colorful scraps!

Well, DD#1 and I have a date to watch the Warehouse 13 marathon, so until next time, happy crafting!!

Friday, June 7, 2013

Flashback Friday- Is there anything current on this card?

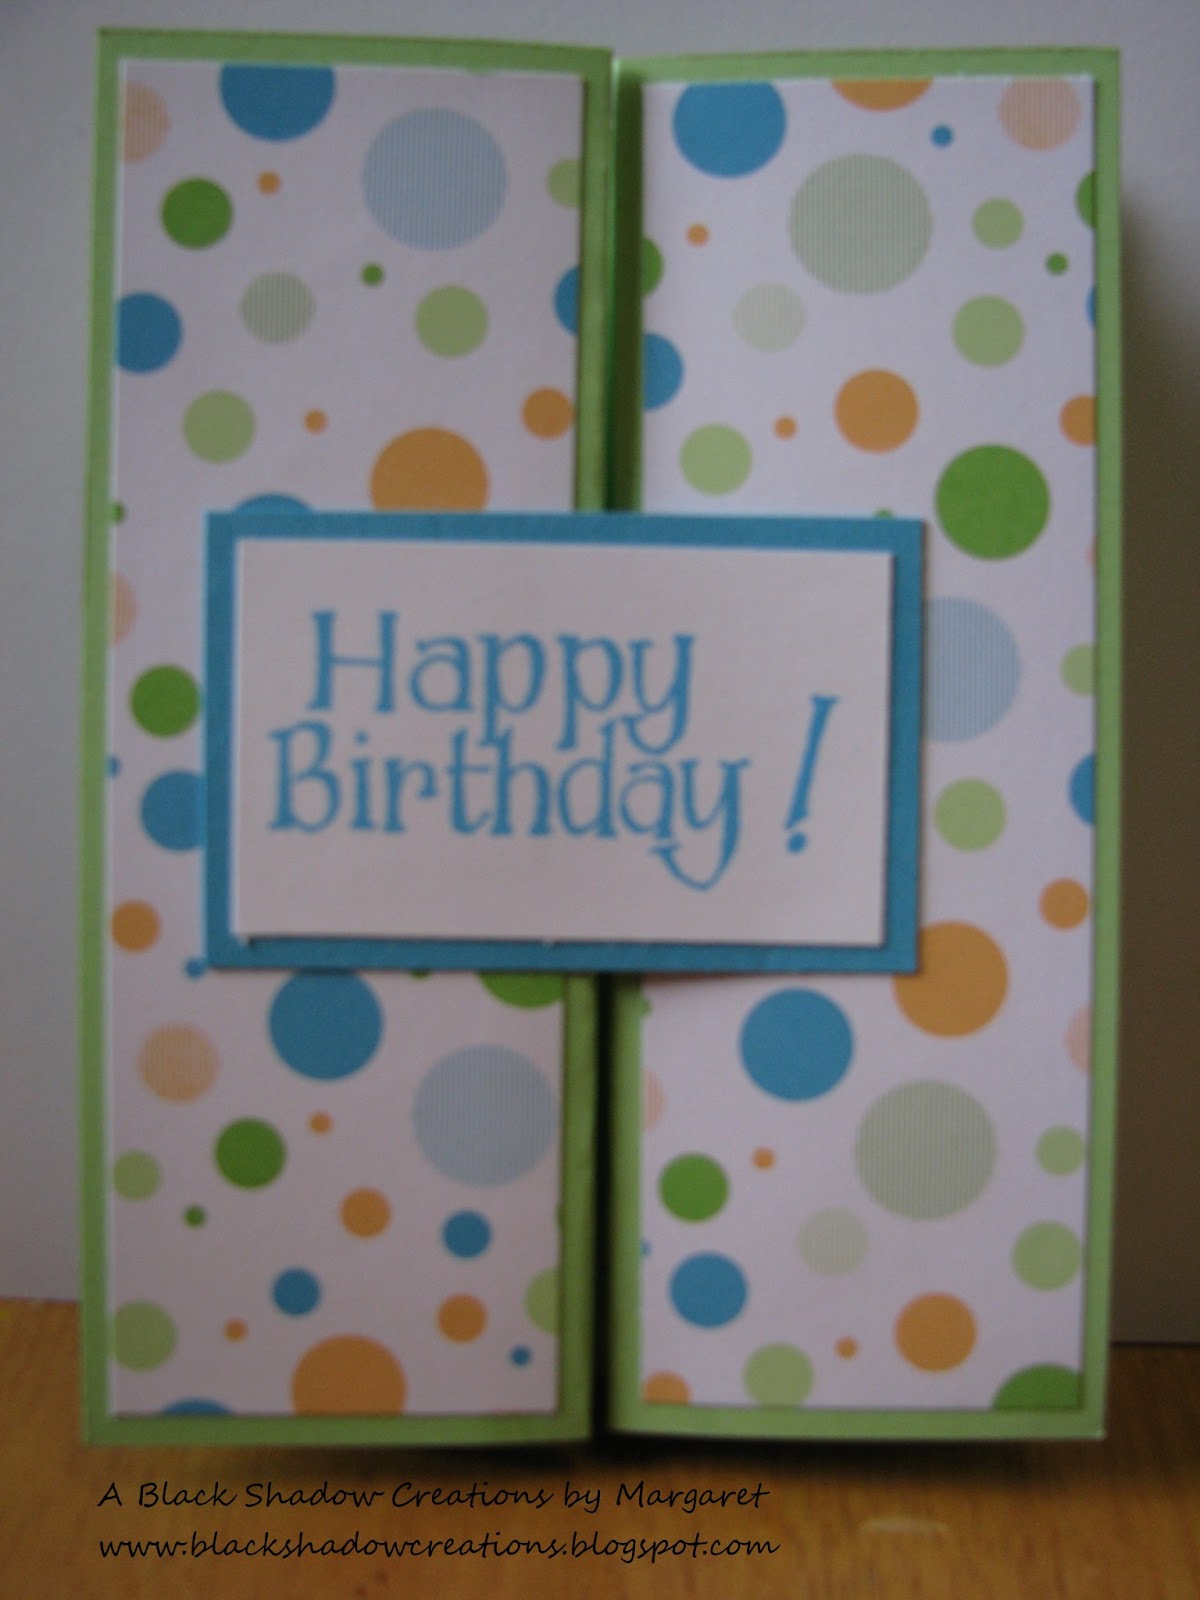
Hello! I'm so glad you stopped in today! Today is Friday, the day that I share what I've made with my old and retired supplies aka Flashback Friday.  You may recognize my DSP from last Saturday.  I really need to work on using up my older paper, and thought making a few cards with Rainbow Sherbet would be a good start.  I decided to make a bifold design since I haven't made one in a while.  If you need instructions for this, I have them at the bottom of the post.

This card will go to OWH...

and this goes to a family member.

As I was putting the cards together, I realized the only 'current' items used were the turquoise and white cardstock and the turquoise ink. Now how's that for using older supplies?!   The base is some very old 12x12 cardstock.  I'm not even sure when I bought this, but it matched the light green in the DSP. I think the SU color was gable green??  The 'thank you' stamp is from the retired set Wacky Wishes, and the 'happy birthday' is a non SU that I've had for ages. I love that the font isn't super plain, but also not overly girly! Perfect for 'anyone' cards.

To make a bifold card you need a 12x12 piece of cardstock.  The base size is 5 1/2 x 12.  You will make score marks at 2,4,8, and 10 inches.  I made my DSP panels 1/4" smaller than the cardstock panels (1 3/4 x 5 1/4") then attached half of the matted sentiment piece onto the left panel.  The sentiment piece varies in size depending on your image.

Well, I hope you enjoyed seeing some of my older goodies and maybe I inspired you to dig into your stash too!  Have a wonderful weekend and happy crafting!


Sunday, March 24, 2013

Anything But a Card Challenge 15-Spring/Easter

It's time for week 2 of Challenge 15 at Anything But a Card Challenges and it's my turn to share my project for the challenge Spring/Easter/Alice in Wonderland.  As much as I really wanted to do an Alice project, I have absolutely no Alice goodies in my stash, sniff! sniff!  So my project is following the Easter portion of the theme.

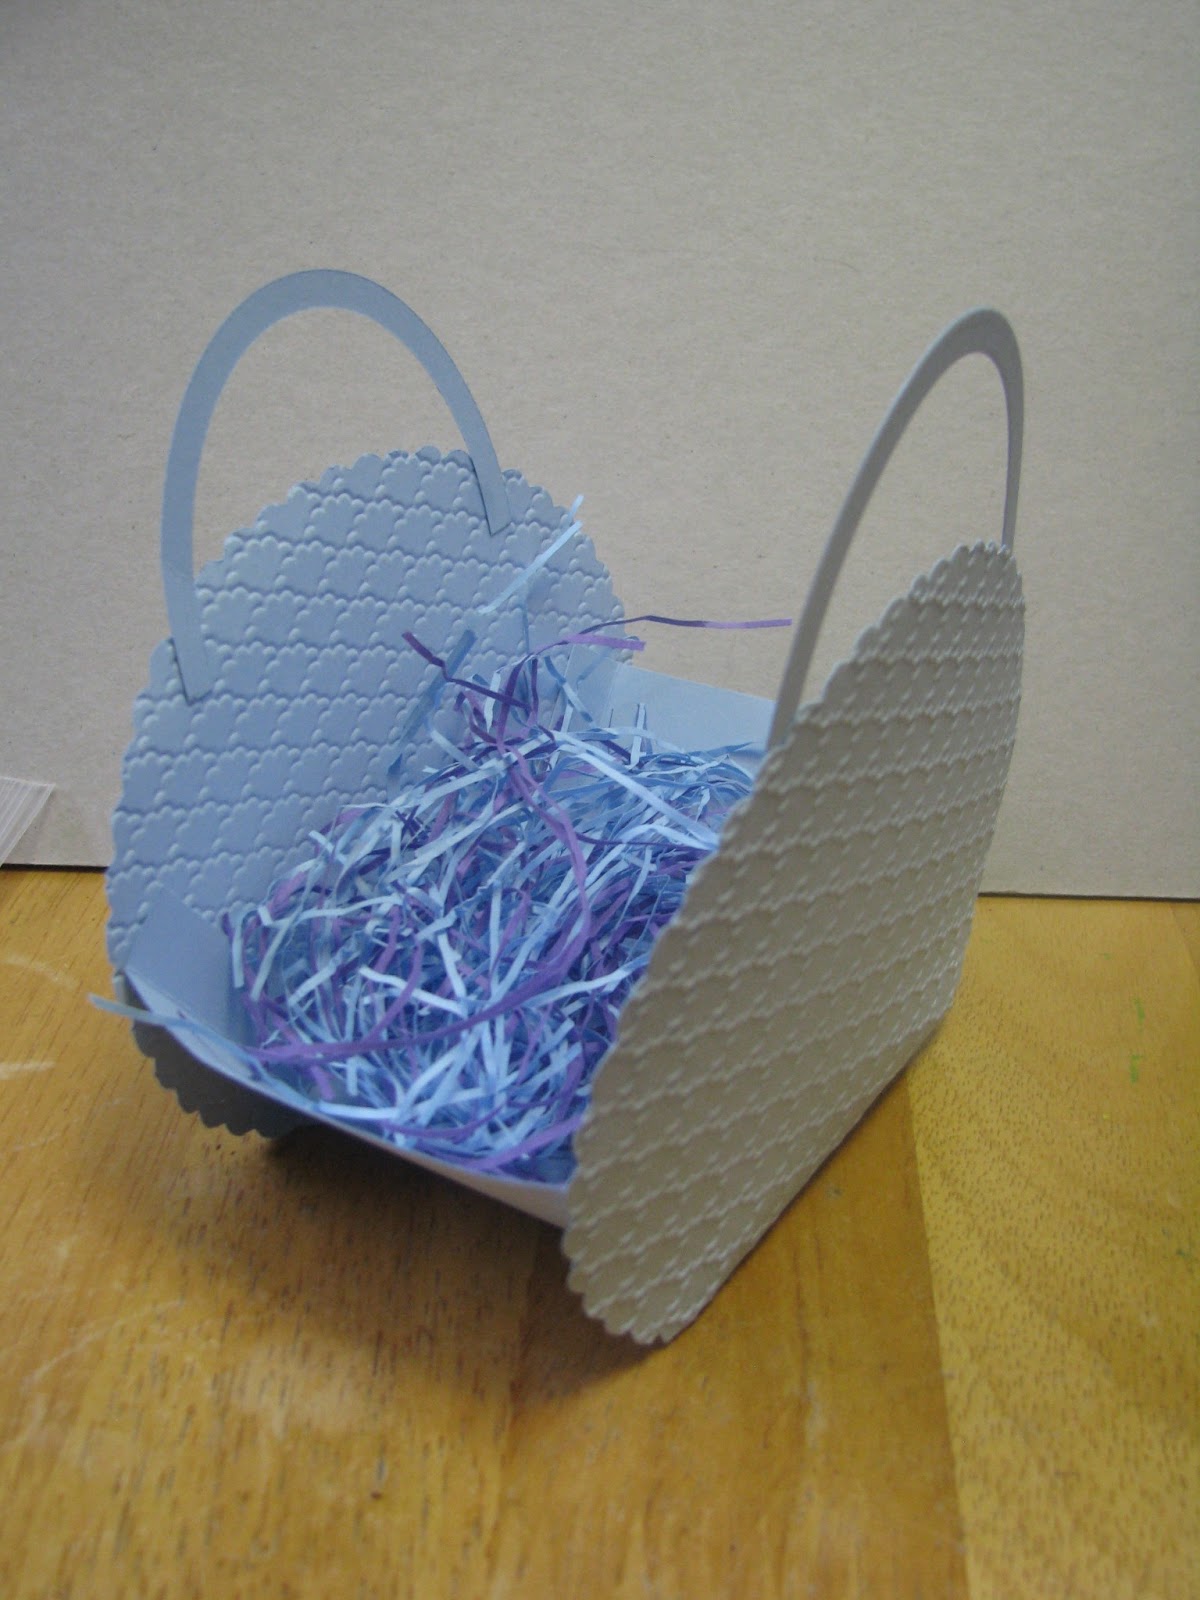
I would love to take credit for this sweet little basket design, but my crafty sistah, Sheila, shared this as a make and take at our most recent Stampin' UP meeting.  I couldn't get over how easy this was to make and only takes one sheet of 8 1/2 x 11 cardstock.  I also added the bow and little tag just to dress it up a little bit!  Wouldn't this be so cute full of candies?! Especially chocolate!!


I will try to get the diagram for the cardstock piece on my blog later this week.  I am officially on spring break and hope to have lots of crafty and bloggy time to get caught up on some much neglected things!  I hope you enjoyed my little Easter basket and that it inspired you to link up with us and share your own craftiness!  Have a fantastic week and happy crafting!

Sunday, March 17, 2013

Anything But a Card Challenge 15

Hello! So glad you stopped in today! It has been a WET and nasty day in southern Indiana. The perfect day for curling up with a good book or crafting, or if you are as fortunate as I was, taking a nap!

There is a new challenge posted at Anything But a Card Challenges.  This time, we are encouraging you to think spring! Of course, if you follow our challenge blog, you know that things are never as simple as this...  We like to get as creative as possible and Carla, our fearless leader, has taken the Spring theme and made it even more open ended!

"For Challenge 15 we are asking for something Spring-y or spring colors, or Alice in Wonderland!  I know it may seem like a strange combination, but that's how it works in my mind! :)  I think it's probably the rabbit/Easter thing."

So there you have it! Get your thinking caps on and see where this challenge leads you.  We would love to see your creation, and if you are so inclined, the team would love it if you checked out their creativity for the week.

I will be posting my project on Week 2, so be sure to stop back in to see the inspiration for the second week as well!

And just so you have something to look at on my blog this week, I created a card for my most recent club meeting that fits the theme of the challenge.  Yes, I know this is a card and the challenge very specifically is Anything BUT a Card, but since this isn't a DT post, I'm bending my rules a little!!  Feeling a bit rebellious at the moment... Hee! Hee!


This card was inspired by a card I saw on Pinterest.  You can see that card here.  She has a great tutorial on how to create her card.  Since I was using mine for a club project, I simplified it using punches instead of the oval framelits.  I also made mine a standard sized card so the ladies could use the envelopes they already have on hand.

I hope you have a most wonderful week and find lots of time to be crafty!!

Card Recipe- Cardstock-Baja breeze, whisper white, pink pirouette, Stamp Set-Wacky Wishes, Ink-Baja Breeze, pretty in pink, early espresso marker, Accessories-extra large and large oval punches, 2 1/2" circle punch, small heart punch, decorative label punch, wisteria wonder bakers twine, perfect polka dots folder, big shot

Friday, October 26, 2012

Color Me Beautiful #9-Fall for fabric

Fall is in full swing in Indiana!  The leaves seemed to explode in color about two weeks ago and now, just a short time later, many of the trees are bare.  While I am sad that the gorgeous color show is coming to an end, I am thrilled that our unbearable hot and humid temperatures are a thing of the past.  In case you haven't picked up on it yet, fall is my absolute favorite season! Time to pull out the sweatshirts and sweaters, build campfires for family cook outs, go on hikes in the woods without being eaten alive by bugs, and snuggle in on the couch with a cup of coffee and a good book.  And don't get me started on the joys of Thanksgiving!!

It's no wonder that this week's challenge at Color Me Beautiful made me so happy!  Just look at those gorgeous leaves  inspiring us to use the wonderful Stampin' UP colors!!


When I saw the In Colors for the first time, Summer Starfruit was probably my least favorite...for about a week.  Then I started combining it with other colors and realized that it was incredibly versatile, picking up shades of orange, yellow, and even brown, depending on what was next to it.  As a matter of fact, when I saw the challenge colors, I looked for my source of Summer Starfruit first and then built my card around the beautiful strip of fabric I rolled into a flower (have I mentioned how addictive these things are??).


While it's not really a 'fall' card, I think it still has the feel, if that makes any sense!!  Plus, it uses all of the colors.  As much as I would love to take credit for the layout, the original design for this card can be found here.  Sandy also has a great tutorial on how to make these flowers at the same spot.  Be sure to visit her blog, and check out the gorgeous creations made by the design team at CMB!  Who knows?  Maybe you will be inspired to share your own creation with us!!

To help put you in the fall mood that currently surrounds me, I'm sharing a few pictures I took last weekend while the girls and I went for a walk.  The leaves were already beginning to fall, but there was still plenty of color.


I hope this has put you in the mood for fall and maybe even to play along with our color challenge! Have a wonderful weekend and happy crafting!

Card Recipe: Cardstock-chocolate chip, crumb cake, very vanilla, Orchard Harvest DSP, Subtles Stack DSP, Stamp Set-Wacky Wishes, Ink-chocolate chip, Accessories- Comfort Cafe fabric, Jumbo Sticky Rounds, Framed Tulip embossing folder, Little Leaves Sizzlit, Big Shot