Showing posts with label Just Believe. Show all posts

Saturday, May 25, 2013

Operation Write Home Blog Hop-Thank You!

Hello! I am so glad you stopped in! A very special welcome is extended to everyone visiting from OWH! This weekend, I decided to join in a wonderful blog hop hosted by Operation Write Home.  You can click on the photo to go to the beginning of the hop.


MemDay2013BlogBanner


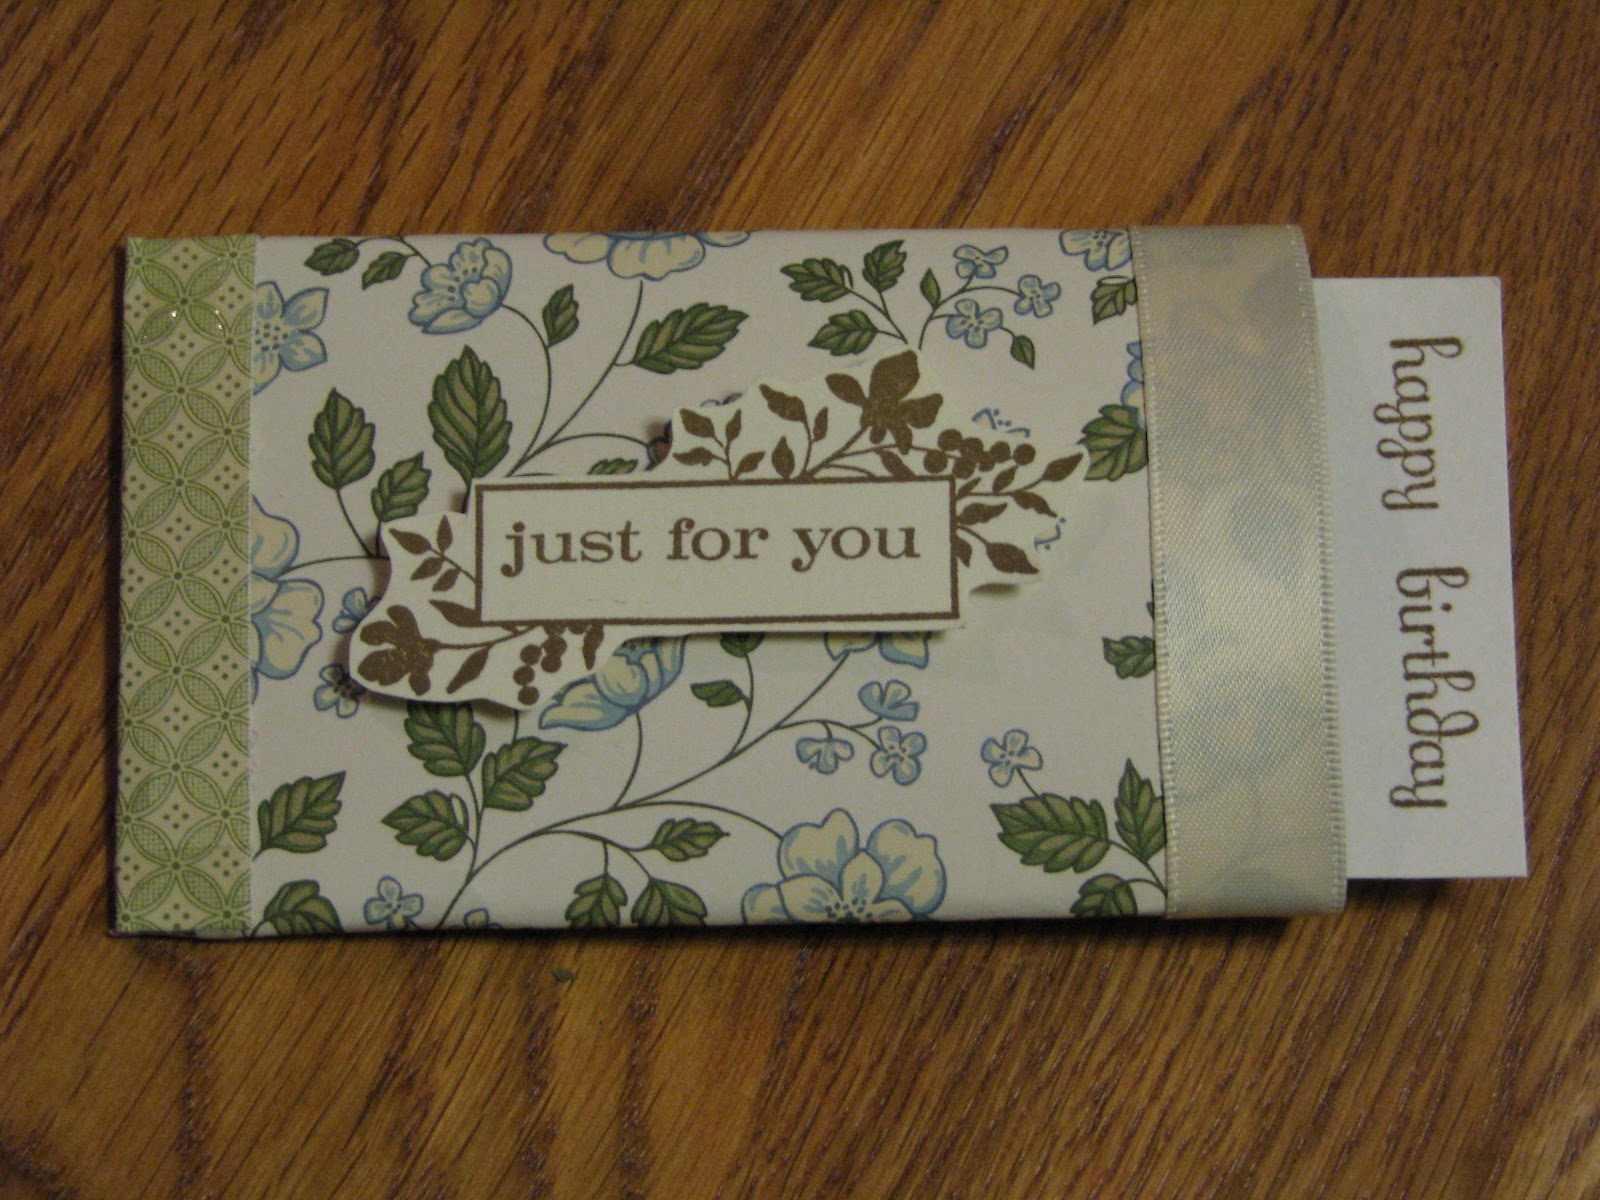
To be a part of the blog hop, I agreed to create a thank you card based off of a OWH sketch.  I chose sketch B-10 from the bonus sketches.  You can find the sketches here.  And here is my take on the sketch...


While it is too late for you to sign up to host a spot on the blog hop, you are welcome to check out the OWH site and learn more about this fabulous organization.  Our preschool class was blessed enough to receive a an OWH card last year from a class pen pal. I am so excited about being a part of the creating side this time!

Thanks so much for stopping by and enjoy the hop! Happy Memorial Day and remember to give thanks for the wonderful people, past and present, who protect our country!  

Card Recipe: All items Stampin' Up, Cardstock-sahara sand, island indigo, Sycamore Street DSP, Stamp Set-Just Believe, Ink-summer starfruit, island indigo

Sunday, May 5, 2013

Anything But a Card Challenge 18- An ATC is HOW small??

It is time for week 2 of challenge 18 at Anything But a Card Challenges.  This challenge is to create an ATC (artist's trading card) which is a pretty open challenge as long as your art measures 2 1/2" x 3 1/2".  Susan has a lot of wonderful information about ATCs on the challenge site and there are some fabulous pieces being shared by the design team and fellow crafters linking up.  

I have a confession to make.  I have NEVER made an ATC before.  Yes... I know shocking! And honestly, I wasn't too concerned about this challenge until I tried to squeeze my big ideas onto my itty, bitty piece of paper (can you imagine me doing inchies??).  But once I started adjusting my thinking to pulling out my smaller stamps and embellishments, things fell into place and I ended up with two different ATCs.


This one looked a lot different in my mind, but for my very first
attempt, I kinda like it!  The picture frame was made with Sculpey 
and a silicone mold (this is not SU, but just wait until you see the 
new catalog, hint! hint!).  I attempted another watercolor, inky
type background, and it didn't really turn out how I wanted, so I 
stopped before it became really muddy and finished it with stamping
and embellishing.  The frame was painted with a gold acrylic and 
smeared with gold glitter glue.


I think of the two, this is my favorite.  Maybe it's just more in my
comfort zone, but I like the softer colors.  I stamped my image and 
sentiment and then added pastels to create the background. I really
like the effect of using the watercolor paper for this!

I really hope that you will share an ATC with us this week, even if you have never made one before! I am beginning to find that I have the most fun with this type of challenge, although I need to stop stressing over the finished product and just let the process happen and learn from my mistakes!

As I am posting this, it is a very rainy Saturday and our plans of attending a local Chalk Walk event have been postponed to next weekend.  So I am going to get out of here and try to do some crafty stuff at home! Have a wonderful week and happy crafting!

Sunday, September 9, 2012

ABACC #1 My first project!!

Hello!  It is week two of the bi-weekly Anything Goes challenge at ABACC (anything but a card challenge) and I am one of the featured designers this week!  If you haven't already checked out the other ladies work, you really need to pop in!  I am in awe of the talent coming from this group and feel just a tad bit intimidated!  But only a little!!

I had a chipboard journal in my stash for over a year, from last year's Stampin' UP regional event as a matter of fact!  I kept meaning to get it out and play with it, but never felt inspired until now.  I inked the chipboard with very vanilla craft ink and then proceeded to add lots of different shades of brown from the neutrals collection.  It also got a good dose of early espresso and crumb cake from the color spritzer.  Nice and grungy!!


I used the more mustard and soft suede cardstock, the linen thread, and the mini clothespin which came in the chipboard project kit.  I did not however choose to decorate it like the project page.  I pulled out the daisy from Reason to smile, inked it up with crumb cake and then colored the center with pastels.


I'm planning on using this for a quotes, verses, thoughts, etc. journal... something to make me think and be a better person, which is why I chose the sentiment from Just Believe.

Well, I hope you enjoyed my first creation for ABACC and that you will make time to play along if you haven't already, and if you have, well...play again!!

Project Recipe:  chipboard journal (retired), Cardstock-more mustard, soft suede, naturals ivory, Ink-very vanilla, early espresso, crumb cake, soft suede, Stamp Sets-Reason to Smile (ret), Just Believe, Accessories-linen thread, pear pizzazz seam binding (ret.), color spritzer, pastels, mini clothespin basic pearl, 1 3/4 and 2 1/2" circle punch, 2 3/8" scallop circle punch, non SU flower punch

Friday, September 7, 2012

Challenge #2 at Color Me Beautiful!

Hello all! I am so far behind today, I think I passed myself twice trying to catch up!! I had every intention of having this post scheduled for first thing this morning, but ended up going out to eat with family last night and then completely forgot.

But anyway, my creation today is for the DT at Color Me Beautiful.  I actually did not have to make a card for this week since I'm on the second team, but the colors were just too pretty not to use, so here I am!  Take a look at the lovely inspiration photo...


and the list of colors...

and finally... My card!


I loved the gorgeous flowers in the photo and thought the wildflowers image from Just Believe would work to recreate them. Using markers to color the image made it easy to pull 3 of the 5 colors into my card. While I still think it might need a little something, I have yet to decide what it is and will just have to see what I come up with later.  There's a good chance it will grow on me too!

So if you think you might like to join me in the challenge, head over to the blog and check out the other design team members' lovely creations and get the details.  Remember, you do NOT have to use all 5 colors to qualify!  I was so happy to see a blogging buddy link up during last week's challenge and hope many more will join this week!!

Have a wonderful weekend and happy crafting!

Card Recipe: Cardstock-Always Artichoke, More Mustard, Very Vanilla, Raspberry Ripple, Ink- Always Artichoke, Raspberry Ripple, Calypso Coral, Stamp Set- Just Believe, Accessories-square lattice folder, word window punch, modern label punch, Victoria crochet trim

Saturday, August 11, 2012

Tiffany's Color and Sketch Challenge

This has been one crazy week! Trying to get the girls back into the school routine while I'm putting in long hours preparing for school is not an easy thing to accomplish!!  I managed to make one more card for our Stampin' UP team meeting before the madness started!

Our team leader, Tiffany, gives us a sketch and some cardstock every month and challenges us to make a card using the colors and sketch together!  This month our colors were Calypso Coral, Baja Breeze, and Daffodil Delight.  I'm not sure that I have ever used Calypso Coral before this card!

I have to admit that the color combo really threw me.  I was having a hard time coming up with a plan that balanced the colors properly.  After going through my various DSPs, I came across Summer Smooches which contained two of the three colors.  It was a little easier from there.


I went completely away from my CAS roots and added lots of layers and a bunch of pearls!  I think it turned out pretty good!  I'll get to share this with my crafty sistahs next weekend.  We always have so much fun!

We had a pretty good rain storm Thursday night and the temperature today was actually a little cooler.  Just the thing I needed to motivate me to create the fall theme projects for my club meeting!  Good thing since we are meeting tomorrow...did I mention how crazy my week has been?!  I will be posting my new fall creations over the next few days and before long, I will have some Christmas gifts in the works.  Have a wonderful weekend and happy crafting!

Card Recipe: Cardstock-calypso coral, baja breeze, daffodil delight, whisper white, Summer Smooches DSP, Subtles Pack DSP, Ink-calypso coral, Stamp Set-Just Believe, Accessories-basic pearls, 1 3/8" circle punch, large scallop circle punch, baja breeze seam binding

Friday, February 3, 2012

I'm positive it's negative...I think...

Hello everyone!  As I have mentioned before, I'm somewhat addicted to pinterest (no, really...just one more pin...Oh wait! There's 5 more...) but I have found a drawback.  I pinned a wonderful Valentine card and made my version by looking at the picture, but when I went to link to the blog to give proper credit, I couldn't find the card on her website... I'm sure it's on there somewhere, but whoever pinned it, didn't pin the actual link only the blog. Grrrr.... So... the inspiration for this card came from Nature of Crafty Things blog, but I can't give you the direct link! Anyway, here is my card...


Wondering how I punched those pretty hearts in different places? I DIDN'T!! I used the new hearts framelits from SU!  It also did the cool embossed layers around the cut out hearts!  Of course, since my supply of scraps are limited (did anyone really buy that line?!) I knew I needed to do something with those heart cutouts.  So, my second design is a complete negative (or would that be positive, since it's the center?) but using the same supplies!  The DSP is also the same paper, but the opposite side.


I am getting closer to completing my Valentines and I'm hoping I can keep the mojo going a little longer to finish!  I keep finding all of these other techniques and stamps I want to use that aren't Valentines!!  I'm hoping this weekend will allow for some uninterrupted craft time so I can finish them and then maybe even get some scrapbooking done.  Monday will be here before I know it and I don't have a page to post yet! AAAAHHHH!!!!

If you are looking for the candy give away, you will find it here!  Hope you have a wonderful weekend and thanks for stopping by!

Card Recipe:  Cardstock-real red, pretty in pink, Raspberry Tart DSP (ret), Ink-stazon black, real red, Stamp Set-Just Believe (sentiment), Accessories-heart framelits

Sunday, January 8, 2012

Be My Valentine

Ever look at a piece of patterned paper and think 'Wait a minute...There's a card in there...'?  That is pretty much what happened with this card.  I was looking for some red sparkly paper for a different project and came across this paper.  It's a retired paper from SU and I actually forgot I had some left.  As soon as I saw the pattern, I had a pretty good idea what my card would look like.  I remember seeing somewhere that someone made an envelope with hearts spilling out, but wouldn't you know, I didn't save or pin that one (a million others, yes...)  So if this was your original idea, please let me know.  The basic design and layout, other than the heart envelope, is from my little ol' head.
**UPDATE- While reorganizing my pinterest card pins, I came across the original card and wanted to give credit where it's due.   Darlene Design is the website where you can see the inspiration piece!


This was not CAS or QAS (quick and simple) and I made 4 of these!  I do not have an envelope die (gasp!), so I used a template that I had from ages ago.  Then I got busy punching, and punching, and punching, and embossing, and glittering, and you get the picture.  I'm slightly obsessive when it comes to putting patterns together, so the hardest part for me was arranging the hearts into a design that I thought looked just right.  I really like the way it turned out!

When I finished this card both of my DD came over and exclaimed "We want to make these for our Valentines!" Ummm.... I DON'T THINK SO!!!!  So now I'm trying to find a more basic way to recreate this so they can make duplicates for their friends.  Plus, I'm not so sure the boys in my youngest DD's class will appreciate this very girly card!

Card Recipe: Cardstock-pretty in pink, real red, very vanilla, Sending Love DSP (ret), Ink-pretty in pink, real red, chocolate chip (distressed edge of envelope), Stamp Sets-Fabulous Phrases, Just Believe, Punches-heart to heart, modern label, word window, Accessories-very vanilla seam binding, basic pearls, square lattice folder, snow burst folder, dazzling details

Tuesday, October 4, 2011

The 411 Challenge

I love checking out the sketch challenges from Stamping 411. Even if I don't get to play along, I try to save the sketches for later inspiration!  But this week, I actually had the time to play along! Here is this week's sketch...

I needed to make a sympathy card for a friend of mine and thought this would be a good starting point.  I turned the sketch on it's side and swapped the oval for a rectangle. I also tried my hand at coloring the white bakers twine with a marker.  I wasn't thrilled with the coverage at first, but once I had it on the card with the crinkled seam binding, it looked a lot better.  I made two versions, changing the ribbon just a little each time.  I also added some vanilla shimmer. I love the pearly sheen that it gives my card!


Card Recipe: Cardstock-whisper white, pear pizzazz, blushing bride DSP from In Color pack, Ink-blushing bride, pear pizzazz, basic gray, Stamp Sets-Just Believe, Word Play, Accessories-vanilla shimmer smooch spritz, pear pizzazz seam binding, white bakers twine (dyed), floral fusion sizzlit, silver brad


Tuesday, July 5, 2011

CAS Anniversary Card

I had a little extra time over the long weekend and today to check out some challenge sites. I found a great sketch at Clean and Simple Stamping and then saw that both SUO Challenges and Top Tip Tuesday had challenges for Anniversary cards.  I can always use a few more of these on hand so I decided to play along! I'm apologizing in advance for my crooked picture...


Card Recipe: cardstock-pretty in pink, very vanilla, and Lap of Luxury DSP (ret.), ink-concord crush, pretty in pink, and basic gray, stamp sets-Just Believe and Fabulous Phrases, accessories-very vanilla 5/8" satin ribbon, 1 3/8" circle punch

Friday, June 3, 2011

Just Believe...

Two challenge cards in one day? I'm on a roll!  This card is for the paper piecing challenge at Hand Stamped Sentiments.  To be quite honest, this is not my favorite thing.  This is why punches were created :-)  But I sucked it up and got busy.  The challenge mentioned patterned papers, but I didn't like the choices I had on hand.  So I hope it's OK to use stamped card stock instead... I have to say that it turned out better than I thought it would!  I used the stamp set Just Believe.  Card stock colors were certainly celery, bashful blue, and whisper white.  Inks used were certainly celery and bashful blue.  You can't tell too well from the pic, but I also used Vanilla Shimmer Smooch Spritz (adds a nice shimmer to the flowers). After cutting out the flowers, I used dimensionals to  pop them up and added just a little bling with the basic pearl jewels.  The certainly celery ribbon is some of my retired stash.

Saturday, May 7, 2011

A Triple Challenge!


I love making cards, but sometimes things get so busy that I don't make the time.  That's why I love challenge blogs (motivates me every time)!  This card was created based on three different challenges.  The first challenge was the color splash challenge from Hand Stamped Sentiments.  The colors were pretty in pink, bashful blue, and certainly celery.  Then I saw the challenge at SUO Challenges requiring the use of butterflies.  I needed to make my niece a birthday card and the two challenges sounded like just the right combo. But how to put it together?  That's where the ladies at Stamping 411 came in!  Here's the 'recipe' for my triple challenge card...
cardstock- certainly celery, pretty in pink, bashful blue, and whisper white
stamps-Butterfly Prints and Just Believe (sentiment) both from IB&C
ink- certainly celery, pretty in pink, bashful blue, and basic gray
extras- butterfly punch, scallop trim border punch, cert. celery grosgrain ribbon, pretty in pink corduroy brad (retired), basic pearls, big shot & backgrounds 1 texturz plates

Saturday, April 23, 2011

A Sneak Peek!


Right now you have a chance to get a sneak peek at some future DSP from the new catalog that will be out this summer!  I decided to play with it while making my card for the 411 challenge.  This is their 200th sketch challenge!! I used old olive, whisper white, and bashful blue card stock.  The DSP is from Paisley Petals.  Inks used were old olive, and crumb cake.  The butterfly and sentiment are from the stamp set Butterfly Prints and the floral stamp is from Just Believe (both are in the IB&C).  Other items used were the scallop trim border punch, basic pearls, and some retired bashful blue ribbon.  There is a punch for the butterfly, however, I chose not to use it so I could have the body & antenna attached to the popped up butterfly.  This made it easier to attach the pearls to the body too.  If you are interested in purchasing the DSP and a special peek stamp set, see my sneak peek post below!  TFL!

Wednesday, February 23, 2011

gift card holder

OK!  First creation downloaded without a hitch!  Since I'm a newbie SU demonstrator, I decided to play with some things for my upcoming open house.  I CASEd part of the idea from some pics on Splitcoast, but put my own little twist on it.  The original was a tag book, but I liked the idea of it housing a gift card better.  This started as a pitiful toilet paper tube (or paper towel) and was transformed by using DSP from Springtime Vintage, very van. satin ribbon & cardstock, and stamped w/ Soft Suede.  I used the stamp sets Just Believe and Fabulous Phrases.  I'm considering adding one of the flower adornments and a bit of pear pizzazz seam binding to bling it up a bit and also tie into the DSP pattern.  Hope you enjoy this and TFL!