Showing posts with label Snow Burst embossing folder. Show all posts

Monday, December 14, 2020

Simple cards and Simple Stories

So I may have an addiction to those tag and 3x4 image sheets of paper because I've made another set of cards using a new sheet of Simple Stories paper...and I may have bought a Christmas pack of DCWV paper that also has some in it...yeah...it's becoming a thing...

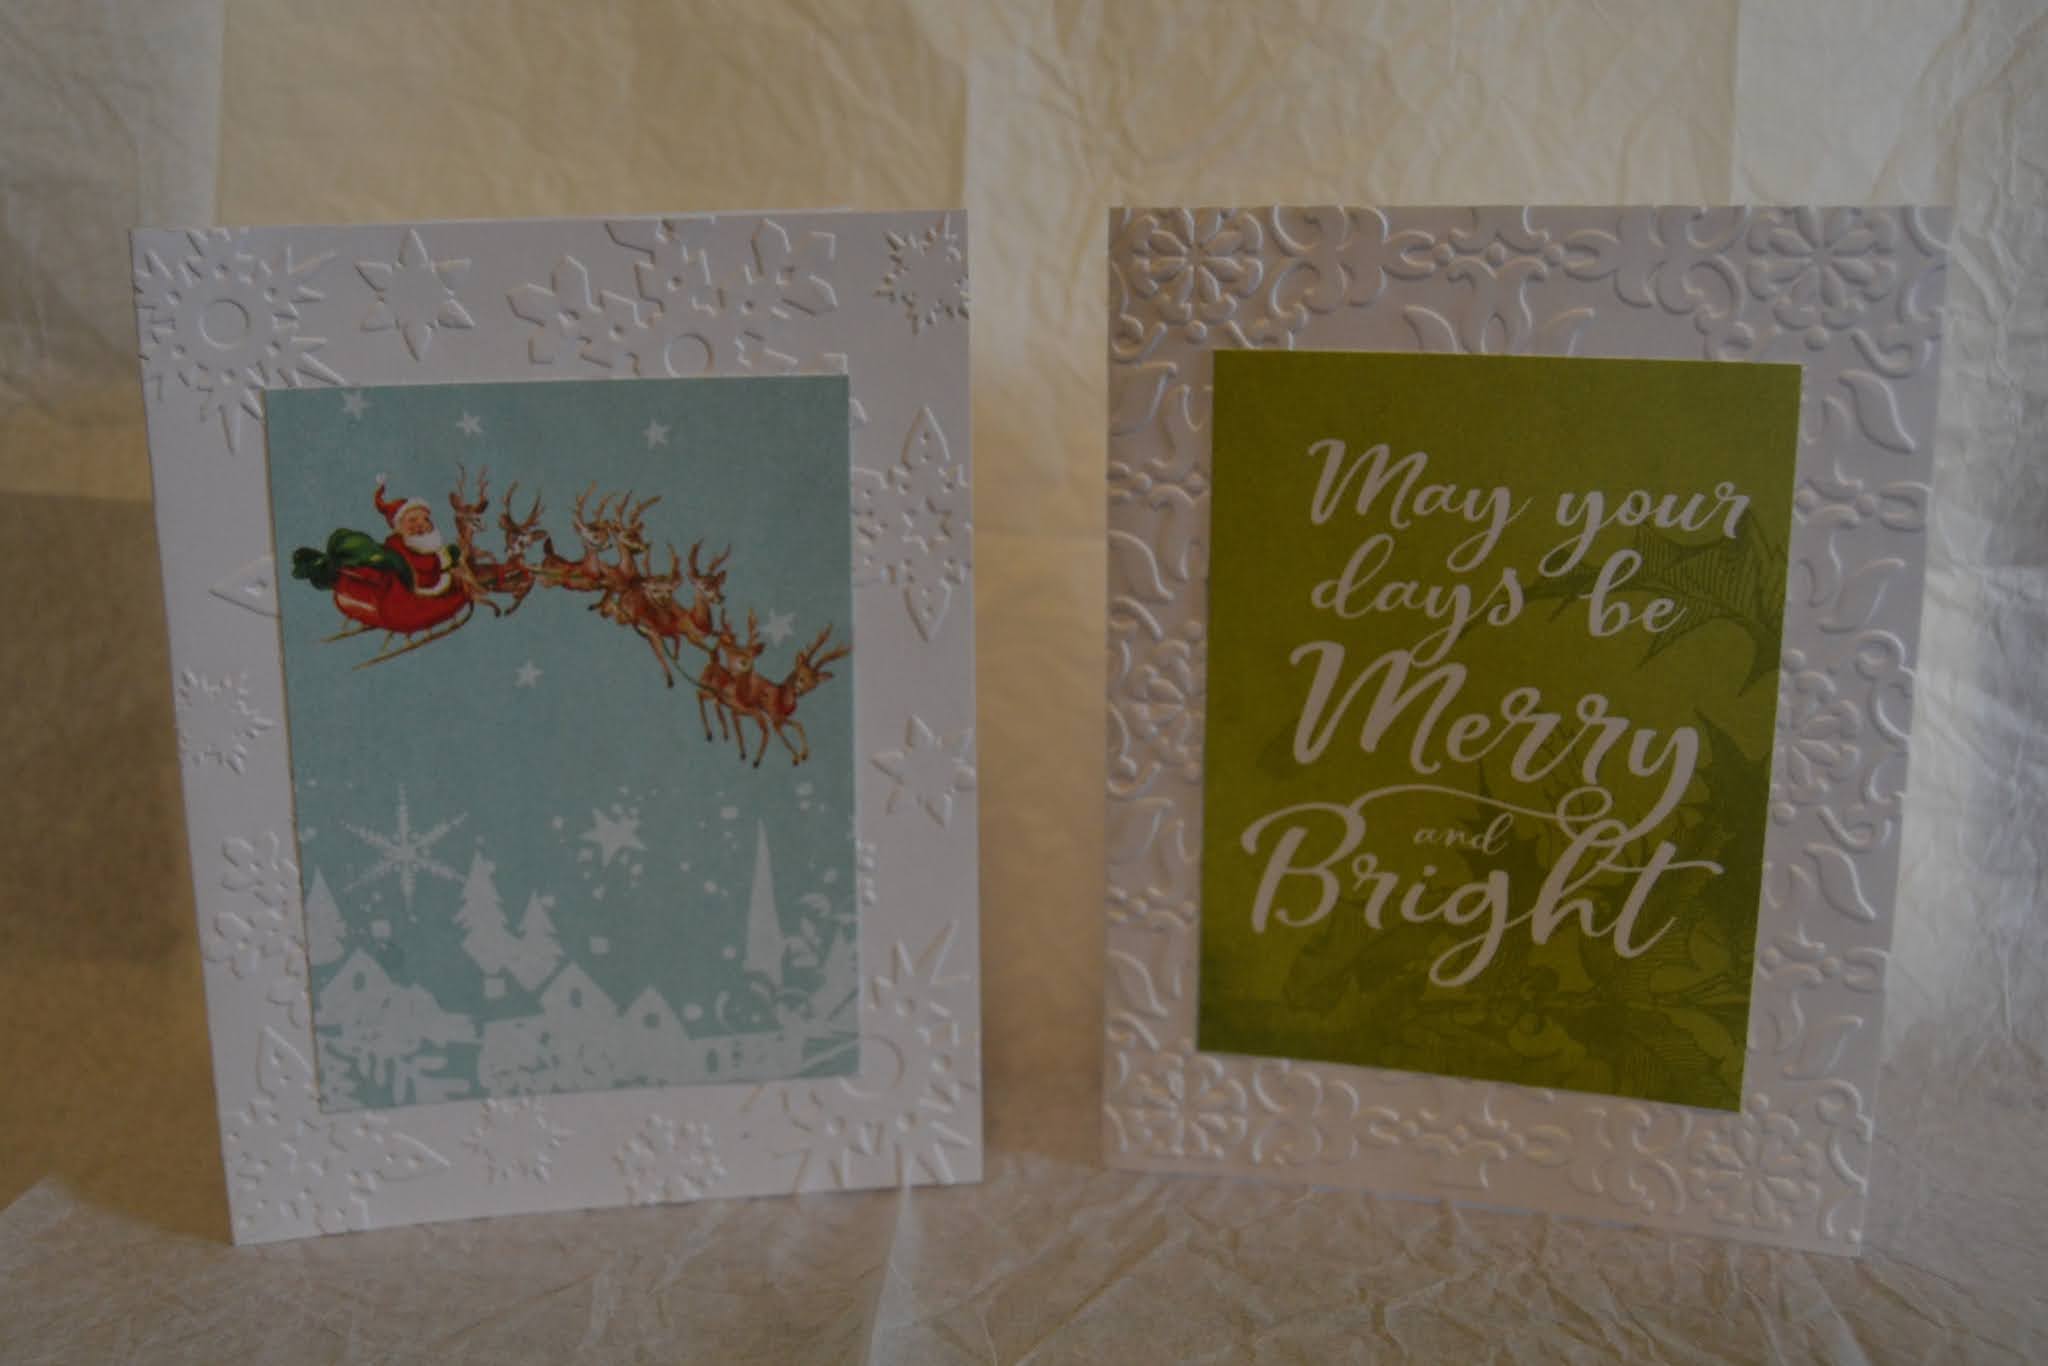
Today's cards also have vintage Christmas images, but this time the colors are a bit brighter.  Most of the images were simply placed on an embossed base and were quickly done!  I did add a little strip of green to one and a mat to another.  There were also a few blocks that I didn't make into cards because they seemed perfect for journaling blocks for scrapbooking.  So maybe they'll make an appearance during the Christmas break!

My DD#1 made a comment about how perfect my embossing went with the images. I readily agreed without mentioning that having a huge collection of folders makes that pretty easy.  Let her think that I'm just that creative!!


I think this is pretty close to the last of my cards unless I just decide that I really want to make more.  I actually had all of my cards finished before Thanksgiving this year!  That hasn't happened in a very long time!  Feels good to be able to spread a little love and cheer in what has been a less that perfect year.  


Monday, December 7, 2020

Tags: Not just for gifts anymore!

I'm making an effort to space out my card posts so they're not bombarding my blog all at once.  Today's cards were actually made about a week ago, but who wants to look at a post with a ton of cards all at once?!  :)  

Once again, I'm using paper that practically makes the cards themselves!  This time it was a sheet of tags that begged to be purchased!  I was thinking in the store how cute they would look with little twine bows, popped at an angle on a solid background-just like a present in the mailbox!!  These took a little fussy cutting and punching to make them just right, but still a super easy card!

I also pulled out the embossing folders again for a little fun and texture!


Can I just say how much I love these cute plaid designs with the twine?!

Going a little nontraditional with the embossing! I 
love how these patterns coordinate with the tags!


I'm feeling a bit like an innovator with these cards!  Tags: not just for gifts anymore!  Oh, how I've missed creating and posting on my blog...

Who knows? Maybe I'm inspiring others to think outside of the box (pun intended-where else would you put a tag?) and be a little creative with their supplies too!


Monday, November 30, 2020

Give a girl the right paper...

Another day of Christmas card making and once again finding super easy ways to get those cards finished in time to mail them out!  I'm well on my way now!

As I was thinking of a title for this post, I thought about how perfect certain papers are.  Sometimes I can see a paper and immediately know what to do with it.  They can make scrapbook pages as easy as matting a photo and adding it to a gorgeous background.  Some can be the inspiration for a perfect 3D or repurposing project.  And others just scream "Buy me and I'll make really cute cards really fast!"  I love it when paper talks to me!!

Over the summer, I was in our LSS and came across just this kind of paper.  There were fun, vintage images already in 3x4 rectangles just waiting to be cut apart.  I also found some coordinating red and green paper to finish them off perfectly.  Then I promptly brought them home and forgot about them.  My recent cleaning reminded me of them and I got busy.  Some of the images were so great, I didn't even mat them.  I just grabbed some embossing folders to add a little texture and tada! Instant cards!!

I felt just like Cinderella with the right pair of shoes...or maybe Dorothy with her ruby slippers... either way-it just proves that if you give a girl the right item, she can get things done!


Aren't those images just the best?!  I'm almost positive these were Simple Stories, but since I tossed the end strips I can't be 100% sure.  

Well, I'm back to work this week and going to do my best to carve out some creative time, so hopefully I'll have a few scrapbook pages in the future.  I do have more cards to share, but they'll have to wait for another day!


Monday, November 4, 2019

Merry Monday (and not a minute too soon!)

Hello!  While I am not nearly ready for Christmas, I am ready to get those cards going so I'm not rushing around at the last minute!  If all the rest of my cards are as easy and quick as today's I'll be done in no time!

I recently purchased a sheet of paper that had 12 3x4 blocks on it and they were absolutely perfect for making Christmas cards.  I know I made a pledge to use up my stash, but if it helps me get cards created quickly so I can make more pages, well...guess I just had to make the sacrifice! Ha!

I found that some of the blocks worked better with different shades of green, red, or blue, but once I had that figured out, it literally took me minutes to emboss the base and glue the layers together. Easy peasy! There were two blank frames that I stamped with sentiments, but other than the embossing, there really wasn't much to do.  Sometimes it's nice to have pretty papers do all the work for you!


So now I have 12 cards in my Christmas stash.  That's not nearly enough, but it's a start!  Thanks so much for stopping by today. I promise my next MM will have a little more effort put into it!  Have a wonderful week and I hope you find some time to be creative too!

Monday, February 12, 2018

Lots of layers for a Merry Monday

Hello! I'm back with two more Christmas cards and I'm so happy that I've been able to make time to create my Christmas cards early!  Today's cards were completely inspired by a trip to a local paper crafting store!  They were recently having a HUGE clearance sale to make room for all of the goodies they ordered from their trip to CHA and I decided to see what treasures I couldn't live without.  Yes, I know I still have lots of supplies in boxes that haven't been unpacked... Yes, I know I'm on a mission to use up my older stash items so there will be room for the aforementioned boxes... Yes, I know I really didn't NEED anything... Thankfully, I also know that most creative people (including my sister who totally enabled me on this trip) will understand exactly why I needed to go!

I showed a lot of restraint and didn't buy a ton of things, but there were a few bargains that were too good to pass up.  One of these was a decoupage pack kit with two really sweet Christmas images.  I've seen others use these, but hadn't tried them myself.  I really liked the 3D effect of stacking the layers and these will make great cards for family members with younger children.  Because the pieces were so layered and detailed, I kept my base to a bare minimum of embossing with a folder.  Other than the time it took to put the layers together, these came together in literally minutes.


The only thing I wasn't thrilled with was the font for the word 'Joy', but I was quite limited by the size of the tag and only had one alphabet set that would work...  

I bought another Christmas set (not on clearance, but still a great deal) and will be playing with that next week.  This set has quite a few more designs and coordinating papers, so I'm looking forward to seeing where it will take me!

Thanks so much for stopping by and I hope you have a wonderful week!

Card Recipe:  Paper-whisper white, card making kit (tossed the paper without thinking to get the name...), Stamp set-Designer Typeset(ret), Ink-memento tuxedo black, Accessories-Snowburst ef, Cuttlebug Star Blanket ef

Monday, November 9, 2015

Early Christmas Cards

Well, hello! It has been so long since I've posted, I almost forgot how!!  I am finally getting around to making a few more Christmas cards.  We won't discuss how many more I need to make before I'm finished...  We'll just focus on the fact that as of right now, I'm ahead of the game! Hey... It's not Christmas yet, so I must be early, right?!

I had a little crafty time the other day and had initially planned to play with the box full of goodies from the Holiday catalog.  However, as I looked through my Pinterest board, I found the sweetest quilt-like card and had to make a few.  I had originally pinned this about two years ago and am finally getting around to making it!  You can see the original, made by Sandy, here.  I changed mine up just a little bit, but the overall design is the same.


I scraped together enough scraps from my almost depleted Ski Slope dsp.  There is such a small amount left that I'm feeling this pulling challenge to finish it off this year.  We'll see how that goes!  I used the triangle shape on the banner punch to make my 'quilt' pieces and then glued them to a piece of copy paper.  Then I trimmed the paper and ran it through the square lattice e.f..  The white background was embossed with the snow burst e.f.  I used Teeny Tiny Wishes for the Merry Christmas and Deck the Halls is from the new Happy Scenes.  A little distressing with chocolate chip ink and a few candy dots and we're done!

I am hoping to back here soon with more Christmas cards and maybe even a scrapbook page or two.  Wish me luck and have a fantastic day!  Thanks so much for visiting!!

Saturday, June 21, 2014

Christmas in June- Early or Late? You decide!

Well, hello! Today is officially the first day of summer...longest day of the year...a wonderfully warm 92* with a humidity level that slaps you in the face if you're crazy enough to venture outside.  So I did what any 'normal' person would do to celebrate the first day of summer-I made a Christmas card!

Yes, I know there are oodles of days before December 25th, and believe me I'm nowhere near ready to think about shopping!  I did however print out several digital images to take along on our recent camping weekend.  It is a lot of fun to sit at a picnic table near a campfire and color.  One of the images was a wintery theme and a freebie from Newton's Nook Designs.  So today, to take my mind off of the extremely humid day, I made a bright and cheerful Christmas card using my colored images.


I also used some retired products including almost the last of my pumpkin pie dots dsp from the brights stack-I should try to do this more often. I really don't think I would 'need' to buy paper for several years, but what fun would that be?!  The midnight muse ribbon is also retired (we won't discuss my ribbon stash...). I think the only current supplies are the real red and whisper white cardstock, and the markers used to color the mittens.

Speaking of retired, I was starting to freak out a bit when I looked through the new SU catalog (check it out on my sidebar) and didn't see any Christmas sets.  Then I remembered an update I had seen.

You can still order some of the recent Christmas/Holiday stamp sets that are not shown in the new catalog.  Click here to view the carry over stamp sets.  These will be available until August 27th, so if there is a set on your wish list, don't wait too long!  There will be some new Christmas and winter holiday stamp in the new Holiday catalog that will be released later this summer.

Well, the family is vegging out in front of the tv so I think I'm going to try to get a little creative time squeezed in before bedtime!  Have a wonderful weekend and thanks so much for stopping by!

Card Recipe: Paper-real red, whisper white, brights dsp stack, Image from Newton's Nook, Ink-real red, pumpkin pie, not quite navy, Accessories-snow burst embossing folder, midnight muse ribbon, staples


Tuesday, December 10, 2013

Day 10-Out with the old...

Hello! I can not believe that in 15 short days, we will be celebrating Christmas... How can a celebration that never changes dates sneak up on you???  Please tell me I'm not alone!

I am happy to say that I'm very close to being finished with my cards!  I am also glad that I have been using a lot of my supplies that I've had for a while.  I am really trying to commit myself to only keeping things I use or love.  Of course crafting supplies have to be replenished, but I could probably go quite a while without buying anything! So I am making an effort to use up a lot of my goodies instead of just adding to the supplies!!

Today's card uses many retired items that haven't been used in a while.  I pretty much CASEd this card from France Martin.  I saw her card a LONG time ago and saved the photo to my computer (prePinterest days...), but didn't save the actual link to her blog post.  But I still wanted to give her credit since I loved her card so much!  I used corduroy brads where she used bakers twine and jingle bells, and the background embossing & DSP is different, but otherwise it's almost exactly like hers.


I really enjoyed breaking out the red glimmer paper again and I LOVE those brads-so sad they're no longer available...but I parted with some all the same.  I also forgot how fussy those bits of stocking are to handle.  I may have muttered a few choice words as I tried to glue them perfectly to the glimmer paper...  But in the end, it really is a pretty, sparkly card!

I have some major Christmas shopping to do this week and I'm hoping to have most of it done by the weekend.  I would love to have everything wrapped and ready by next week, but I'm not sure that will happen! Gotta be realistic...

I am so glad you stopped by and I really appreciate my blog friends that leave such wonderful comments.  It makes my day even happier!  I hope you have a wonderful day and find some time amid the busyness to do something fun!

Card Recipe: Paper-whisper white, ruby red (ret), baja breeze (ret), old olive, red glimmer paper, Holiday Treasures DSP (ret), Accessories-1 3/8" circle punch, large scallop punch, stocking builder punch (ret), baja breeze corduroy buttons (ret), snowburst embossing folder (ret), dazzling details

Friday, July 19, 2013

Flashback Friday- A little more Ski Slope...

I am so glad you stopped in today, and hope that you're not sick of seeing my Ski Slope Christmas cards!  I am happy to say that all that is left is 1 full sheet and a baggie of scraps!  So there's a good chance that this will be the last you see of Ski Slope for a while, but no promises!

I went with a very simple design  that featured the DSP as the focal point and embossed the paper for a quilted look.  I love the distressing that occured when I did this-a happy accident, but happy all the same!  The delicate snowflakes were punched from some ragged scraps of whisper white cardstock that really needed to be used up.  I only made two of this design, but I think I will probably use this layout again using different papers.

a close up for a little more detail...


I hoped you enjoyed my new creations using old products and that maybe I've inspired you to dig out some of your older favorites too!  As this is posting, I will be knee deep in cookie making and camp prep. We are once again helping out at our local Kids Camp and will be in charge of feeding 18 hungry boys!!  Wish me luck! Have a wonderful weekend and happy crafting!

I also linked this up at Crafty Hazelnuts Christmas Challenge. They have an anything goes as long as it's Christmas challenge for the month of July!

Card Recipe:Paper-Baja Breeze (ret), Riding Hood Red (ret), Whisper White, Ski Slope (ret), Stamp Set-Teeny Tiny Wishes, Ink-chocolate chip, Accessories-snow burst embossing folder, non SU snowflake punch, basic rhinestones

Wednesday, October 10, 2012

Scrapbook Wednesday with a hint of Flashback Friday

Hi! So glad you stopped by to visit my blog today!  I decided to rearrange my scrapbook posting day to Wednesday instead of Monday.  I'm hoping this will give me a little more time between design teams to get my regular posts on here. I'm also calling this a hint of Flashback Friday because I have used a lot of retired goodies from my stash on this layout.


The pictures are from a few years ago when DD#2 was chosen as the student of the month for her class.  As if that recognition wasn't enough to make her head swell, she was then chosen as the corporation's student of the month for the entire elementary school.  She received a very nice award at the school board meeting and even had her name on the school's message board.  We were a little proud as well!  I wanted both pictures on one page and since she wore pink in one picture and red in the other, I thought Sending Love DSP would work nicely.  There are hints of glitter in the DSP which DD loved.  I used an old Page Maps sketch for the layout and as I was working on the layout and digging through my stash, I found a pretty in pink scallop circle from who knows where.  This sparked the idea for the little 'flower' embellishment on the bottom half.

Well, I think I hear a mountain of dirty laundry calling my name... better go tell it to be quiet :P
Hope you have a fantastic rest of the week and find some time to be crafty!

Page Recipe: Cardstock-red base from stash, very vanilla, Sending Love DSP (ret), real red, pretty in pink, chocolate chip, Ink-chocolate chip, Stamp Set-Notes and Details (ret), Accessories-scallop trim border punch, 2 1/2" circle punch, 1" circle punch, 2 3/8" scallop circle punch, large scallop circle punch, corduroy buttons (ret), chocolate chip twill ribbon (ret), bakers twine (dyed chocolate chip), snow burst embossing folder, big shot

Friday, July 13, 2012

Flash Back Friday


Happy Friday!  I realize it is Friday the 13th, but since 13 tends to be a good number for me (married on 13th, child born on 13th, first home had 13 in the address), I don't buy into the whole 'bad things' superstition.  Besides, isn't any Friday a good day, regardless of the date!  I am a little sad that I have less than a month of summer vacation left...

Today, I have yet another Christmas card for you!  The good news is I made 3 other cards besides this one and now my Merry Moments is all but gone!  So while I will continue to make at least one Christmas card a week (trying to stay ahead!), there will be a lot more new products and a wider variety of cards, after the last three are posted!  

Once again, I've used a Merry Monday sketch-#9 to be exact.  This seemed to be a good sketch as well (still grumbling about the complete loss of mojo on #7!) and the ornament just seemed to be the perfect thing to put on the center panel!


The pattern I punched out is probably my favorite design out of the entire package.  I'm a little sad it's all  but gone, but I am sure I will find a new favorite to replace it! My Flash Back items are the DSP (obviously!) and the now retired snow burst embossing folder (still sad about this one...), and the stamp set.

I hope you have a wonderful weekend and are able to find a little time to be crafty!

Card Recipe: Cardstock-crumb cake, very vanilla, real red, Merry Moments DSP (ret), Ink-chocolate chip, Stamp Set-warm words, Accessories-snow burst folder (ret), perfect polka dots folder, ornament punch, bitty banners framelits, lucky limeade bakers twine, scallop trim border punch

Friday, June 15, 2012

Flashback Friday- Christmas already?

Don't panic!  I am not going to start counting the days til Christmas. I don't want to know that information just yet either! So why in the world would a perfectly happy procrastinator like myself make Christmas cards in June?  Well... the answer has absolutely nothing to do with me trying to better prepare myself for the upcoming holidays, nor does it have anything to do with me being in a cheery Christmas mood.  I am making Christmas cards for purely selfish reasons.  I WANT NEW PAPER!!!!!!!

I saw a sneak peek of Stampin' Up's Holiday Catalog that will be available in August and almost hyperventilated and passed out over this baby!! OH! MY! WORD! I have always been a sucker for Christmas stamps but these were amazing and I won't even go into the details of my racing pulse from the variety of DSP...

Just a reminder:  I started doing Flashback Fridays to try to reduce my mountainous collection of supplies and had decided that I was not going to buy more Christmas paper until I used up what I had. Do you see my dilemma?  Here I am viewing all of this beautiful Christmas paper goodness, and my stash (and my resolve) is taunting me with my prior resolution.  So I did the only sensible thing I could do.  I started making Christmas cards... in June...

As crazy as this seemed to me, apparently there are people out there who are organized and actually make their Christmas cards year round. Whoda thought???   They even manage to get their cards completed before the day before Christmas (amazing and shocking, I know!).  One of these organized types is the crew at Merry Monday.  They have a new sketch challenge every week for Christmas/Holiday cards.  Now, even though I am a procrastinator, I am also a saver/hoarder, so I have been saving all of their sketches for the time when I finally deemed it necessary to make my cards (you know, around December 20th...) and being a little bit anal, I had to start with sketch number one for my card. All of those organized people (like Sherry) are on week 24 already!

So here is sketch #1 from Merry Monday


and here's my card, complete with retired DSP!


I pulled out my pastels to color the image.  I think it works better for the aged look than the markers.  I also did some ink distressing with soft suede.  I've also decided that I'm going to have to start using way more paper on my cards!  This design really didn't make a dent in my supply.  There's always gift bows... Is it too early to start making those?

So there you have it! My first Christmas card of the year! I'm hoping no one will revoke my membership in the Proud to be a Procrastinator Club.  After all, I did wait over a year to use this paper!!  Have a great weekend and happy crafting!

Card Recipe: Cardstock-very vanilla, real red, Merry Moments DSP (ret), Ink-crumb cake, chocolate chip, soft suede (distressing), pastels, Stamp Set- Bells and Boughs, Accessories-labels framelits, snow burst embossing folder,
Saturday, January 28, 2012

Clean and Simple Sketch

This has been one of those crazy weeks when I really wanted to sit down to create, but other commitments had first billing... TGIF! Grocery shopping finished, dinner made, kids in bed and time to get crafty!!  Clean & Simple Stamping had a great sketch that I really wanted to use to get a few more Valentines done.  I had hoped to be finished by now... Just where did January go anyway?!

I've been determined to use up some of my older DSP, so out came Cottage Wall.  I also used the stamp set Outlined Occasions, which is a Sale-A-Bration item.   As much as I wanted to color in the word Love and the cute little hearts, I resisted in an effort to keep the spirit of CAS!  Of course, I did end up using some Vanilla Shimmer Smooch on the embossed heart...


I even added a little DSP to the inside!


Well, I hope you enjoyed my CAS Valentine.  I actually made a few different cards, but you'll just have to come back to see them later!  Hope you weekend is filled with plenty of opportunities to be crafty!

Card Recipe: Cardstock-pale plum (ret), rich razzleberry, whisper white, Cottage Wall DSP (ret), Ink-pale plum (ret), Stamp Sets-Butterfly Prints, Outlined Occasions, Word Play, Accessories-scallop trim and full heart punches, snow burst embossing folder, Vanilla Shimmer smooch spritz


Wednesday, January 18, 2012

Shaking the 411

I love checking out the sketches at Stamping 411, but don't seem to find time to play along as often as I would like.   This week, the sketch was just too appealing, and when I saw that Hand Stamped Sentiments had a challenge to make a shaker card, I thought the two would work well together!  This is my first EVER shaker card and it was a very easy technique thanks to my shaker frames!!
The funky dotted border was made using the eyelet border punch.  I had estimated my strip of paper a little too narrow, but when I looked at it, I thought it looked pretty cool anyway!


A close up of the shaker window and all of it's glittery goodness...


It's almost my bedtime, so I'm going to cut this short and hurry off to link it to the two challenges! Thanks for visiting!

Card Recipe: Cardstock-old olive, marina mist, whisper white, Paisley Petals DSP, Ink-marina mist, Stamp Set-Precious Butterflies, Accessories-2 3/8 scallop circle punch, eyelet border punch, 3/4 circle punch, snowburst embossing folder, basic pearls, dazzling details, shaker frame, glass and fine glitter

Sunday, January 15, 2012

The Gnomes Part 2

If you came here today expecting a dignified post and intelligent conversation, SORRY!!  Remember my Gnome Sweet Gnome  card?  I was trying  to come up with a cute little saying to put inside and my blogging friend, Lisa,  gave me several ideas.  I settled on "Gnome-one is as special as you!".  She also planted the seed of a sequel as she was wondering where they were off to and what adventure they would have.  Well...I can't tell you all of the details, since neither would kiss and tell, but Chip and Rocky (he's a little chipped and she's made of stone, get it?!) wanted me to share their latest adventure...


That's right, they fell in love, are now happily married and living in Boulder (sorry...couldn't resist)!


Check out Chip's fancy suit and his crystal effects hat, jacket, and shoes.  Of course, Rocky is all dressed up as well.  Did you know that when you put lots of dazzling details on vellum, it wrinkles?  I didn't. However, since it is her wedding day, we are calling them ruffles and just attached the vellum to a piece of blushing bride card stock!!

I had so much fun with this card, especially since it really wasn't for anyone other than me!   Oh, just a heads up that Chip and Rocky are keeping in touch and may show up on my blog again for another adventure.  I hope you have enjoyed my 'pun'filled adventures of Chip and Rocky! If not, I blame Lisa! She started it!!

On a more professional, crafty note, I used my heart framelits for the first time on this card. I LOVE THESE THINGS!!! Can't wait to see what SU comes out with next in this department!!

Card Recipe: Cardstock-very vanilla, Sending Love DSP (ret), real red, vellum, Stamp Set-Gnome Sweet Gnome, Ink-stazon black, assorted markers, Accessories-very vanilla seam binding, cherry cobbler & original dazzling details, crystal effects, snow burst embossing folder, hearts collection framelits

Sunday, January 8, 2012

Be My Valentine

Ever look at a piece of patterned paper and think 'Wait a minute...There's a card in there...'?  That is pretty much what happened with this card.  I was looking for some red sparkly paper for a different project and came across this paper.  It's a retired paper from SU and I actually forgot I had some left.  As soon as I saw the pattern, I had a pretty good idea what my card would look like.  I remember seeing somewhere that someone made an envelope with hearts spilling out, but wouldn't you know, I didn't save or pin that one (a million others, yes...)  So if this was your original idea, please let me know.  The basic design and layout, other than the heart envelope, is from my little ol' head.
**UPDATE- While reorganizing my pinterest card pins, I came across the original card and wanted to give credit where it's due.   Darlene Design is the website where you can see the inspiration piece!


This was not CAS or QAS (quick and simple) and I made 4 of these!  I do not have an envelope die (gasp!), so I used a template that I had from ages ago.  Then I got busy punching, and punching, and punching, and embossing, and glittering, and you get the picture.  I'm slightly obsessive when it comes to putting patterns together, so the hardest part for me was arranging the hearts into a design that I thought looked just right.  I really like the way it turned out!

When I finished this card both of my DD came over and exclaimed "We want to make these for our Valentines!" Ummm.... I DON'T THINK SO!!!!  So now I'm trying to find a more basic way to recreate this so they can make duplicates for their friends.  Plus, I'm not so sure the boys in my youngest DD's class will appreciate this very girly card!

Card Recipe: Cardstock-pretty in pink, real red, very vanilla, Sending Love DSP (ret), Ink-pretty in pink, real red, chocolate chip (distressed edge of envelope), Stamp Sets-Fabulous Phrases, Just Believe, Punches-heart to heart, modern label, word window, Accessories-very vanilla seam binding, basic pearls, square lattice folder, snow burst folder, dazzling details

Thursday, December 22, 2011

How many days left????

I don't know about everyone else, but this month has flown by for me!  I had a lot of cards made by the first week of December and I believe it tricked me into thinking I was prepared. WRONG!  There are still a few gifts to finish and a couple of last minute cards to make, plus all of the wrapping, baking, and cleaning...

I did take a little time to check out blogland and found that a card that I had floating in my head would fit well with some challenges!  SUO Challenges is looking for Merry, Happy, or Joyous greetings. My card has Merry right on the front! Top Tip Tuesday wants Anything Christmas and a tip. Here's my tip: when using a large focal image, I cut my strip or ribbon behind the image to save paper.  This is also a great way to use up smaller pieces of cardstock and ribbon. After all, no one will see it behind the focal point!  While this may not be a new tip for more seasoned stampers, it might be something new and less frugal (I refuse to call myself cheap!) stampers have not considered.  This card also fits The Squirrel and the Fox's request for Christmas.  Wow! One card, three challenges!!


This card is using some new 'sneak peek' items from Stampin' UP (demo perk!) and a stamp I have yet to ink up before this card!  

Hope all of your holiday preparations are going well and that you also find a little crafting time in the craziness! Thanks for looking!

Card Recipe: Cardstock-crumb cake, cherry cobbler, soft suede, very vanilla, Stamp Sets-Christmas Postcard, Bells & Boughs, Ink-crumb cake, soft suede, black Stazon, various markers, Accessories-framelits labels, cherry cobbler dazzling details, snow burst embossing folder, blender pen

Saturday, December 17, 2011

Am I Crazy?!,

This time of year is always hectic for me.  I teach 4 different preschool classes and I organize the Christmas program that they perform.  We also have 4 separate parties.  I also help the children at our church with the special children's service on Christmas Eve.  Add to these the normal holiday preparations and it gets quite busy!  This year was the first year I had a pretty good start on my Christmas cards and I came up with the 'brilliant' idea to make all of the tags for our gifts this year!! Am I CRAZY?!  Most of the tags are very simple, after all, I'm sure most of them will be thrown in the trash with the wrapping paper (sniffle...).  However, I put a little more effort into some of them, especially the ones I designed for our team's Christmas tag swap. We were to make a set of three tags.  This is one of the tags I took to the swap...


I love the little accents of glimmer and the stocking punch made this super easy!  Next week, I only have three days of school, so hopefully I will be able to catch up on my blogging!!

Recipe:  Cardstock-wild wasabi, cherry cobbler, whisper white, silver glimmer paper, Ink-wild wasabi, soft suede, Stamp Set- Stitched Stockings, Accessories-snow burst folder, stocking punch, ticket corner punch, cherry cobbler bakers twine

Tuesday, November 22, 2011

The only card I made at the crop...

If you have seen my last two posts, you are already aware that I organized a Crop night for our daycare and preschool.  While I had a wonderful time and taught two projects, I accomplished next to nothing of my own! I had colored some images about a month ago and brought them along with the hopes of getting them turned into Christmas cards by the end of the night.  I actually finished about 5 of them...  But I did enjoy checking out what everyone else was making and visiting with friends.

Here is a picture of the only project I worked on!


Card Recipe:Cardstock- whisper white, bashful blue, DP from stash, Ink- Stazon black, Early Espresso & Blush Blossom markers, copics, Stamp- Non SU, Accessories-dazzling details, snow burst folder, clear trim tinsel (ret.)

Sunday, November 20, 2011

Crop Project #2

Friday night was our daycare and preschool's fundraiser Crop night.  This is the second project that I taught.


Recognize the branches of the tree?  It's the pine tree from Lovely as a Tree turned sideways and stamped twice! This card was a CASE of Debbie's card, I just changed the papers a bit.  I also did a card like this using the tinted glimmer paper and will show that picture soon.  The ladies really enjoyed this card!  Most of the people attending were scrapbookers and they loved trying something new.

Card Recipe:Cardstock-whisper white, garden green, cherry cobbler, marina mist, Stamp Sets-Lovely as a Tree, Word Play (sentiment), Ink-soft suede, garden green, cherry cobbler, Accessories- ornament punch, snowburst folder, square lattice folder, top note die, cherry cobbler bakers twine