Showing posts with label perfect polka dots embossing folder. Show all posts

Monday, December 14, 2020

Simple cards and Simple Stories

So I may have an addiction to those tag and 3x4 image sheets of paper because I've made another set of cards using a new sheet of Simple Stories paper...and I may have bought a Christmas pack of DCWV paper that also has some in it...yeah...it's becoming a thing...

Today's cards also have vintage Christmas images, but this time the colors are a bit brighter.  Most of the images were simply placed on an embossed base and were quickly done!  I did add a little strip of green to one and a mat to another.  There were also a few blocks that I didn't make into cards because they seemed perfect for journaling blocks for scrapbooking.  So maybe they'll make an appearance during the Christmas break!

My DD#1 made a comment about how perfect my embossing went with the images. I readily agreed without mentioning that having a huge collection of folders makes that pretty easy.  Let her think that I'm just that creative!!
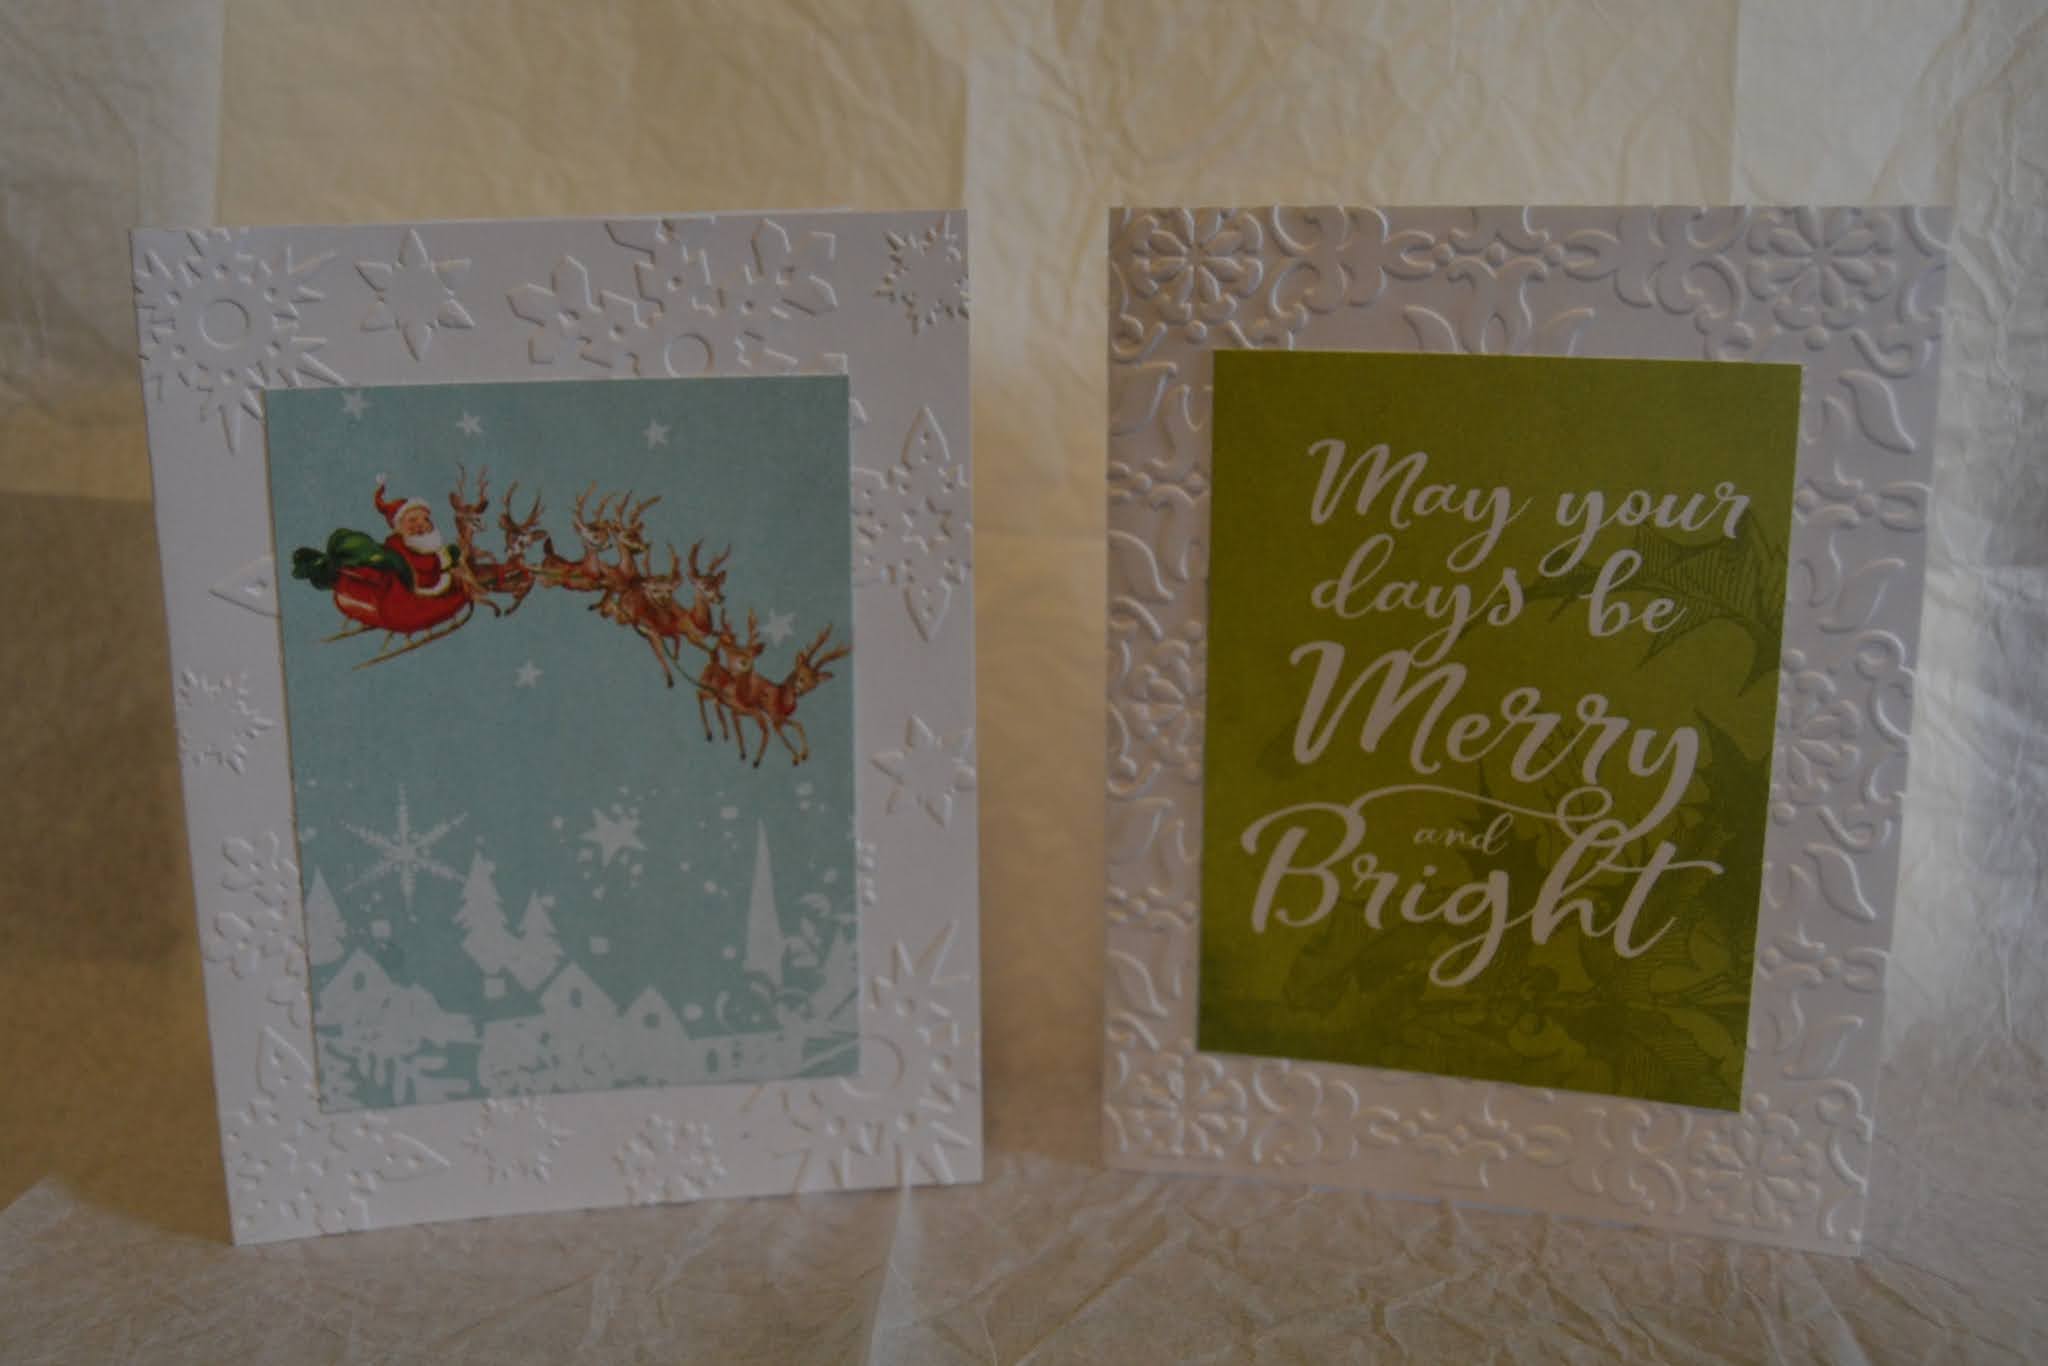


I think this is pretty close to the last of my cards unless I just decide that I really want to make more.  I actually had all of my cards finished before Thanksgiving this year!  That hasn't happened in a very long time!  Feels good to be able to spread a little love and cheer in what has been a less that perfect year.  


Monday, November 4, 2019

Merry Monday (and not a minute too soon!)

Hello!  While I am not nearly ready for Christmas, I am ready to get those cards going so I'm not rushing around at the last minute!  If all the rest of my cards are as easy and quick as today's I'll be done in no time!

I recently purchased a sheet of paper that had 12 3x4 blocks on it and they were absolutely perfect for making Christmas cards.  I know I made a pledge to use up my stash, but if it helps me get cards created quickly so I can make more pages, well...guess I just had to make the sacrifice! Ha!

I found that some of the blocks worked better with different shades of green, red, or blue, but once I had that figured out, it literally took me minutes to emboss the base and glue the layers together. Easy peasy! There were two blank frames that I stamped with sentiments, but other than the embossing, there really wasn't much to do.  Sometimes it's nice to have pretty papers do all the work for you!


So now I have 12 cards in my Christmas stash.  That's not nearly enough, but it's a start!  Thanks so much for stopping by today. I promise my next MM will have a little more effort put into it!  Have a wonderful week and I hope you find some time to be creative too!

Tuesday, May 26, 2015

A little Word Play to start my summer

Hello! I am so very happy to announce that my summer vacation has officially begun!  We had our final day lunch meeting today and now I am free for a few months!  We still have softball sectionals going on, but other than that my days are filled with laundry, weeding, and other very neglected chores!

Of course, this also gives me a little play time as well so I hope to be posting and visiting more often!  Today's card was made last week, but I'm just now getting around to posting it.  This is a graduation card for a special young lady.  Not only is she family (my cousin's daughter), but she was also one of my preschool students a few years ago (must be super smart to graduate so early! wink!).  I made her card in her school colors and thought this sentiment from Word Play fit perfectly.


It was so much fun to pull out my supplies and make individual cards again since I haven't done this for a while!  I'm still a little behind on my birthday card making so that will probably be next on my 'to do' list.  Well, at least the one that I actually want to work on completing- the housework one? not so much...

I have a few more graduation cards to share with you but will save them for another day!  Until then, I hope you manage to find some time this week to make something fun!

Card Recipe: Paper-night of navy, whisper white, cherry cobbler, Ink-night of navy, cherry cobbler, Accessories-perfect polka dots ef, cherry cobbler seam binding

Sunday, March 15, 2015

Anything But a Card Challenge 45-Green with Envy

Hello and happy Ides of March!! " Et tu, Brute?" (My high school lit teacher would be so proud that I remembered this!) It is time for Week 3 of the Green with Envy challenge at Anything But a Card.    The team has shared some wonderful versions of green and envy, and we would love to see what makes you go green!  I have to say that this challenge stretched my mind creatively (happens quite a bit with these amazing ladies!) since I really couldn't come up with anything for 'envy' and while I like green, it's not my 'go to' color.  So I went to my trusty Pinterest search box to see if something there would inspire me.

If you want to be completely overwhelmed and wowed at the same time, try typing in 'green art' in the Pinterest search box!  There were a lot of amazing creations, but this one really caught my eye!


It's made from glass bottle bottoms!! Isn't it fantastic?!  Now, I am nowhere near skilled in glasswork.  I would either shatter the pieces or slice off a finger in the process!  I did like all of the varied shades of green and the round shapes.  I also knew I had a lot of green scraps that could create a similar design.  I decided to make a scrapbook page, using the greens to make a background pattern.  I set out with all of my circle and scallop punches and a bunch of green papers. *Bragging moment- I did not cut any whole sheets of paper for my page!  Everything was scraps, except for the green base!*

After punching a lot of shapes, I started to lay out my pattern, and this is where it all went downhill fast.  I was totally stressed out over their placement.  First, too many of the same size, then the same color, then colors that didn't look great together.  Grr...  So I took a break, made lunch, and did a load of laundry, and during these tedious jobs a thought struck me.  This is supposed to be fun and I'm not having fun.  I'm choosing laundry over creating...  So I went back to the pile of circles and reminded myself that art is process not product.  Rather than attempting to lay out the entire page, I started in a corner and worked my way out.  Interestingly enough, it became easier once I was committed to complete what was already glued down!


To add interest, some of my circles went off the page and were trimmed.  I then reused the cut off pieces to fill in other edges.  Truly a 'scrap'py page!  The photo I added was from a craft day that my daughter's Girl Scout troop sponsored, so all of the green ended up being quite appropriate for the scouting page.

I hope you will join us with your green with envy creation!  We would love to see what you do with the challenge!  It's a great way to celebrate St. Patrick's day too!

Page Recipe: papers of almost every shade and pattern of green, various circle and scallop circle punches, perfect polka dots embossing folder


Tuesday, February 25, 2014

If you give a cardmaker scraps...

...she will make a birthday card!  I am frequently teased about the scraps of cardstock and pattern paper that  I save. "Oh wait! There's still an eighth of an inch of paper there..." ha...ha...ha...

I'm not quite that bad, but I do save pieces that I think can be used, including strips of white cardstock that are 1/2 an inch wide.  Why? They are the perfect size to use with the word window punch and the bitty banners!  I also save smaller pieces of ribbon that can be folded and tucked to dress up an image or turned into something else.  These scraps also keep me from cutting into a full sheet of paper when I only need a tiny piece, and stretch a spool of ribbon just a bit further!

I was in desperate need of some birthday cards, especially kids and gender neutral.  I came across the dinosaur image that I made ages ago and put in my "Do Something With This" box.  We won't talk about how many things are in there... I made this paper pieced dinosaur shortly after I made this card.  The background paper just looked like dinosaur skin! So I used the scraps (seeing a pattern here?) to stamp and paper piece this awesome guy!

notice the scrap of paper used for the banner!

I also made a gender neutral card because sometimes I forget birthdays (gasp!) and then need to grab a card as I walk out the door.  These are great for those occasions!  I managed to use smaller pieces of cardstock for most of this card, but the best scrap use is the ribbon scrap as the tails of the badge.


Now I have a few more cards in my file and a few less scraps hanging around! Bonus!!

I hope you are having a wonderful week and perhaps you'll spend a day digging through your scraps too! Who knows what you might find?!  Thanks so much for visiting!!

Card #1 Recipe: Paper-crumb cake, garden green, whisper white, Woodland Walk DSP (ret), Ink-garden green, crumb cake, stazon black, Stamp Set-Dinoroar (ret), Accessories-pastels, bitty banners framelit, big shot

Card #2 Recipe: Paper-whisper white, daffodil delight, old olive, Ink-night of navy, old olive, Stamp Set-Blue Ribbon, Accessories-circle framelit, 2 1/2 " scallop circle punch, 1 3/8" circle punch, perfect polka dot embossing folder, chevron embossing folder, denim ribbon

Wednesday, May 29, 2013

A sneak peek, spring/summer cleaning, and lots of rambling...

Hello and welcome to my blog! I am so excited to have some new followers and hope that you get either inspiration, insight, or something to make you smile when you visit!!

I am in a 'bunny trails' kind of mood today, so I will share my cards (a sneak peek of my ABAC project for Sunday) first-just in case you don't want to wander the trails with me!


Challenge number 20 at Anything But a Card Challenges  is "Dust Off Your OLD Supplies". For this challenge we are having a bit of a spring cleaning theme. Go "Dust off your older supplies" for this challenge - and make something... ANYTHING GOES! Use up those paper scraps, break out tools that haven't seen the light of day, finish up one of those U.F.O's {unfinished objects}... or how about those hoarded stickers - we all have a stash. The theme is open so the possibilities are endless.... just remember create anything except a card... this is going to be FUN!!!

Now how easy is this?! Well... When your crafting space looks as horrific as mine, first you actually have to do spring cleaning (or for those of us who love to procrastinate, summer cleaning) to find most of your supplies and the table. I really wish I was exaggerating, but I'm not!  It's been a very crazy month! So after spending the morning finding my table (and several started projects), I knew what I would be doing for our challenge.  I am part of week 2 of the design team and usually finish my project Friday night or Saturday morning and rush to get it photographed, but this week it is ready to go by Wednesday afternoon!  I am sharing the cards today because I can't show the other part yet, and the blog is anything BUT a card...  Can't be flaunting any cards on Sunday, so the cards become the sneak peek for the main piece.

I spent most of the afternoon working on the cards for a very special friend from our  church.  She is one of the most caring and selfless people I know.  She made meals for my parents when Dad had his stroke, and still occasionally drops off goodies for them.  She has also been a wonderful mentor.  Last week, she stopped by to drop off some asparagus from their garden since she knows my oldest DD loves asparagus.  She handed me two HUGE bags of fresh asparagus, enough for many meals, and refused to accept any payment for it. "It will be a relief to get it out of the house." is all she says.  Well, if I have learned little else from the crafting community, one of the joys of crafting is passing on our creations to others.  Plus, I know she won't be able to turn down a handmade just for her gift! Pretty sneaky, right?  So I made a set of 8 greeting cards for her.

Now if you're still on the trail with me, I'm moving on to dusting off supplies.  I decided that while I was in cleaning mode, I would go through my DSP and clean that up too. OH MY!  We will not discuss just how much retired paper I have that can't be used for classes, not to mention the non SU things...  So I decided my summer crafting goal would include using up some of that paper.  I found a lone sheet of the paper above and have no clue which set it came from but I do know it was from a loooooong time ago. I managed to use almost the whole sheet for the 8 cards! Woo! Hoo! 1 page down, 4 million to go...  I also dusted off my daisies die which hasn't bonded with my Big Shot in ages. They were so happy to be together again!

I have really been slacking in the commenting and visiting of blogs lately.  Mom has been in the hospital twice this month with heart issues.  While her condition is not life threatening, it does sap all of her energy and messes with her heart rate.  They switched her to a new med this time so we are crossing fingers and praying that this one gets the job done.  I'm just thankful that I wasn't working this last time and could commit to being there for her and Dad.  Makes things a little less stressful!

Well, this is the end of today's bunny trail and post. If you made it all the way to the end, I applaud your tolerance! Hopefully Sunday will bring some less distracted blogging!  Have a wonderful rest of the week and I hope you don't have to clean before you do your happy crafting!

Card Recipes: Cardstock-wild wasabi, bashful blue, pumpkin pie, whisper white, old DSP, Stamp Sets-Word Play, Loving Thoughts, Ink-pacific point, bashful blue (sponged on daisy), Accessories-daisies 2 die, boho blossom punch, 2 1/2" circle punch, perfect polka dots & square lattice EF, non SU circle framelits, brights buttons, white bakers twine, bashful blue brad

Sunday, March 17, 2013

Anything But a Card Challenge 15

Hello! So glad you stopped in today! It has been a WET and nasty day in southern Indiana. The perfect day for curling up with a good book or crafting, or if you are as fortunate as I was, taking a nap!

There is a new challenge posted at Anything But a Card Challenges.  This time, we are encouraging you to think spring! Of course, if you follow our challenge blog, you know that things are never as simple as this...  We like to get as creative as possible and Carla, our fearless leader, has taken the Spring theme and made it even more open ended!

"For Challenge 15 we are asking for something Spring-y or spring colors, or Alice in Wonderland!  I know it may seem like a strange combination, but that's how it works in my mind! :)  I think it's probably the rabbit/Easter thing."

So there you have it! Get your thinking caps on and see where this challenge leads you.  We would love to see your creation, and if you are so inclined, the team would love it if you checked out their creativity for the week.

I will be posting my project on Week 2, so be sure to stop back in to see the inspiration for the second week as well!

And just so you have something to look at on my blog this week, I created a card for my most recent club meeting that fits the theme of the challenge.  Yes, I know this is a card and the challenge very specifically is Anything BUT a Card, but since this isn't a DT post, I'm bending my rules a little!!  Feeling a bit rebellious at the moment... Hee! Hee!


This card was inspired by a card I saw on Pinterest.  You can see that card here.  She has a great tutorial on how to create her card.  Since I was using mine for a club project, I simplified it using punches instead of the oval framelits.  I also made mine a standard sized card so the ladies could use the envelopes they already have on hand.

I hope you have a most wonderful week and find lots of time to be crafty!!

Card Recipe- Cardstock-Baja breeze, whisper white, pink pirouette, Stamp Set-Wacky Wishes, Ink-Baja Breeze, pretty in pink, early espresso marker, Accessories-extra large and large oval punches, 2 1/2" circle punch, small heart punch, decorative label punch, wisteria wonder bakers twine, perfect polka dots folder, big shot

Wednesday, November 28, 2012

Glitter and Framelits, and Folders...OH MY!

So, are my fellow American crafters still eating turkey?  As much as I love Thanksgiving, I think I've had enough turkey to last me till next year!! 

I'm busy trying to get our house ready for Christmas and the girls are 'working' on cleaning out their closets and reducing their inventory of stuff in their room!  Not sure they will be finished by Christmas eve...

Today I'm sharing the last card from my stamp club.  What would a Christmas card be without glitter, framelits, and embossing folders?? The colors are not what I would normally use, but I decided to use the color coach to add some variety!  I really like the colors together!


When the Holiday catalog came out, I was instantly drawn to the set Evergreen.  I love the two step stamping giving so many options!! I spritzed the main image with vanilla shimmer smooch, but of course that doesn't photograph nearly as shimmery in person.

I was having some trouble with the bottle of smooch trying to clog up and stick.  It was getting quite frustrating trying to use it, but then I remembered the new Stampin' Spritzer bottles that were waiting for a purpose.  I emptied the contents of the vanilla smooch into the spritzer bottle and it worked like a champ! Now I have to be careful not to saturate my card when spraying...

I hope you are still managing to find plenty of crafting time during this busy season!  I'm sure trying to squeeze in as much time as possible!!  Have a wonderful rest of the week and happy crafting!

Card Recipe: Cardstock-pink pirouette, soft suede, whisper white, Stamp Set-Evergreen, Ink-certainly celery, soft suede, Accessories-dazzling details, vanilla shimmer smooch, perfect polka dots folder, Petals a Plenty folder, Labels framelits, big shot

Friday, October 12, 2012

Color Me Beautiful #7 and a scrappy page

It's Friday!!! Yippee!!! We have survived another week and it's time for a new challenge at Color Me Beautiful. I absolutely loved these colors as soon as I saw them and the wheels started turning when I saw this wonderful blue boat!! 

  
Doesn't that picture just make you want to pack a picnic and set off to your own little private island?!

I have always been something of a 'water baby' and love spending time anywhere near the water.  The colors for this week's challenge felt so aquatic and I really wanted to stay with the watery inspiration.  I also have a ton of pictures begging to be scrapped and after a quick look through the box, I found pictures from a pool party we attended this summer. BINGO!!  My next problem was trying to fit 5 fun filled photos onto one page...  I hunted through some old Page Maps sketches and found one with hinges on the bottom picture.  So rather than making the hinges simply decorative, I made a little mini album to house the extra pictures.  This also gave me a perfect place for journaling too!


I managed to use all of the colors in the challenge and found that I really love these colors together!  I even managed to find some old alphabet stickers in my stash that fit the theme and used them for my title.  

I hope you have a fantastic weekend, find some time to be crafty, and maybe even accept our color challenge and link up your fabulous creation!  Thanks so much for stopping by!!

Page Recipe: Cardstock-sahara sand, old olive, river rock, bashful blue, pacific point, Ink-old olive and pacific point markers, Accessories-2 1/2" circle punch, modern label punch, perfect polka dot embossing folder, metallic brads,stickers from long ago, 2 bowls for making larger circles

Friday, July 13, 2012

Flash Back Friday


Happy Friday!  I realize it is Friday the 13th, but since 13 tends to be a good number for me (married on 13th, child born on 13th, first home had 13 in the address), I don't buy into the whole 'bad things' superstition.  Besides, isn't any Friday a good day, regardless of the date!  I am a little sad that I have less than a month of summer vacation left...

Today, I have yet another Christmas card for you!  The good news is I made 3 other cards besides this one and now my Merry Moments is all but gone!  So while I will continue to make at least one Christmas card a week (trying to stay ahead!), there will be a lot more new products and a wider variety of cards, after the last three are posted!  

Once again, I've used a Merry Monday sketch-#9 to be exact.  This seemed to be a good sketch as well (still grumbling about the complete loss of mojo on #7!) and the ornament just seemed to be the perfect thing to put on the center panel!


The pattern I punched out is probably my favorite design out of the entire package.  I'm a little sad it's all  but gone, but I am sure I will find a new favorite to replace it! My Flash Back items are the DSP (obviously!) and the now retired snow burst embossing folder (still sad about this one...), and the stamp set.

I hope you have a wonderful weekend and are able to find a little time to be crafty!

Card Recipe: Cardstock-crumb cake, very vanilla, real red, Merry Moments DSP (ret), Ink-chocolate chip, Stamp Set-warm words, Accessories-snow burst folder (ret), perfect polka dots folder, ornament punch, bitty banners framelits, lucky limeade bakers twine, scallop trim border punch

Saturday, June 16, 2012

A Crafty Color and Sketch Challenge

My upline, Tiffany, gives us a new color and sketch challenge each month.  She's even nice enough to supply some cardstock to make it easier for us!  This month our colors were the new gumball green, along with melon mambo, and so saffron.  We could also use a neutral.  She picks sketches from older Stampin' Success issues (magazine for SU demos only-another great perk!).

Here is my card...


I used the retired stamp set, Look Who's Turning and chose to add whisper white as my neutral color.  I finished this card on Friday afternoon and was so proud for getting it done on time.  Then I left this morning for our meeting and forgot the silly thing on the kitchen table! Grrr...

Card Recipe:  Card stock-gumball green, so saffron, melon mambo, whisper white, Stamp Set-Look Who's Turning, Ink-gumball green, melon mambo, so saffron, Accessories-rhinestones, white bakers twine, perfect polka dots folder, felt flower (ret), owl punch (for circles), dazzling details

Friday, March 30, 2012

Tiffany's Challenge

Every month our SU group, The Crafty SisTAHS, get together.  Tiffany, my upline's upline, hosts the meeting and everyone takes turns with sharing, making a project, choosing a swap theme, and bringing snacks.  This month, Tiffany had a challenge for all of us to make a card using a sketch and some cardstock she gave us.  We were allowed to add a neutral color and any embellishments, but couldn't change the color combo.  The colors were wisteria wonder, cherry cobbler, and pretty in pink.  Very girly colors! So I pulled out the stamp, Packed For Mom for the first time; added some whisper white, and began to put my card together. I had a great time playing with this image! I knew I wanted to color some of the images and pop up the flower and the next think I knew...the dazzling details  and crystal elements came out and there was even some fussy cutting too!


A closer shot of the image...


I have to confess that I did use a different base than the one Tiffany gave me.  I knew I wanted to use bakers twine as the 3 ribbon/bows part of the sketch and couldn't wrap them with the base she gave us.  So I cut a new piece the long way for my card.  Hopefully, she'll forgive me for taking liberties with her challenge : )  I really enjoyed doing this and hope she will continue to offer these challenges.  I really didn't use wisteria wonder too much before, but now I think it's starting to grow on me!  Thanks, Tiffany!

Card Recipe:  Cardstock-wisteria wonder, cherry cobbler, pretty in pink, whisper white, Ink-black Stazon and several markers, Stamp Sets-Packed For Mom and Party This Way (sent), Punches-modern label, large oval, word window, 3/4 " circle, Extras- white bakers twine, cherry cobbler & original dazzling details, crystal effects, basic rhinestones, perfect polka dots embossing folder