Sunday, March 29, 2015

Another Fifth Sunday at Anything But a Card Challenges

Hello!  In case you had not noticed, this month has 5 Sundays in it.  That means there is a mini challenge going on this week at Anything But a Card Challenges to create something with five.  That's it; no other requirements (other than the whole card thing...) needed.  It can be the number five, five items- the sky's the limit!

I went to a Relay For Life cancer fundraiser crop this weekend and had the most wonderful time with my oldest DD and many incredibly talented ladies.  Lots of food, lots of laughs, and lots of creating for a very good cause.  My five could also easily be the five pounds I probably gained from all of the yummy snacks and meals, but instead I'll share a photo of my five flowers I made on this scrapbook page.  You really don't want to see me with my extra five pounds!
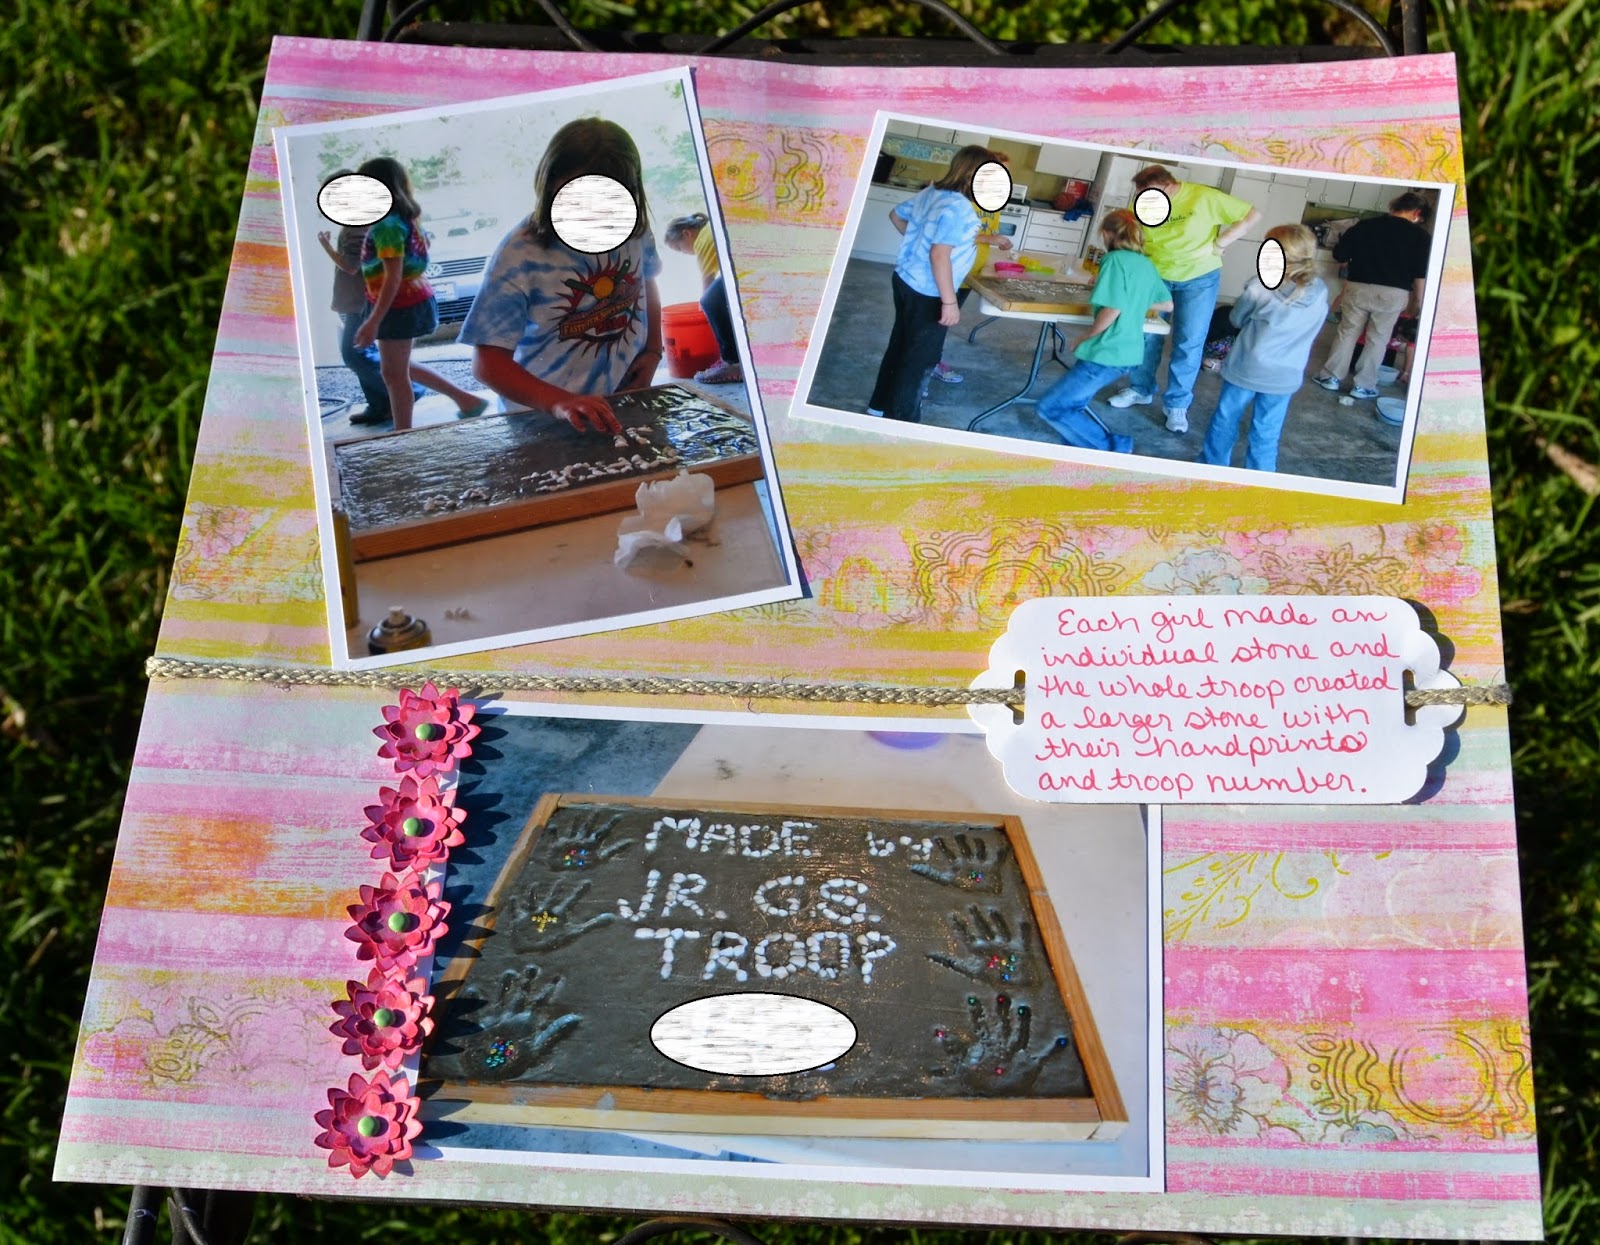

I used the Boho Blossom punch to make the flowers, inked the edges and put them together with some very old green brads I had in my stash.  That's one of the good things about crops-they make you use what you brought!

I have also decided I love my tag topper punches! These are so awesome for dressing up journaling!  I was a little proud that when we left the crop, I had scrapped all of the photos I had brought with me.  Feels pretty good to be putting a few more pages in my girls' albums!

I will be back soon with more layouts from my scrapbooking day.  Have a wonderful week and thanks so much for stopping by for a visit!

Page Recipe: paper-base from stash, whisper white, ink-strawberry slush, accessories-boho blossom punch, scallop tag topper punch, green brads, twine from stash

Friday, March 27, 2015

Sure Signs of Spring

There are so many heralds of spring-crocus and daffodils, robins returning, grass greening, buds forming on trees, the ping of a ball hitting a bat... What?! That doesn't happen everywhere???  In our home, the true sign of the arrival of spring is muddy cleats and softball pants!  This sign shows up sometimes before the first flowers!!

I have once again been neglecting my poor blog for other priorities, like playing taxi driver and running a full service sports laundromat...  I did however manage to combine one of our favorite spring sports with some crafting time recently.  I volunteered to create this year's bulletin board located at our school's softball field.  While these are not the most 'crafty' things I have made, I did color and bling up the images that I printed!


This image was already created, but I colored the letters 
with red and added dazzling details to the word 
'diamonds' 

I used a digital softball image, turning the color from 
black to red, then added the Bible verse.  It was printed 
onto softball colored cardstock.

This was a digital image that I simply printed.

I created the inspiring sentiment in a word document,
then added some sparkly softball stickers for good 
measure!

All of the items were mounted on basic black or real red cardstock.  I also made some smaller softballs using a stamp, real red ink, and the softball colored paper.  Each player will have her name and number on a softball.

Well, I know it's not super creative, but I thought I would share just what I had been up to!  I also have another project to share but have to wait a little while for that.  I am also heading out to a crop tomorrow, so there should be a bit more coming up shortly!  Thanks so much for stopping by and I hope you have an incredibly creative weekend!

Thursday, March 19, 2015

Bunny Butts, Anyone?

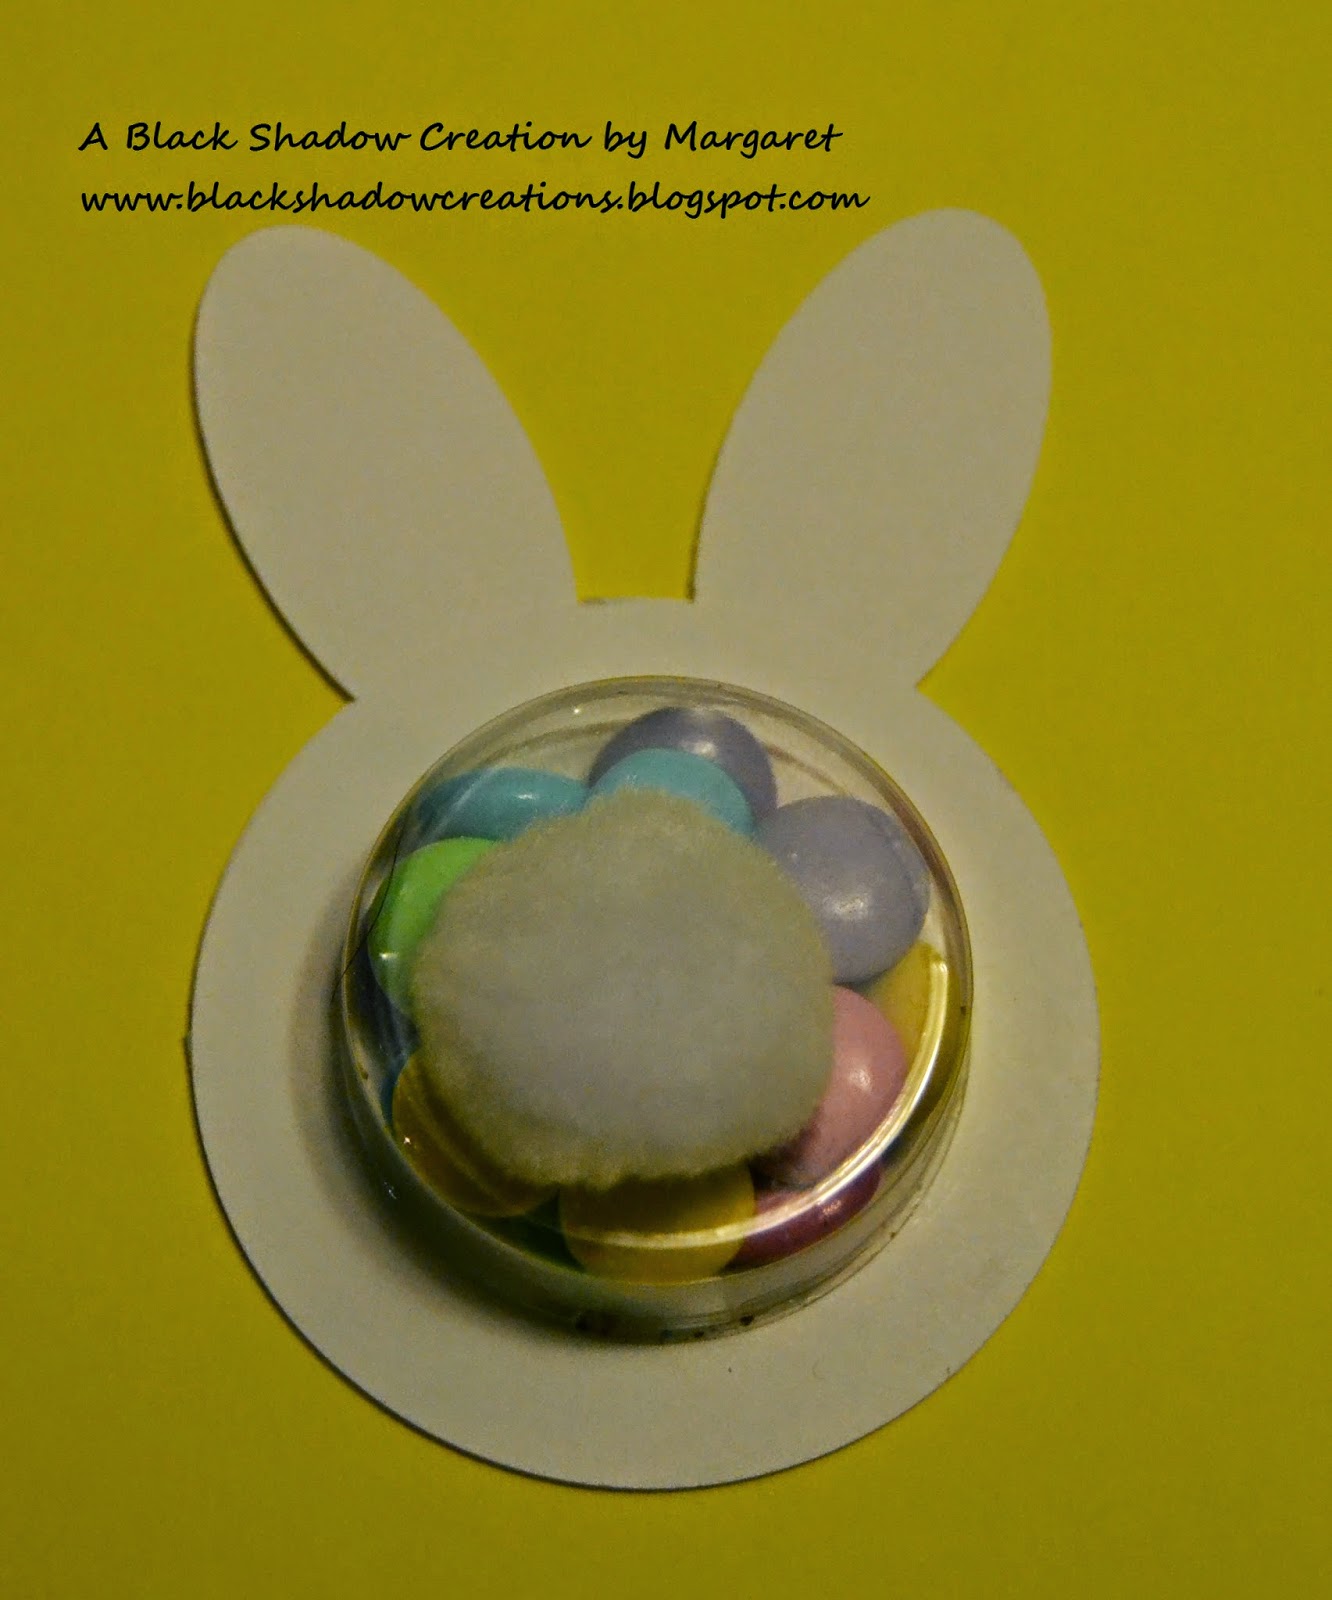
Hello! So very happy you stopped by for a visit! Today I have a cute little treat that is super easy to make and perfect for Easter.  This was my 'make and take' project for a recent fundraiser at my school.  My girls have affectionately named these Bunny Butts. 


If you need something that is easily reproduced (like bunnies...), this is a terrific option.  I punched out all of the pieces for 30 of these while watching tv one evening.  They are even easier to put together.  For each Bunny you need a 2 1/2" circle with a 1 3/4" circle punched out, a complete 2 1/2" circle, and two small ovals.  I also used a circle treat cup ($2.95 for 12) and a 1" white pompom.  The snack size bags of pastel m&ms fit perfectly inside the cups!

We had a lot of fun making these at the Ladies Day Out and I think they could be cute table setting decorations for Easter as well.  I have been playing around with a lot of my new to me supplies and will have quite a bit to share with you soon!  Spring Break is almost here and I have big plans to get a lot of scrapbooking completed and lots of other creative things accomplished too!

Well, I better get hopping back to work! Thanks so much for stopping by!

Project Recipe: Paper-whisper white, Accessories-2 1/2" and 1 3/4" circle punches, small oval punch, circle treat cups, white pompoms

Sunday, March 15, 2015

Anything But a Card Challenge 45-Green with Envy

Hello and happy Ides of March!! " Et tu, Brute?" (My high school lit teacher would be so proud that I remembered this!) It is time for Week 3 of the Green with Envy challenge at Anything But a Card.    The team has shared some wonderful versions of green and envy, and we would love to see what makes you go green!  I have to say that this challenge stretched my mind creatively (happens quite a bit with these amazing ladies!) since I really couldn't come up with anything for 'envy' and while I like green, it's not my 'go to' color.  So I went to my trusty Pinterest search box to see if something there would inspire me.

If you want to be completely overwhelmed and wowed at the same time, try typing in 'green art' in the Pinterest search box!  There were a lot of amazing creations, but this one really caught my eye!


It's made from glass bottle bottoms!! Isn't it fantastic?!  Now, I am nowhere near skilled in glasswork.  I would either shatter the pieces or slice off a finger in the process!  I did like all of the varied shades of green and the round shapes.  I also knew I had a lot of green scraps that could create a similar design.  I decided to make a scrapbook page, using the greens to make a background pattern.  I set out with all of my circle and scallop punches and a bunch of green papers. *Bragging moment- I did not cut any whole sheets of paper for my page!  Everything was scraps, except for the green base!*

After punching a lot of shapes, I started to lay out my pattern, and this is where it all went downhill fast.  I was totally stressed out over their placement.  First, too many of the same size, then the same color, then colors that didn't look great together.  Grr...  So I took a break, made lunch, and did a load of laundry, and during these tedious jobs a thought struck me.  This is supposed to be fun and I'm not having fun.  I'm choosing laundry over creating...  So I went back to the pile of circles and reminded myself that art is process not product.  Rather than attempting to lay out the entire page, I started in a corner and worked my way out.  Interestingly enough, it became easier once I was committed to complete what was already glued down!


To add interest, some of my circles went off the page and were trimmed.  I then reused the cut off pieces to fill in other edges.  Truly a 'scrap'py page!  The photo I added was from a craft day that my daughter's Girl Scout troop sponsored, so all of the green ended up being quite appropriate for the scouting page.

I hope you will join us with your green with envy creation!  We would love to see what you do with the challenge!  It's a great way to celebrate St. Patrick's day too!

Page Recipe: papers of almost every shade and pattern of green, various circle and scallop circle punches, perfect polka dots embossing folder


Tuesday, March 10, 2015

Happy Easter Bunny

Hello! I am so glad you stopped by today!  I have a fun little card to share with you that I made during one of our most recent snow days.  I am not normally prone to purchasing Easter stamps since they aren't as versatile for other purposes, but the Happy Easter Bunny stamp from the Occasions catalog was just too cute!  Plus, it has absolutely nothing to do with snow and freezing cold weather, so it was a pleasant change from my current view...

I paired the sweet bunny with the Painted Blooms DSP (also from Occasions) because this spotty paper reminded me of dyed eggs.  It was fun to color the image as I watched movies with my girls.


When I finished putting all of the layers together, the card looked like it still needed something.  So I pulled out some retired wild wasabi ribbon to make a bow.  I really wish I had moved the oval up a little so the bow would be under the image, but it was already glued down and I didn't want to tear up the card.  

I can't believe that in a few short weeks, Easter will be here!  Where has the time gone?! Not that I am complaining that spring is on its way!!!!! Bring it on!  I am just hoping that I will be ready when the time comes!  

Thanks so much for visiting today and have a marvelous day!

Card Recipe: Paper-daffodil delight, whisper white, Painted Blooms DSP, Ink-memento tuxedo black, wild wasabi, rose red, blackberry bliss, soft sky, blushing bride, pacific point, Stamp Set-Happy Easter Bunny, Accessories-oval framelits, wild wasabi stitched ribbon


Saturday, March 7, 2015

School Fundraisers aka Shopping Without Guilt!

I don't normally share posts like this, but right now I am helping our school's special needs teachers raise money for Hands In Autism.  If you would like to help us out and support your creative habit at the same time, please go to the Stampin' UP website and place an order.  When you get to the check out, enter Hostess Code WND67AWZ, and the proceeds from your purchase will help cover the costs of their training.  I will close ordering for the fundraiser on Friday, March 13th.

Don't forget that this month is Sale-A-Bration too!  Every order of $50 receives a free item from the list of SAB items!!

Friday, March 6, 2015

Flashback Friday- Ladies Day Goodies

Hello! I am back again with another Flashback Friday, and I'm so glad you stopped in to visit!  I really need to get back to regular postings on Fridays.  It encourages me to use my older goodies to create something new, and occasionally even makes a dent in my mountain of paper!

I was so happy on Monday that the temperatures were finally above freezing and all of the snow was melting away.  We even had rain on Tuesday to wash all of the dirty grimy stuff off of the roads!  But apparently winter is not quite ready to give up yet because I woke up Wednesday morning to a school cancellation because we were expecting rain turning to sleet turning to snow.  I was really hoping the weather people were wrong and I would have a day off without all of the nasty weather.  No Such Luck!  It was raining when I woke up and by 10 it had already started to shower little pellets of ice.  By the time DH left for work that evening, we had over 6 inches of snow on the ground... Yuck!

On a more positive note, the snow day did give me a chance to work on some things for an upcoming fundraiser I am participating in at our school.  Two of our teachers are raising money to attend a training on autism and are hosting a Ladies Day Out.  Lots of different vendors, including me, and some of our students made things to sell in their booth.  I've never participated in an event like this and am not quite sure what might possibly sell besides the wonderful Stampin' UP items from the catalog.  I made a lot of cards with the thought that if they don't sell I can still use them, and I also made a few little Easter goodies.  I will also have a fun little 'make and take' that I will share with you next week.

Today's creation is a little treat holder.  I found the cutest mini Uno and Apples to Apples games at Wal-Mart in the Easter section, and I made little folders to pretty them up a little.

The folder measures 2 1/2 x 2 1/2, so you can 
have some idea of how little the card sets are!


My base is 2 1/2 x 5 1/2.  I scored the base at 2 1/2 and 3.  Then I used some retired DSP and added the cute little bunny from Tags So Much!  Hopefully, some other people will think these are as cute as I do!

I will try to post more of my creations in the following week, and I hope I can share that the event was a huge success!  Have a wonderful weekend!

Project Recipe: Paper-pistachio pudding, crisp cantaloupe, pool party, whisper white, Sweet Sorbet DSP (ret), Stamp Set-Tags So Much (ret), Ink-memento tuxedo black, pistachio pudding, crisp cantaloupe,pool party,blushing bride,  Accessories-1 3/4" circle punch, decorative label punch 


Friday, February 27, 2015

Flashback Friday- Hoping for Spring

Hello! I can not tell you how excited I am to be sharing a Flashback card with you!  I have not been feeling very creative or motivated lately, but today's card was one that kind of came together on it's own and I'm feeling hopeful that my muse hasn't completely left me!

Springtime Vintage might be one of my all time favorite papers.  It reminds me of fabric and I love the delicate floral patterns. Plus it has 'spring' in the name-just what I need right now! 


My card is very simple, but I loved the way the papers came together to remind me of a quilt.  So naturally they got 'quilted' with the fancy fan embossing folder.  There ended up being a few more retired items on here than originally planned and that is always a good thing in my book!

This week has been cold once again, and I'm calling this 'the winter that came late and stayed...forever'.  Please, please, March, come in like a lamb!!!!!  I guess no matter what the weather decides to do, I will still be here and I hope you'll come back to visit me, and if you can bring some sunshine and warmer temperatures with you, I would greatly appreciate it!

Card Recipe: Flashback Items (all retired)-Springtime Vintage dsp, Baja breeze ink, Baja breeze seam binding, vintage flowers, Stamp Set-Remembering Your Birthday, Paper-very vanilla, Accessories-MS leaf punch, fancy fan embossing folder

Monday, February 23, 2015

Lamps and Mushrooms

What?! Lamps and Mushrooms????  If you are confused or a little intrigued, it's OK.  Apparently, my muse thought it would be funny to mess with me and confuse my kids.

My card started out with a really cute mushroom stamp that was part of a set gifted to me by Audrey.  I thought the daisy paper from Floral District (ret) would be a fun paper to pair with the stamp.  So I set out to make my card.  I had the orange and yellow fungi stamped on whisper white cs and punched them out to put on the daisy paper.  It needed a little more 'ooomph' to make them stand out so I cut another strip of daisy paper, added a strip of daffodil delight, and placed the mushrooms on there.  When I finished the cards the mushrooms looked a little blah, so I added orange and yellow glitter glue.  As they were off to the side drying, DD #2 asked why I put lamps on a birthday card.  DD#1 added that it would be cute to add "Shine bright on your birthday."  Umm... They're MUSHROOMS! oooohhh... "Happy birthday to a 'fungi'?"  (at this point I did laugh because it occurred to me that they were every bit as creatively warped as their mother, but still!)

So now I have a lamp/mushroom card and while I think it's kinda cute and sparkly, I have no clue what to put inside.  Thoughts??


Unfortunately, this is not the only mishap my muse created this week.  There was also a single layer birthday card that looked amazing in my head that was an absolute disaster on paper-still not sure if it can be saved or if it's destined for the trash.  I guess that is what happens when I don't exercise my brain enough; it rebels.  The extremely cold and nasty weather is not helping much either.  I am so ready for spring that I might just jack up the thermostat and slip on my flip flops anyway!

At any rate, I did make a few things and that is always good, even if it doesn't turn out well.  A bad day creating is still much better than a good day doing housework (or at least that's what I've heard. I've never really had a good day doing housework!).  

Thanks so much for stopping by and if you have any suggestions for my mushroom/lamp card, I would love to hear them!

Card Recipe: Paper-whisper white, daffodil delight, Floral District dsp (ret), Ink-tangerine tango, daffodil delight, Stamp Sets- Remembering Your Birthday and gift from Audrey, Accessories- orange and yellow glitter glue, circle framelit

Wednesday, February 18, 2015

A super simple card

Hello! I am so glad you stopped by to visit!  Today, I am sharing a card I made on Valentines Day.  It was cold, windy, and a little snowy, which seems to be the weather that puts me in the mood for creating.  Not much else to do, right?

This just might be the most basic card I have ever made!  I was trying to come up with ideas for birthday cards and was going through the new to me things that were still sitting on my table waiting to be used.  I bought the Happy Heart embossing folder thinking it would be so cute for Valentines.  Needless to say, I did not make Valentines...  It is always so strange to me that I will set out to make one thing and my supplies tend to pull me in a completely different direction.  I also need some Anniversary cards and thought the hearts would be pretty for the background.  I embossed and sanded some primrose petals core'dinations paper (retired...) and went through some papers and embellishments trying to decide my next step.  In the end, I opted to leave the background as the main panel.  The layered sentiment became my focal point and I found that I really, really liked how simple and uncluttered it was.


Speaking of uncluttered, this is definitely not to be said about my home at the moment!  January started out being a pretty good month for cleaning and organizing, but February is not following the pattern!  I am beginning to think that for every bag full of items going out in January, two managed to take its place in February...  Add to this the kids having the day off of school for President's Day and two snow days...  I am thinking that my spring break next month will be spent cleaning instead of playing.  Yuck!

Thank you so much for visiting and I hope you will come back again soon.  I'm trying to post at least once a week, so hopefully, there will be something new to enjoy next time!  Have a marvelous day!

Card Recipe:  Paper-very vanilla, basic gray, primrose petals core'dinations, Stamp Set-Teeny Tiny Wishes, Ink-basic gray, Accessories-Happy Heart ef, word window punch, modern label punch