Wednesday, December 25, 2013

A Season of Peace

Hello!  Today I am celebrating Christmas with my family, but I wanted to take a minute to thank everyone who stops by my blog!  I have met some wonderful people through 'blogland' and received a lot of marvelous inspiration from all of you!  It is so nice that in our technological world, we still manage to make real connections with people.  I have learned about different traditions around the world and have found that for all of our differences, we really have a lot more in common than one would think.  So as I gather with my family to celebrate the coming of Jesus, I will give thanks for the blessings I have received through our friendships.

I wish my fellow celebrants a very merry Christmas, and I wish everyone a wonderful season of peace and love!  May 2014 bring you happiness and joy, and may we all find peace in the new year.

I will leave you with a photo I took several years ago at our church...  For me, Christmas isn't Christmas until I've had a chance to meditate on what truly happened so long ago and how He continues to bless my family every day.
 
Merry Christmas and Happy Holidays!

Tuesday, December 24, 2013

What day is it? Accomplishments are abounding!

Hello! I am so glad you stopped by to visit.  Today is Christmas Eve and I am happy to say that my list is pretty well completed.  I still need to find a box for one of my gifts, but that celebration isn't until Sunday, so I have a little time to find the right size.  I've been so busy that my blog has been completely neglected, and I thought this would be a good time to catch up.

Rather than trying to match up days with blog posts and sounding like a really bad version of the 12 days of Christmas, I will just share a few photos of the things that have been consuming my time.

Cookie Day was very successful.  We made
10 different kinds of cookies in one afternoon
and most of them have been given as gifts already.

My girls helped in the making of Santa and 
Grinch bottles for their religion and school 
teachers.  I stole these ideas from Pinterest.

St. Nick brought the girls a Charlie Brown
gingerbread village kit.  We spent an afternoon
putting these together and the girls had a lot of
fun decorating the houses.


We also mailed Christmas cards, finished shopping and wrapping, attended a bridal shower, and made another batch of chocolate chip cookies since the others were gone.  Of course, one of our favorite activities was picking a Christmas movie to watch each evening before we went to bed.  It's a great way to see a lot of classics and everyone gets to see his or her favorite.  I suffered through the Home Alone series, but got to see White Christmas and the majority of the Santa Claus and Rudolph claymation movies.  I still have to squeeze in the Nutcracker, It's a Wonderful Life, and A Christmas Story!

Today is our church's Children's Mass and my girls will be singing in the youth choir and helping the littles during the service.  Then we will come home and enjoy our first Christmas dinner and open a few presents.Time to relax and enjoy!! 

I hope your lists are almost completed and you managed to stay on Santa's nice list!!  Have a wonderful Christmas and Happy Holidays!!
  

Sunday, December 15, 2013

Anything But a Card Week 3 of Anything Goes

Hello!  It is my turn to share a project for Anything But a Card Challenges.  Our challenge this month is Anything Goes-With a Holiday Twist.  This leaves the creativity door wide open for just about anything!  There have been a lot of wonderful holiday theme creations shared at the challenge site, but that doesn't mean you have to do that.  As a matter of fact, my share is not Christmassy at all (well there is a peek of an evergreen on there, but that's it!).


At the beginning of the challenge, I had decided I was going to get some Christmas and winter scrapbook pages finished.  Then we had a major ice storm followed by a lot of snow and after getting stuck in my driveway three times this week, I did NOT want to think about crafting anything that resembled snow or winter!  So I went in a completely different direction and made a page for my art journal.  It was quite relaxing to pull out some stamps and lots of inks and sponges. I also played with some Inka Gold metallic rub.  It's very pretty, but I need to play with it a little more.  My initial application was more streaky than I wanted, but I love the gilded look it gave my sculpey picture frame.

It hasn't been a bad week, but there have been a lot of cancellations and rescheduling of plans.  It left me feeling out of sorts and annoyed-not at all what I want be. I was debating what the message of my page should be and decided that since art is my therapy, my message should reflect what I want to achieve.  So I decided on 'enjoy the journey', a good reminder that things will happen and I can either get upset or get over it.  I don't have to like ice and below freezing temperatures, but since they're not going away any time soon, I need to enjoy my journey.  Of course, digging my car out of the driveway in the frigid air was no picnic...  Hey, I said it was therapy, not a miracle!

I hope you will find time to join us this week and please stop by the blog and leave some love for my fellow crafty peeps!!

Project Recipe:  Stamp Sets-Lovely as a Tree, World Map, Of the Earth, Wonderful Favorites, Fresh Vintage, Ink-soft suede, crumb cake, early espresso, garden green, poppy parade, very vanilla Accessories-Tim Holtz metal tag, twill ribbon, postage stamp punch, Martha Stewart clay mold, Log Cabin smooch spritz, Inka Gold metallic rub

Saturday, December 14, 2013

Day 14- The Last of the Christmas Cards!

Hello and welcome to day 14! This post celebrates two accomplishments! The first is the completion of my Christmas cards and they're all in the mail now!! The second is that as you read this, I am celebrating our family's annual cookie day.  Yes, I have the arduous task of making, baking, and tasting lots of yummy Christmas cookies! How will I manage??  This is one of my favorite Christmas activities because not only do I spend the day with my favorite ladies, we also recreate some of the recipes that have been in my family for generations.  As an added bonus, most of these cookies will be given as gifts which means I can cross that off of my list too!

My last card uses one of my favorite Christmas stamps.  I love the vintage style of Christmas Postcard and it's fun to color too!


After coloring the image, I added some cherry cobbler dazzling details and yellow glitter glue for just a bit of sparkle.

BTW- No, I did not forget how to count... Day 13 is still in the works and will be posted as soon as I finish my project and get a decent photo!

Thanks so much for stopping by today!  I'm not sure if I will continue to have daily posts since a lot of my 'to do' list is not so crafty, but I will still be popping in to share the creations I have made for gifts.  Have a wonderful weekend!

Card Recipe: Paper-chocolate chip, whisper white, Berry Bouquet DSP (ret), Stamp-Christmas Postcard, Ink-black stazon, chocolate chip, wild wasabi, so saffron, real red, cherry cobbler, Accessories-cherry cobbler seam binding, cherry cobbler dazzling details, Ovals collection framelits, yellow glitter glue

Thursday, December 12, 2013

Day 12-A Play Day!

Hello! I am so happy you stopped by to visit today!  I am happy to say I am almost finished with my Christmas cards and the envelopes are already addressed and ready to go!  The tree is up and decorated and now I'm working on decluttering the toys, movies, and closets so they are no longer overflowing.  Well, until Christmas anyway...  Sometimes I feel like I'm fighting a losing battle on this!

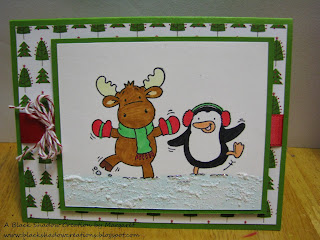
Today's cards were the end result of a play day.  During my earlier crafty cleaning day, I re-found some stamps that had never been inked before.  They are from Riley and Co. and my blog friend, Kelly, introduced me to them.  Thanks, Kelly!! I ordered a few of them and one was a freebie from Kelly's blog.  These were added to my supplies long ago and I'm just now getting around to using them... sound familiar??  I also used a really fun new product that I recently bought during a little shopping trip.
see the fluffy looking sparkly snow?  That is snow-tex
and I absolutely LOVE this stuff!  Great texture without
too much bulkiness!

Yes, I fussy cut the wreath! I also added some crystal 
effects to the ornaments and bow.

This is my DD's favorite! She loved the cute penguin
making snow angels.

I'm pretty sure my nieces and nephews will love receiving these sweet cards.

Well, I'm off to work and then home to get some cleaning done... Sounds like fun right? Wanna help?? Yeah...didn't think so...  Have a wonderful day and make some time to be crafty!

Card Recipe: Paper-gumball green, whisper white, primrose petals, Snow Festival DSP (ret), Stamp Sets-from Riley and Co., Notable Alphabet, Ink-Stazon black ink, copics, baja breeze (ret), primrose petals, Accessories-real red satin ribbon (ret), cherry cobbler bakers twine, crystal effects, Deco Art glittering snow Snow-Tex 

Wednesday, December 11, 2013

Day 11-A little something sweet

Hello! I am back again with another Christmas card.  We are having our annual family Cookie Day this weekend and I have really been in the mood for some yummy treats.  I guess that's what inspired me to pull out the gingerbread man stamp from Scentsational Season.  I remembered seeing a fun card made by Sarah-Jane last year, and did a little searching to find it.  Unfortunately, I didn't have the fabulous ribbon slides that she used, so I did a little creative searching and used one of the antique brads instead.


I think this is quite a cute card and now I am really making myself hungry for the real thing!  Of course... after a day of cookie making with my mom and sisters, I will probably be so sick from cookie dough that I won't eat too many baked cookies!

Well, I'm off to get more things finished and try to clean the house a little. Wish me luck!  Have a wonderful day and thanks so much for stopping by!

Card Recipe: Paper-crumb cake, cherry cobbler, very vanilla, Be of Good Cheer DSP (ret), Ink-crumb cake, Stamp Set-Scentsational Season, Accessories-holiday collection framelits, silver dazzling details, cherry cobbler crochet yarn (ret)

Tuesday, December 10, 2013

Day 10-Out with the old...

Hello! I can not believe that in 15 short days, we will be celebrating Christmas... How can a celebration that never changes dates sneak up on you???  Please tell me I'm not alone!

I am happy to say that I'm very close to being finished with my cards!  I am also glad that I have been using a lot of my supplies that I've had for a while.  I am really trying to commit myself to only keeping things I use or love.  Of course crafting supplies have to be replenished, but I could probably go quite a while without buying anything! So I am making an effort to use up a lot of my goodies instead of just adding to the supplies!!

Today's card uses many retired items that haven't been used in a while.  I pretty much CASEd this card from France Martin.  I saw her card a LONG time ago and saved the photo to my computer (prePinterest days...), but didn't save the actual link to her blog post.  But I still wanted to give her credit since I loved her card so much!  I used corduroy brads where she used bakers twine and jingle bells, and the background embossing & DSP is different, but otherwise it's almost exactly like hers.


I really enjoyed breaking out the red glimmer paper again and I LOVE those brads-so sad they're no longer available...but I parted with some all the same.  I also forgot how fussy those bits of stocking are to handle.  I may have muttered a few choice words as I tried to glue them perfectly to the glimmer paper...  But in the end, it really is a pretty, sparkly card!

I have some major Christmas shopping to do this week and I'm hoping to have most of it done by the weekend.  I would love to have everything wrapped and ready by next week, but I'm not sure that will happen! Gotta be realistic...

I am so glad you stopped by and I really appreciate my blog friends that leave such wonderful comments.  It makes my day even happier!  I hope you have a wonderful day and find some time amid the busyness to do something fun!

Card Recipe: Paper-whisper white, ruby red (ret), baja breeze (ret), old olive, red glimmer paper, Holiday Treasures DSP (ret), Accessories-1 3/8" circle punch, large scallop punch, stocking builder punch (ret), baja breeze corduroy buttons (ret), snowburst embossing folder (ret), dazzling details

Monday, December 9, 2013

Day 9- Birthdays and Hairballs...

I am so excited that I am actually on Day 9 of Accomplishments!!  This has really helped me 'make' time to create and get some of the handmade items ready for Christmas!  But today's card is actually a birthday card.  I didn't really need a birthday card right now, but while cleaning up my crafting space (which REALLY needed to be done), I came across a small piece of watercolor paper.  Rather than set it aside for a later date, I decided to use it.  I hadn't used the stamp set Giggle Greetings yet, and thought the cat would be fun to use.  I did end up using some Christmas paper, so my stack is a little smaller now!


 a shot of the inside, nothing fancy, but love the sentiment!

I would love to say that I watercolored the entire thing, but actually only the cat was colored.  The sky and grass are actually pastels.  They just seem to work better for me.  I need to practice a little more with the whole watercoloring experience...

Well, we have another snow day today, so I am hoping to get my decorating done.  We still don't have our tree up... I'll let you know how that goes!  Have a wonderful day and thanks so much for stopping by today!

Card Recipe:  Paper-ruby red (ret), baja breeze (ret), Holiday Treasures DSP(ret), watercolor paper, whisper white, Ink-basic black marker, chocolate chip, pastels, Stamp Set-Giggle Greetings, Accessories-baja breeze seam binding (ret), blender pens

Sunday, December 8, 2013

Day 8-Cozy Christmas Card

Hi!  I am so glad you stopped by today!  I have been stuck in my cozy home for the past two days due to the snow and ice.  So what is a crafty girl to do?  Why, make things of course!  And since it's so frigid outside, I decided to make a warm and cozy Christmas card.  I saw a card on Pinterest that used the postage stamp punch and it reminded me of a quilt.  So I pulled out some of my retired Christmas paper and got busy making my own version of a Christmas quilt card.


This came together fairly quickly once I decided which patterns to place where!  I ended up with four of these to add to my pile.  So I'm a little closer to crossing another thing off of my list!

As you know, we had quite a winter storm starting Thursday night that continued through Friday.  I'm beginning to wonder if we will have school tomorrow... The roads are still really slick and I know many of the rural roads haven't been cleared yet.  I might have another day to play...

Thanks so much for visiting and I hope you have a most wonderful week!

Card Recipe: Paper-real red, soft suede, whisper white, Christmas Cocoa (ret), Ink-soft suede, Stamp Set- from a Paper Pumpkin kit, Accessories-postage stamp punch

Saturday, December 7, 2013

Day 7 of Accomplishments-A Little Organization Never Hurt Anyone!

Hello!  Welcome to day number 7 of the 25 Days of Accomplishment!  As we speak, I am in the middle of a winter wonderland...well...winter anyway!  We had several layers of freezing rain followed by several inches of snow yesterday.  Although I really didn't want one, we had a snow day from school.  The girls played in the snow while I made some Christmas cards and did a little cleaning.  Needless to say, I am staying safely inside my home for the weekend!

Today's item is not crafty per se, but it will help me out next weekend during our annual cookie baking day!  Usually I'm scrambling at the last minute trying to decide which cookies to make and rushing off to the store to get the ingredients.  But this year, I have my list of cookies a week in advance and I'm shopping for the ingredients as soon as the roads are cleared!  How's that for being organized?!

Since I don't really have a picture to share with you, I thought I would share a photo of the party favors from my nephew's fiancee's shower.  My sister made these and I thought they were so pretty!


She even found silver and purple M&Ms to coordinate! I am happy to say that we also finished the thank you cards for the wedding, so now my work is done until after the big day.  Then I have some scrapbooking to do... But that's AFTER Christmas!

I hope you are having a wonderful weekend and that all of your holiday planning is going well!  Thanks so much for visiting today!

Friday, December 6, 2013

Day 6- Another Dishing Divas Meeting and some pretties

Hello! I'm so glad you stopped by to celebrate the 6th Day of Accomplishments!  I'm slowly getting things finished as we prepare for Christmas and a few other special occasions this month!  Our family must have managed to stay under St. Nick's 'naughty' radar, because we woke this morning to find some yummy chocolates and candies in our stockings! Phew!! I'm beginning to think he grades on a curve and we manage to fall within the 'pretty good' section...either that or he's just very forgiving!

Monday was our monthly Dishing Divas meeting where we sample yummy food, make a few crafts, and at the end of this club, we will receive a hard bound recipe book of all of the delicious meals.  This month, I was in charge of creating two main dishes.  There really aren't any boundaries of what we make as long as it's fairly easy to put together.  I  decided to make one of my tried and true quick dishes and also tried out a new recipe from Pinterest.  Pizza Bake is one of my families favorite meals and I love that it takes very little time to put it together and then it goes into the oven to bake.  Taco Pizza was a new one for me, but it was also super easy and pretty tasty too.  I think I will add a few more toppings when I make it next time.

After we ate, my upline Tiffany, had the crafts ready for us.  We made a country style ornament that was so cute, and a fun little treat bag with a few chocolates inside.  As much as I loved the ornament, I am going to change this one up a bit.  On the drive home I was debating if I really wanted all of that fabulous burlap ribbon stuck inside the ornament or if I wanted to pull it back out and reuse it on something else.  Then I started imagining what could go in its place.  You will have to stay tuned to see how that turned out!

The ornament-Isn't that ribbon pretty?


The cute little treat bag...


If you are interested in the recipe for the Taco Pizza, go here.  My Pizza Bake is an old Pampered Chef recipe, and honestly, I haven't looked at it in ages, so my measurements are more like suggestions than rules...

Pizza Bake
2 cans crescent rolls
1 lb. ground beef
1 tsp Italian seasoning
1 tsp garlic powder or 2 cloves minced fresh garlic
1 small jar pizza sauce
1/2 c. shredded Cheddar cheese
1 c. shredded Mozzarella cheese

Preheat oven to 350*.  Brown the ground beef in a skillet, adding Italian seasoning and garlic when beef is almost done.  Drain any grease from the beef.  In a 9x13 pan, roll out one can of crescent rolls, covering the bottom of the pan. Spread the ground beef over the crescent rolls, cover with pizza sauce, and sprinkle cheeses over the top.  Roll out the second can of crescent rolls and completely cover the cheese with them.  Bake 25-30 minutes or until crescent rolls on top are a golden brown.

Well, that's it for me today! I hope you have a wonderful weekend and that you are able to accomplish things that make you happy!

Thursday, December 5, 2013

Day 5 of Accomplishments-Two birds with one stone...

No, I didn't kill the proverbial turtle doves... but I did manage to add two Christmas cards to my stash AND help DD#1 complete her demonstration speech.

DD had to give a demonstration speech at school. No problem right?  Well... no food of any kind, no live animals, and make it original... EASY...  Well, after a little thought we came up with the idea of her showing how to make a card.  After all, that is something she knows how to do very well and we wouldn't even need to run to the store for supplies.  So we went through some of my cards to find one she liked-no luck, but a quick scan through my photo album of completed projects turned up a pretty easy card for her to share with the class.  We worked together to create the first one and then she prepared the supplies for the demo card.  I am proud to say that she received an A on her speech and she was the only one to ever demonstrate how to make a card!

Apologies on the shadowy dark photos... I was working under the gun to get these downloaded before I went to bed last night.

Here is my version:


And the Grade A card created by DD:


Well, I'm off to dig out our stockings.  St. Nick comes tonight!! Maybe he'll bring me some craft supplies!! I hope that your holiday preparations are going well and that you are finding plenty of time to be creative! Have a fabulous day!

Card Recipe: Paper-real red, crumb cake, chocolate chip, Stamp Sets-Teeny Tiny Wishes, Ink-chocolate chip, Accessories-top note die, assorted ribbon scraps

Wednesday, December 4, 2013

Not a Scrooge, but quite stingy all the same! -Day 4

Hello! So glad you're here!  As promised, I've got something I checked off of my list today!  I'm still in desperate need of Christmas cards, and today I am sharing a card I made with the newest Paper Pumpkin kit.  It has the most wonderful star garland and the directions called for wrapping the garland around the tag three times.  Three times????  But that means that a lot of that gorgeous garland will be hidden behind the tag!!  Can't have that!  So being my frugal self, I trimmed the garland into two shorter strips and managed to make four cards and still have lots of that pretty garland left for another project! SCORE!  I have decided that while this could be viewed as slightly stingy, I am definitely not a scrooge since it is a Merry Christmas card...  Maybe we'll just change stingy to frugal and then it's not a bad thing at all!  Yes...let's do that instead...

Enough of my silly banter!  Here is the card-


I have to admit that the stripes gave me a little vertigo until I had the large tag attached, but I think it's quite festive!  This kit made four wonderful cards, so now I'm a little closer to being finished with my cards!

Well, I'm off to work on more Christmas preparations!  I hope you are having a wonderful week and find some time to do something crafty as well!

Tuesday, December 3, 2013

Day 3 of the 25 Days of Accomplishments-Ornaments!

Once again, this post is also a bit of a cheat as we actually had them completed by Thanksgiving.  Tomorrow will begin the actual crossing things off the list!

Today's project features the artwork of DD#2 and once again DH was roped into helping us!  This time he was the master of the white spray paint!  And such a fine paint job too!!


We actually got the bottle caps from my dad's sister, so we owe her an ornament too!  DH painted the caps white, but the gold coloring kept bleeding through, so he ended up spraying these THREE times- the first coat that didn't take, the primer coat, and the final coat, and then we added the spray glitter!  I am so glad this was all completed in his shop and not my kitchen!!!!  He was actually very pleasant about the whole process and even gave us a thumbs up on the finished ornaments!  I cut the green ribbon and tied a loop using bakers twine, then DD#2 glued the bottle caps to the ribbon and let them dry.  The next day the faces and buttons were made using acrylics, and the snazzy red ribbon was added as a lovely scarf!  I know you can't tell from the photo, but these are absolutely SPARKLY!!!

I hope you have enjoyed seeing my girls ornaments and maybe they inspired you to make your own tree decorations this year!  I'll be back tomorrow with another project.

Project Recipe: bottle caps, satin white spray paint, glitter blast glitter spray, acrylics, gumball green ribbon, real red stitched ribbon

Monday, December 2, 2013

She's makin' a list and checkin' it twice...

No, I'm not disputing that Santa is a dude...  I'm referring to myself and my dire need to stay on top of things as we go into a very busy month!  While I don't usually stress too much about Christmas (things always have a way of working out), this year is a little different.  Not only is my nephew is getting married on the 28th, but I just received an invitation to a shower for my niece who is getting married next Feb.  Guess when her shower is?  December 15th...  So now my already busy schedule just got a little busier!

I decided that this would be a good year to try something new, so I am going to try to post something new every day this month.  At first I was debating whether this would add to my already long list, but I'm hoping that knowing I have to post something will help me stay on task with the homemade items that need to be finished on time.  Wish me luck!

Since I already posted yesterday without even thinking about this, today is officially Day 2 of my countdown.  Maybe I shouldn't call it a countdown... too much pressure in that name!  How about the 25 Days of Accomplishment? Now that has a very positive sound!!

So here is today's item (and I'm cheating a little) that was actually finished before Thanksgiving.  Every year my mom, her sisters, and all of the offspring get together for dinner.  It is quite a large crowd now and we love visiting cousins that we normally wouldn't get to see.  We also do a Sneaky Santa ornament exchange.  Many of you already know that my girls started a tradition several years ago of making their own ornaments for the exchange.  The Aunts love seeing what they have made for each year and the occasional battle for the handmade has been known to occur.  Last year we actually recreated an ornament for each aunt so no one would feel left out!

DD#1 did a scan on Pinterest and knew immediately what she wanted to make.  Fortunately, I had almost everything we would need.  Only thing missing was the 'canvas', but during our girls day out, we found just the right things at a 'pickers' store.

the blank canvas that turned into...

snow women spoon ornaments!


This actually turned into something of a family project. DH, who usually runs and hides when we get crafty, didn't make his getaway fast enough!  We asked him if he had any tools we could use to bend the handles. I knew that he would rather do this himself than allow us to play with his 'toys' and it would probably be easier to do it than to explain how to do it.  He did a fabulous job!  In an effort to speed the process, I made the felt hats as DD painted the spoons.  She did add the chalk to the edge to make it stand out more and glued them to the spoon to keep them from slipping off.  Over all I think she was quite pleased with the end results!  Now we just have to make a few more for Grandma and DD's two aunts, and me of course!

I will be back tomorrow with DD#2's ornaments!  Have a wonderful day!

Project recipe:  old spoons, assorted acrylic paints, black felt, brights buttons, white bakers twine, white pastel

Sunday, December 1, 2013

Blending the old with the new!

Hello! I am so glad you stopped by to visit!  December crept up on me and now I'm in a semi rushed state trying to get all of my projects completed on time!  Good thing I had a jump start on my cards!

Today's card features a stamp set I've had for quite a while and it is still one of my favorites!  I gave this set a modern twist with some new paper and accessories from the SU Holiday catalog...


I love the silver and blue combination that seems to be so popular this year, and the papers in Winter Frost are gorgeous!  I paired the paper with the pretty silver ribbon layered on top of some pool party seam binding.  After I finished my card, I realized that pool party was not the blue in the DSP, but it went beautifully anyway so I left everything as is!

Our family survived two food filled days of Thanksgiving and now we are in full mode for Christmas!  Hopefully all of the decorating and cookie baking will keep me focused on the Christmas cards that I really need to finish!  Wish me luck!  

Thanks so much for stopping by and I hope you have a marvelous and crafty day!

Card Recipe:  Paper-Winter Frost paper stack, Island Indigo, Pool Party, Whisper White, Ink-Island Indigo, Encore Silver, Stamp Set-Miracle of Christmas, Accessories-large oval punch, decorative label punch, pool party seam binding, 1/8" silver ribbon, rhinestones

Thursday, November 28, 2013

Sometimes thankful is not as easy as you might think...

**Warning-This post is not crafty or artsy at all, just some ramblings of a happy crafter**

Happy Thanksgiving to all my fellow Americans celebrating this wonderful day of family, food, and gratitude!

Every year after Halloween, I start mentally counting the days  until my favorite of all holidays arrives.  As much as this day is about the fantastic food, that we eat way too much of, and the happiness of having most of my family together, this is not why Thanksgiving has such a special place in my heart.

When I was younger, I LOVED Christmas.  Couldn't wait for the excitement of opening gifts and seeing if I got what I wanted.  Thanksgiving was not quite as special.  I actually volunteered to work on Thanksgiving when I was in high school...  But at some point I realized that while I still loved the spirit of Christmas and the religious celebration, most of December had become a crazy, stressed out time for me, and I actually found myself one year, wishing Christmas was over.  I think that next year started my love of Thanksgiving.  There really aren't a lot of requirements and expectations for this day.  Yes, the food can be important, but really, I don't ever remember a year that I thought "If only Aunt Sally (pseudo aunt) had made a few more pies...", or " I can't believe Cousin Bob (pseudo cousin) brought green beans. I wanted corn..."  It just seems to be a day that we all do our part and then just hang out and really take some time to 'be'.

As I add more Thanksgivings to my memory banks, I find it interesting that the things I'm thankful for have also changed over the years.  I will always be thankful for my family and their health, having a home and plenty of food, and knowing that I am blessed with wonderful friends and family to support me, but I seem to find a new little something to add to that general list each year.

This year's thankful thought struck me in somewhat of an unusual place-the parking lot of the school.  My girls have to be at school half an hour before I do, so I often sit in my car in the parking lot and read, pray, meditate, or just enjoy the silence.  I had been contemplating my recent job change and how I still kind of feel like I'm finding my way.  I enjoy my job and like my co-workers, but I keep thinking I should have this whole feeling of contentment and idea of being happily settled, that just isn't there yet.  During this musing, a person got out of his vehicle and walked into the building.  This is a person who I try to avoid, not because of a personal dislike, but because this person complains... a lot... like every time I can count on hearing about how bad this is, or that is, or the government did this, or so-and-so wastes money on that..., he should be paid more to do his job while others should be paid less to do theirs...  I really don't hate him, but I dislike how 'down' I feel after I talk with him.  But I digress.

 My gut reaction to seeing this person was an eye roll and wondering what was going to be the complaint of the day.  Yes, I am far from perfect... But, this was immediately followed by the thought that I was quite blessed to be as happy as I am.  Now this where it gets a bit ironic because this guy's home is much nicer and larger than mine, his vehicle is more expensive and newer, and I know their family has more money as well.  But there I sat in my 'finally' paid off used car thinking how much luckier I am than that person because I can see the joy in my life.

I like my job and all of those moments when I feel like I'm contributing something of value, even if my paycheck would make most people laugh.  I may not get paid what I'm 'worth', but I really do feel that the rewards are as good as money most days, and my job allows me time with my girls (who will be grown and gone before I know it).  I enjoy those moments when a student who has been struggling finally 'gets it' and wants to rush to me for a high five, or puffs out his chest in pride over an improved grade.  I even love the times when my own kids are shrieking and squealing when I'm trying to focus or relax.  They are my reminders of why I'm here and sometimes being in that moment is more important that any other time in the world.  I can also be thankful that even though our country is far from ideal, it is still a pretty awesome place, and I can be a part of trying to make it better for myself, my children, and my children's children.

So while my morning had started out wondering if I was still on the right path, the sight of one grumpy person made me realize that I have a lot to be thankful for and that while my life might not be all that I expected, it's still a really good life, and I have a grouch to thank for that!  Quite fitting somehow...

Whether you are celebrating  today with me or just popping by, I hope your day is filled with happiness and thankful thoughts for all of your blessings!  Have a wonderful rest of the week!

Tuesday, November 19, 2013

A Shower Invitation

Just popping in to share one of my major projects that I've been working on.  This is the shower invitation for my nephew's fiance. My sister and I spent two hard core work sessions (translated: mostly talk, with some crafting) to get all of them done.  I didn't want to share the photo until the invites were mailed and since this is the one that I received in the mail, I'm assuming it's safe!


We went with something simple since we were making quite a few of these, but also wanted them to be elegant.  The embossing folder made this so easy!  We even resorted to child labor and made my girls add the dazzling details to the centers!!  While I really like this design, I am glad they are finished.  I'm really not cut out for the whole mass production business!

Thanks so much for stopping by and happy crafting!

Card Recipe: Paper-elegant eggplant, whisper white, Ink-elegant eggplant, Accessories-silver dazzling details, non SU stamp, elegant bouquet embossing folder


Sunday, November 17, 2013

Anything But a Card Challenges #29-Fall into Fall

Hello! It's my turn to share a project for our current theme, Fall into Fall, at Anything But a Card Challenges.  I decided to make a scrapbook page holding photos of my favorite girls playing in the leaves.


I used an old Page Maps sketch for my inspiration.  I wanted to use brown as my primary color, but didn't want the whole page to blend in too much, so I chose an orange base and worked in a few accent colors too.  After I added the punched lace ribbon border, I thought it needed a little something to make it stand out a bit more.  So I colored some basic rhinestones with a pretty blue sharpie and voila!  I really like how the page turned out and I even managed to squeeze a ribbon flower on there! The leaves were some spares that were left from a different project, so I added more mustard ink to them so the colors worked with the page.

the ribbon flower (love making these)

the sharpie colored rhinestones-they really are shiny in person...

I hope you enjoyed my page and I would love to see you link up with us!  There are some wonderful projects to be view too!  Have a wonderful week!

Page Recipe:  Paper- orange base from stash, Orchard Harvest DSP (ret), early espresso, more mustard (ret), daffodil delight, Ink-crumb cake, early espresso, more mustard (ret), blue sharpie, Accessories-autumn accents die, woodgrain embossing folder, jumbo sticky rounds, island indigo ruffled ribbon (ret), lace ribbon border punch, orange alphabet stickers from stash

Friday, November 15, 2013

Flashback Friday- More Christmas Cards!!

I'm baaaaack! With another Christmas card!!! Shut the front door!  I also used lots of retired goodies- the only current items are some of the inks, and the chocolate chip and whisper white paper! Woo! Hoo!

Because the striped paper was pretty busy, I decided to keep the design simple.  It went together so quickly, I made four of them! Now I have four more cards to add to my stash!!


I'm surprised I didn't have to blow some dust from the stamp set!  I haven't used it in ages, but I really love it!  Such a simple image to work with.

Well, I'm trying to get my laundry done so I can go to a local arts and crafts festival tomorrow.  This is our traditional girls day with my mom and sisters, but one of my sisters won't be with us.  She somehow got this crazy idea that it would be more fun to take a cruise to the Bahamas with her husband instead of shopping with her favorite little sister... What was she thinking???  I'm hoping to score some fabulous crafting goodies and old postcards so I can rub her nose in it show her my purchases. Wish me luck!!

I hope your weekend is super fabulous and filled with inky, crafty, goodness too!

Card Recipe: Paper-Holiday Treasures DSP (ret), ruby red (ret), chocolate chip, whisper white, Stamp Set-Sidekick Sayings, Ink- stazon black, chocolate chip, old olive, ruby red (ret), summer starfruit, Accessories-chocolate chip ribbon (ret)

Tuesday, November 12, 2013

A Girls Night Out with the Dishing Divas

Hi! I am so glad you stopped by and hope that your week is going wonderfully so far!  I don't know about you, but I'm counting the days until Thanksgiving!  I love getting together with my family and oh... the FOOD!!  I am so blessed to belong to two families of wonderful cooks!  Now if only I was blessed with a lot of willpower to keep from eating too much!

While I'm on the yummy food trail, I thought I would share a fun new group I've joined.  My Stampin' Up upline, Tiffany, started a food and crafting club called the Dishing Divas.  Every month, we sample four different one dish meals and make a few crafty things.  At the end of the club meetings, we will receive a hard bound cookbook containing all of our yummy recipes.  We had our first meeting two weeks ago and the food was fabulous! We had taco soup, pasta salad, lasagne, and enchiladas. Next month, I will be in charge of two dishes and I have no idea what I will be making... Any suggestions??

Our craft projects were pretty simple since several of the ladies don't normally do paper crafting, but sometimes simple is a great thing!  We made a cute gift tag to attach to the bow on one of Stampin' UPs kraft boxes (perfect for a little gift), and I love the CAS elegance of the one layer card!


It was a wonderful evening and I met some new people who share the love of good food.  I hope my meals measure up!

I'm sorry that I don't have a 'recipe' for the projects, but we used a new acrylic stamp set, whose name has escaped me, and the gift tag is from a kit in the Holiday catalog.

Have a great day and happy crafting!!

Saturday, November 9, 2013

Flashback Friday (on a Saturday night) -Still trying to get a jump start...

Hello! I am so glad you stopped by and I'm even happier that I actually had a little time to get online and post something for you to see!  I am amazed at how quickly time can pass lately.  Normally, I'm online every evening and catching up on things, but it has been several days since I've even gone online!  Things are going well with my job and our lives aren't overly crazy right now, but I still find that between work, family, and housework, there is very little time at the end of the day!  Not complaining though!!  I am however missing out on visiting my blog buddies and really want to squeeze in some time to visit everyone again!  So if I haven't been around lately, I promise I will be soon!

Many of you know that I am a true blue procrastinator and always seem to be doing everything at the last minute.  You may also remember that last year I actually had my Christmas cards completed early and was quite shocked at the extra craft time it gave me.  I also decided last year that I would make Christmas cards throughout the year so I could be finished earlier this year too. Well... let's just say that I started out with the best of intentions and then it all just kind of went out the window!  But I recently was inspired again to dig into some of my older papers and decided I REALLY needed to make a few (ha!) more Christmas cards before Dec. 25th!  So I pulled out some retired paper and ribbon, combined it with several current materials and knocked out 4 more cards!  They are all the same so I'm only sharing a photo of one.


On a noncrafty note, I've recently started doing a major overhaul of my entire home.  We are hoping to build within a year and I really want the actual move to be as painless as possible.  Our current little home is so crowded with stuff that we 'needed' when we moved here and I'm really trying to look at everything with a new perspective.  I think I've finally hit the point where I've realized that all of this stuff is not necessary and it will be so much easier to move if there is less to pack.  I even got the girls on board this week and they have gone through their closet and dresser to pull out any clothes they know they won't wear.  Now I need to make a trip to our local charity thrift store to give all of our 'stuff' a new home!  If you are looking for a great site to motivate you to organize and clean your home, Fly Lady is awesome!  She even sends you emails to remind you that you're supposed to be cleaning instead of playing on pinterest (not that I would EVER waste time on pinterest when there was housekeeping to be done...) Nope, sorry...couldn't keep a straight face through that one!!  She has a great sense of humor too which helps when you're facing a messy house!

I hope you are enjoying your weekend and find some time to be crafty too!  Thanks so much for visiting!

Card Recipe:  Paper-Holiday Treasures DSP (ret), old olive, Baja breeze, ruby red, whisper white, Stamp Sets-Four Frames, That's the Ticket, Ink-chocolate chip, ruby red, Accessories-old olive scallop dots ribbon (ret), ticket duo builder punch, decorative label punch


Sunday, November 3, 2013

A new challenge at ABAC!

It's time for a new challenge at Anything But a Card Challenges!!

School is in Full Swing and Indian Summer has faded - this challenge is open theme - Please share any current project you have created, and if it's FALL themed that's perfectly OK, too! JUST REMEMBER... create anything EXCEPT a card for this challenge. ALSO - Please new projects only {no-backlinking}. :)

**A REMINDER** This Challenge will go through midnight Nov. 23rd... giving you 3 weeks to play along and ENJOY the creative process! We will share more of our Design Team's creations each Sunday to keep you inspired.

I won't be sharing until the end of the month, but don't let that stop you from checking out the fun inspiration from the team and the wonderful projects that are being linked up!  Hope you find time to play along with us!!

Wednesday, October 30, 2013

Something New

 Well, since I've received my card in the mail, I'm pretty sure it's safe to post one of the projects I've been working on.  My nephew is getting married this December and he and his future bride asked if I could make a Save the Date design for them.

Of course, I was more than happy to help!  Any reason to play!!!  I made several prototypes and then we got together one evening so they could view them and do any tweaking that needed to be done.  Their colors are silver and purple so they had a lot of options, but we finally managed to make something that they both liked.  The faces are purposely blocked to protect their privacy, but you get the idea.  I love that their 'babies' are in the photo with them!


I created this as a 4x6 project in MDS and then saved it as a jpeg so they could take it to their favorite printing service.   I really like how the printed versions turned out!

This was the first time I had ever done a commissioned project and I have to admit, it was a little daunting!  Usually I just follow my muse and make whatever appeals to me at the time.  Even when I've made cards for others, I usually have a lot of leeway on the artistic design.  It was hard for me to come up with a variety of designs that might appeal to different tastes, but in the end it worked out pretty well.  

I had to laugh when we first started and I was showing them different ideas.  Neither one of them would give me a 'like it' or 'hate it' until I finally assured them that I would not consider it a personal attack if they hated any of the options.  It was quite productive after that!

I was also amazed at the amount of money brides and grooms spend on invitations, decorations, etc!  It's quite fortunate that Alex has a very crafty mother and aunt to help create all of those special things!  As the date gets closer, I will share the shower invitations and other pretties we are making for their special day!

I hope you have a wonderful day and find some time to be crafty!! Thanks so much for stopping by!

Friday, October 25, 2013

Flashback Friday- A Collaborative Effort

Hi!  I can't believe that October is almost at an end!  It seemed like a month ago, we were getting our camper ready for the season, and now we're squeezing in our last few outings before it is stored for the winter!  Plus, Halloween will be here before I know it, and then Thanksgiving, and then GASP! Christmas!!  I'm feeling a bit panicked already!

But I didn't intend to stress you out today, I'm here to share another scrapbook page for my Flashback Friday!  My oldest took one look at the photos and exclaimed, "That is SO Shadow!"  My page title was born!  She continued to offer ideas and opinions as I worked on the page and since it's for her album, I used pretty much everything she offered.


The vibrant red base is one that I have had for a very, very long time.  It always seemed a little too red for everything.  But today, the red seemed to add another element of energy to the very energetic photo.  I am quite happy that it now has a home because I was about ready to just pitch it!  I kept the page incredibly simple and let the fun pictures of Shadow be the main attraction.  A quick dig through my stickers file turned up the vellum piece.  He really was still quite a puppy at the time the pictures were taken, only a year old!

Thanks so much for stopping by! I hope you have a wonderful weekend! Happy crafting!

Page Recipe:  Paper-red base from stash, basic black, whisper white, Stamp Set-Designer Typeset, Ink-black stazon, Accessories-vellum quote & black alphabet letters from stash

Sunday, October 20, 2013

Orange and Black Challenge at ABAC- It's My Turn!

Hello! I am so glad you're here!  We are winding down our orange and black challenge at Anything But a Card Challenges.  I hadn't shared a scrapbook layout for our challenges in quite some time, and the orange and black colors seemed so perfect for a Halloween layout.  Unfortunately, I don't currently have any Halloween pics to scrap, so I made a page that will hold a standard 4x6 photo and now I will have a page all ready to go when my photos are printed!  I don't usually do this, but I'm glad I have a bit of a jump start!


This layout is a nice mixture of some new goodies and older supplies.  The black and very vanilla colors in the Modern Medley DSP were perfect and I had so much fun playing with the splatters in the Gorgeous Grunge stamp set!  The orange base, buttons, and letter stickers were some oldies from my stash.  The letters were white and I inked them up with a little tangerine tango ink to coordinate with the buttons and paper.

I hope you have enjoyed my page and don't forget that there is still time to join us with your very own orange and black creation!  Have a wonderful week!

Page Recipe: Paper-orange from stash, very vanilla, basic black, Modern Medley DSP, Ink-
tangerine tango, stazon black, Stamp Set-Gorgeous Grunge, Punches-large scallop circle, 1 1/4 scallop circle, eyelet border, Accessories- Sweet Stitches buttons (ret)

Friday, October 18, 2013

Flashback Friday- They grow up so fast...

Hello! I'm so glad you've stopped by for another Flashback Friday, where I attempt to use up some of my older crafting supplies, and dust off those retired Stampin' Up items.  I have another scrapbook page this week.

A while back, my youngest was commenting about all of the pictures I still needed to scrapbook.  In her ever optimistic mind, she thought if I had a whole weekend for scrapbooking, I could get caught up.  Isn't that cute?!  Not that I mind the idea of locking myself away for a weekend of crafting, but I'm pretty sure that wouldn't even make a dent in the pages that need to be made.  I might be able to get all of my  printed photos scrapped, but then there are the hundreds of photos that are still on CDs that need to be printed.  Such is the life of a shutterbug...

I have managed to squeeze in quite a bit of time this month to working on pages and I'm slowly getting them finished.  Today's page has photos from 2008 and I had to smile at the sweet little faces!  They don't look quite the same 5 years later!!


I used an old sketch that I've had for ages.  I'm not even sure where it's from, but I loved the little scallop blocks for the title.  It was also nice to use some older cardstock for my base.  That pile is slowly getting smaller too!  The original sketch had die cut style flowers, but since I've loaned out my Big Shot to my sister for a project, I made ribbon flowers instead. *I never realized just how much I use the Big Shot until it wasn't here!*  Oh, and those red letters in the title?  I can not even fathom a guess as to how long I've had them.  I was a little surprised they were still sticky!

close up of the ribbon flower...

I hope you enjoyed today's post and that maybe you are inspired to catch up on your scrapbooking or use some of your older supplies.  Have a wonderful weekend and happy crafting!

Page Recipe:  Paper- yellow base from stash, whisper white, pacific point, Accessories-scallop square punch, jumbo sticky rounds, ice cream parlor ribbon (ret), really old red alphabet stickers  

Friday, October 11, 2013

Flashback Friday- Getting Inky!

Hello! I'm apologizing in advance... Today's post is a little picture heavy, but I did include some cute, furry kitten photos so I hope I'm forgiven!  As I was making some phone calls and paying bills last week, I was grumbling to myself  that I really needed to get a little more organized with all of the papers that seem to accumulate when the girls go back to school.  Sign this, send in $ for that, be sure the choir gowns are altered by the first concert, return fundraiser information now...  It is enough to drive me batty some days!  Just as I was wondering what in the world I could find that would organize and I would actually use, Shadow's big ol' Lab tail knocked a clipboard off of a shelf.  I picked it up and was going to return it to the shelf when inspiration struck.  I should have taken a before picture, but didn't think of it until it was already painted.  The clipboard was one that I had bought to use for preschool and the kids helped 'decorate' it with stray marks from markers and pencils.  I gave the whole clipboard a good coat of off white acrylic paint.  As the paint was drying, I went to Pinterest to see what ideas I could borrow to make my new organization board.

I really wasn't in the mood for a neat and clean papered clipboard, of which there were TONS of photos.  I liked them, but didn't really want to do the whole paper thing.  I did however find some inspiration in a mini clipboard that was all inky and stamped-not my usual style, but it looked like a lot of fun!  

So I pulled out some of my favorite stamps, lots of ink pads, and got busy.  I'm not sure if it was the acrylic paint or the clipboard, but my bold browns were sucked right in, leaving behind a very muted design.  I really liked it, and quickly decided to exchange my subtle blues and greens for the stronger, brighter colors.  The funny thing was I would never have combined the different shades that I used, but they really worked well together once they were dry.  Then I went back and sponged some browns and blues, and a little vanilla for good measure.


When I finished, the chrome clip looked completely out of place! Can't have that!!  So I pulled out the vanilla flower trim and made it all inky as well.  The newsprint bird was a suggestion from my oldest DD, and I added some 'vintage' crochet ribbon to finish it off.


Now I just have to convince myself to clip important notes and paper on here.  Not an easy task since it will cover up all of the inky goodness, but maybe it will motivate me to take care of those papers so I can see the clipboard again.


I hadn't intended to share photos of the kittens, but they were weaving in and out of the table legs as I was trying to take my pictures.  I figured if they were feeling so photogenic, I should oblige.

Katniss decided to climb up my leg as I took her photo. Ouch!

Beauty was too busy swiping to sit still, but finally
I was able to capture this shot.

Where was Shadow during all of this?  Why, resting comfortably on the deck like a good dog.  I'm pretty sure he's convinced that we make way too much fuss over the silly cats who don't even have the courtesy to stay out of my pictures.  He does however make quite a big deal of strutting back into the house with me.  I'm certain he makes faces at them through the window as he enjoys his place inside.

I hope you have a wonderful weekend and find some time to play with your craft supplies too!

Project Recipe: Paper-very vanilla, First Edition DSP (ret), Stamp Sets-Faith in Nature (ret), Inspired by Nature (ret), Warm Words (ret), World Map, Ink-soft suede, early espresso, baked brown sugar, marina mist, not quite navy, night of navy, garden green, old olive, Accessories-bird builder punch, scallop oval punch, vanilla flower trim, Chantilly crochet trim